Create Groups
|
grandMA3 User Manual » Show Creator » Create Groups
|
Version 2.1
|
Creating groups based on your current patch is easy and quick.
To do so, press Menu and tap Show Creator. On the left side of the Show Creator window, tap Create Groups.
Tap the video below to see the example.
The Create Groups menu opens.
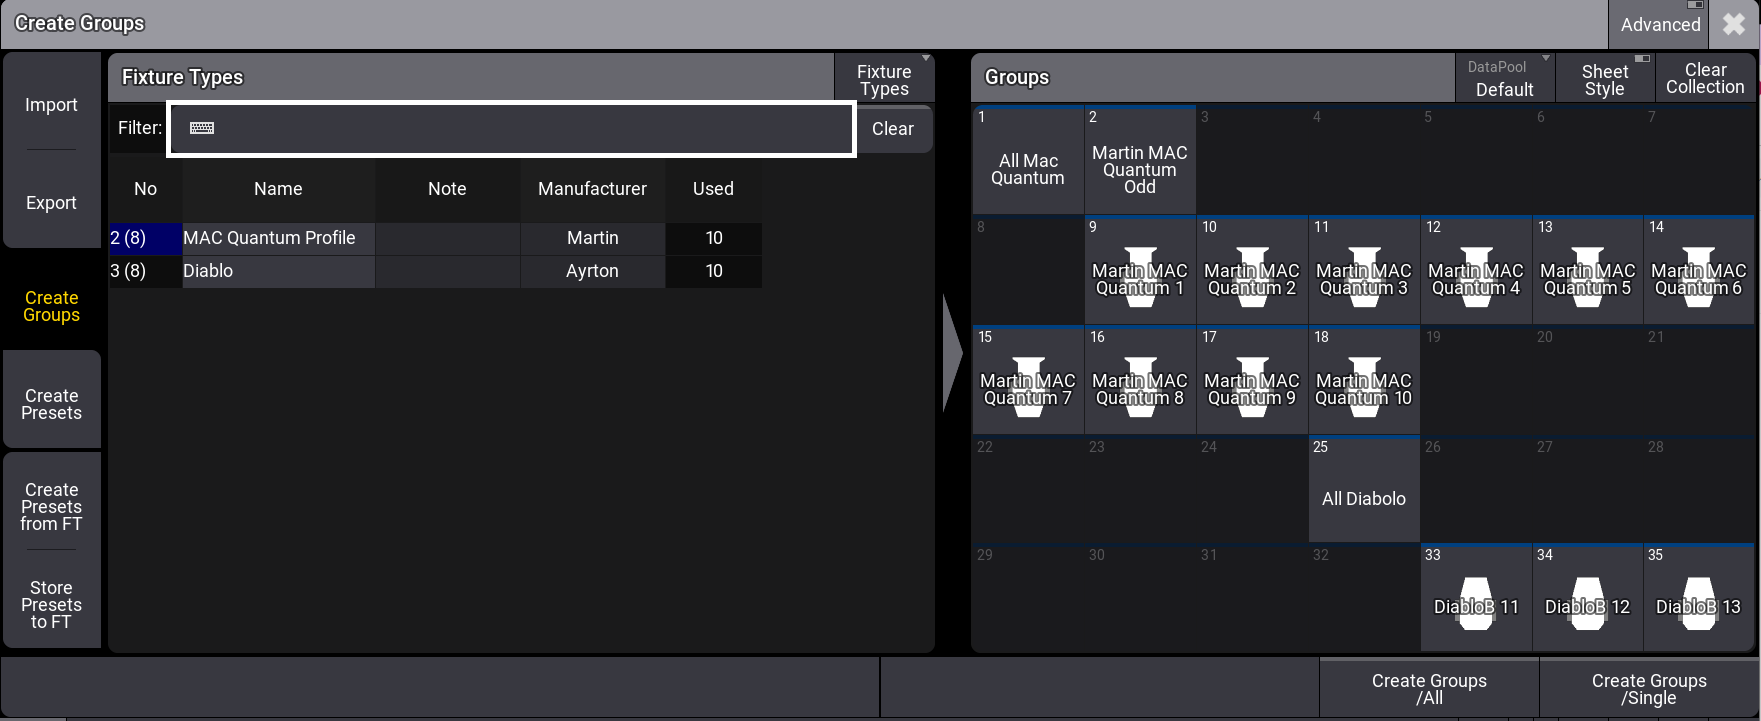
Create Groups menu
The left side of the window displays fixture types that are available based on your patch. Tapping Fixture Types in the title bar switches to Classes and Layers. To learn more, see Classes and Layers.
The right side of the window displays the group pool. Tap DataPool in the title bar to select the desired Data Pool from the dropdown list; tap Sheet Style to change the display to sheet style.
To create groups:
- In the left area, select the fixture type, class, or layer for which you want to create a group.
- In the right area, tap an empty pool object.
- Tap Create Groups /All to create a group with all fixtures for the selected objects or Create Groups /Single to create single fixture groups. To learn more, see the AutoCreate keyword.
When tapping Advanced on the Create Groups title bar, a center area appears. It allows the creation of groups based on a reduced set of fixtures.
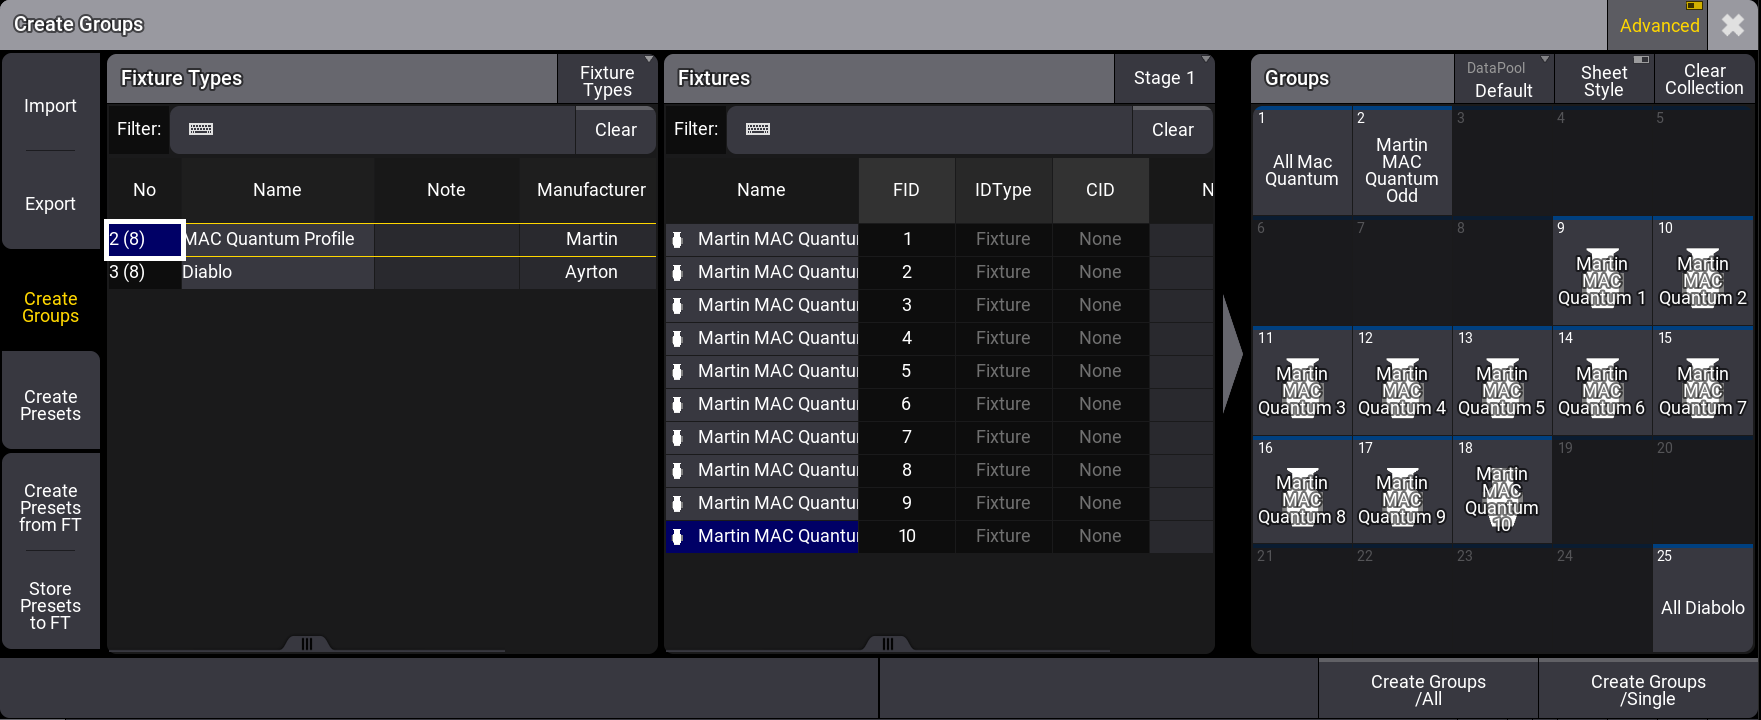
Create Groups menu with Advanced mode enable
Create groups with Advanced enabled:
- Select the objects you want to create a group in the left area. The center area now displays the fixtures for the selected objects.
- From the center area, select the fixtures for which you want to create a group, for example, all odd fixtures.
- Tap an empty pool object in the right area.
- Tap Create Groups /All.
- A new group with odd fixtures is created.