Import / Export
|
grandMA3 User Manual » Show Creator » Import / Export
|
Version 2.0
|
The Import / Export menu presents a graphical workflow for exporting objects from the current show file as a smaller file with a minimum of additional show data.
| Hint: | |
| When exporting objects that reference other objects in the show, the referenced objects are automatically included in the export. For example, when exporting a macro with a defined appearance, the exported file includes the referenced appearance. |
This menu also allows the import of objects from these smaller files into the current show file. For example, this menu provides an easy way to copy a user profile or selection of macros from one show file to another.
Open the Import / Export menu using the following steps:
- Press the Menu key or tap the
 icon near the top of the Control Bar.
 - Tap Import / Export along the bottom row of buttons in the Menu pop-up.
Once the main Import / Export menu is open, tap the Import or Export tab in the upper-left corner to access the desired interface.
Object Types
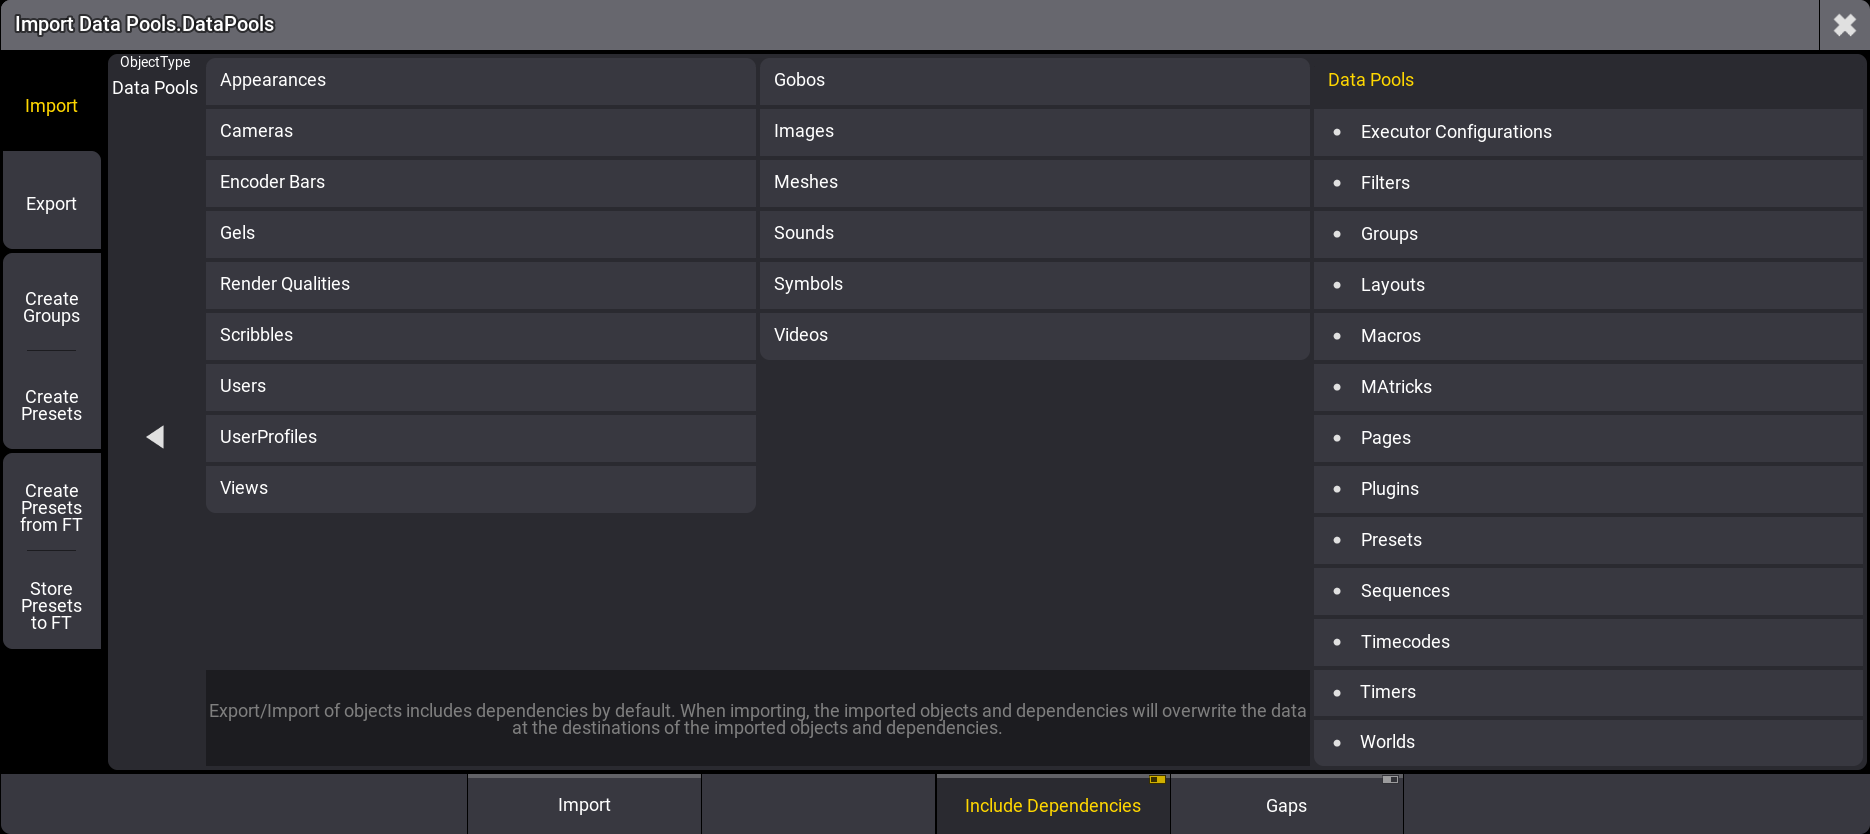
These menus allow for the import and export of a wide variety of object types. Tap ObjectType on the left side of the main area to open or close the full list of available object types:
- Appearances
- Cameras
- Encoder Bars
- Data Pools
- Executor Configurations
- Filters
- Gels
- Gobos
- Groups
- Images
- Layouts
- Macros
- MAtricks
- Meshes
- Pages
- Plugins
- Presets
- Render Qualities
- Scribbles
- Sequences
- Sounds
- Symbols
- Timecodes
- Timers
- Users
- UserProfiles
- Views
- Videos
- Worlds
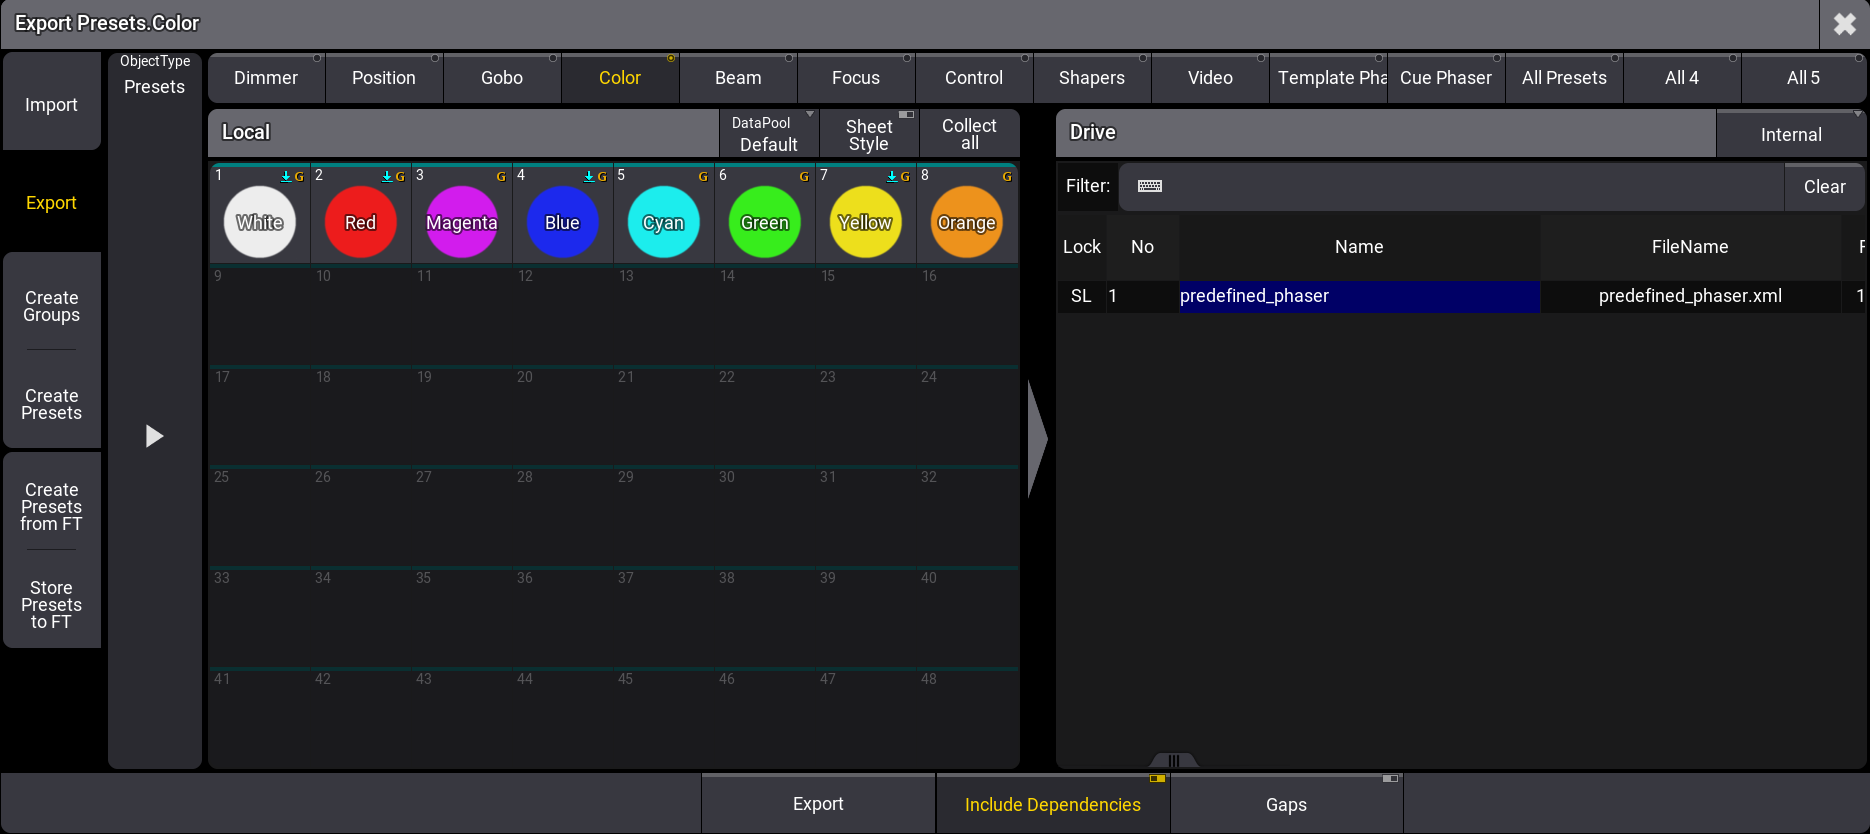
The main area of both the Export and Import menus shows the source of the data on the left and the destination on the right. Therefore, the Export menu displays the specified object types from the current show file in the area on the left, in an area titled Local, and the contents of the relevant folder of the selected drive on the right, in an area titled Drive. In the Import menu, these two areas appear on opposite sides.
- An enabled Gaps button imports or exports the gaps of the XML file. For more information, see /Gaps Option Keyword.
- Enabeling Include Dependencies will import and export dependencies. For more information, see /NoDependencies keyword.
Drive Selection
To choose a different destination drive for the exported data, tap the Internal button at the right side of the title bar of the Drive section or swipe to open a list of available drives. In the Import menu, this drive setting defines which drive the console uses as the data source.
Local Section Title Bar Tools
The title bar of the Local section includes a few buttons with helpful tools.
- Tap DataPool to cycle through available data pools within the current show file or swipe to open a list of data pools. This option is only available when importing or exporting an ObjectType which is incorporated into a DataPool within the show file. These ObjectTypes are listed below DataPools in the right column of the ObjectType section.
- Tap Sheet Style to display objects in the Local section as a sheet with relevant details for each object. Tap Sheet Style again to view objects as they appear in their pools. Some objects, like UserProfiles, never appear in pools. Therefore they will always appear in the sheet format regardless of the state of the Sheet Style button.
- Tap Collect all to select all objects of the current type for export. Once tapped, this button changes to read Uncollect all. Tap this button to deselect all objects. These functions do not appear in the Import menu.
- Tap Clear Collection to reset the collection of objects. This option is only available in the Import menu.
Object Sub-Types
Some entries in the ObjectType selection include several collections of objects, which appear as different pools. These include:
- PresetPools: The Import / Export menu handles and displays each preset pool individually.
- GelPools: The Import / Export menu handles and displays each gel book as an individual pool.
With the PresetPools or GelPools ObjectType selected, a row of radio buttons appears across the top of the main area showing all of the relevant object sub-types. Tap one of these buttons to display the desired pool below.
Multiple Object Selection
Tap any object in the displayed pool to select it for export. A brown border appears around each selected object. To select multiple objects in a pool, tap each of the desired objects. Tap any selected object to deselect it.
When Sheet Style is enabled, select multiple adjacent objects by drawing a lasso over all desired objects. To select just one object, tap only the desired object. To toggle selection for any objects in the sheet without changing the selection status of any other objects, hold Ctrl on the keyboard while tapping the desired objects in the sheet.
Export Workflow
- Tap the Export tab in the upper-left corner.
- Set the desired ObjectType.
- Set the desired destination drive.
- Select all of the desired objects to export from the Local area.
- Enter the desired file name in the Name field of the Drive area.
- Tap Export at the bottom of the menu.
Import Workflow
- Tap the Import tab in the upper-left corner.
- Set the desired ObjectType.
- Set the desired source drive.
- Select all of the desired files to import from the Drive area.
- Select the desired destination in the pool in the Local area.
- Tap Import at the bottom of the menu.
| Hint: | |
| Certain object types (including Gobos, Images, Symbols, and Videos) can be included in Appearances. To automatically create new Appearances based on these objects as they are importing, toggle on the Create Appearances option before tapping Import. |
Import and Export Using Command Line Syntax
For information about exporting and importing show data using command line syntax without the use of these menus, see the Export keyword and Import keyword topics.