|
grandMA3 User Manual » MAtricks and Shuffle
|
Version 2.0
|
MAtricks is a tool that can be used to divide a selection of fixtures into sub-selections.
The general workflow involves selecting fixtures and applying different MAtricks settings to the selected fixtures inside the primary selection.
For example, ten fixtures are selected, and you want to step through these ten fixtures one at a time to do a position correction. MAtricks is the tool used to do this.
The selection can be shuffled using a set of shuffle tools. Read more below.
MAtricks Tools
One of the ways to work with MAtricks is the MAtricks toolbar or window.
The MAtricks tools are available in a window that can be created like any other.
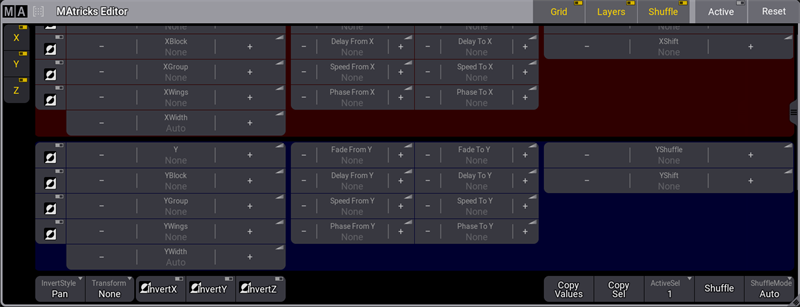
An overlay version of the MAtricks window can be opened by tapping MAtricks in the Encoder bar.
The two versions have the same buttons and options. For details about the different options, read the following topics.
Tap Grid, Layers, or Shuffle to display or hide the corresponding group in the title bar.
The MAtricks window is divided into three sections, one for each axis. The X-axis section has a red background, the Y-axis section has a blue background, and the Z-axis section has a green background.
Tap X, Y, or Z in the toolbar on the left side to display or hide the corresponding axis.
Each axis section has its properties grouped.
Here are the groups and their properties:
- Grid: Axis (X, Y, Z), Block, Group, Wings, and Width.
- Layers: Fade From/To, Delay From/To, Speed From/To, and Phase From/To.
- Shuffle: Shuffle and Shift.
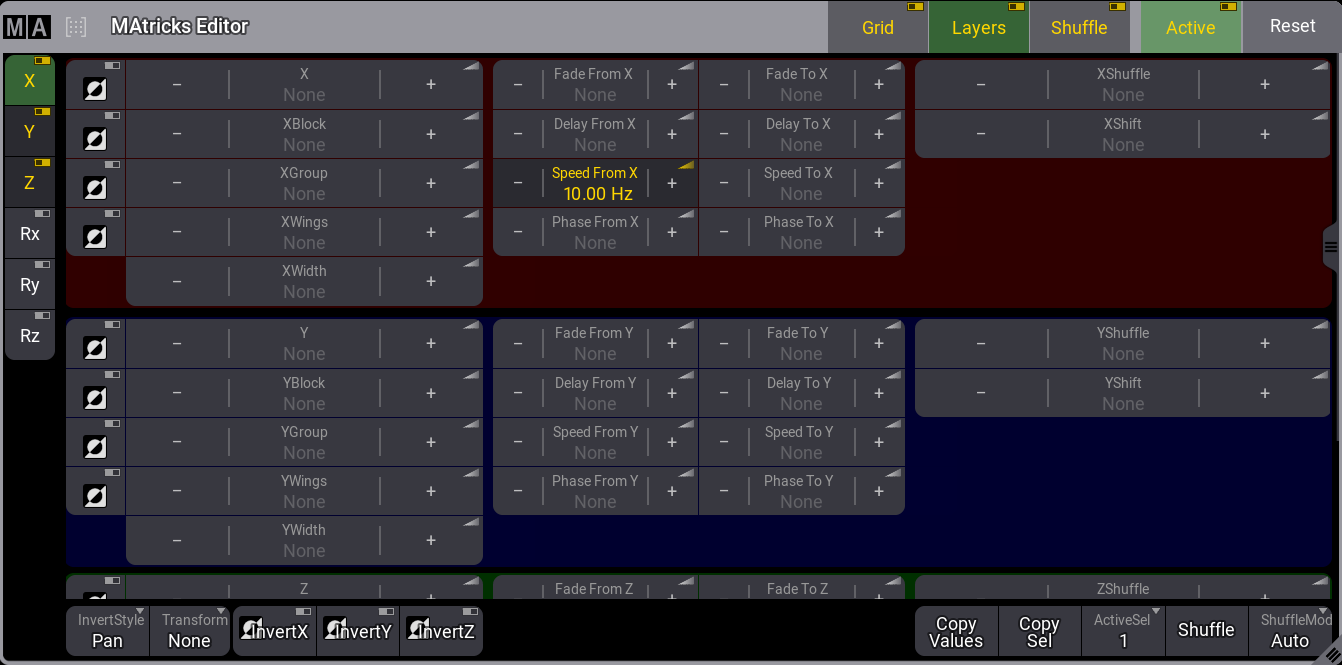
The Layers speed readout format can be set to Hz, BPM, or Seconds in the User Profile. See User Settings.
For the following example, the speed readout format is set to Hertz.
|
|
User name[Fixture]>Set Selection MAtricks "SpeedFromX" 10 |
|
|
Important: |
Now that the command respects the readout format the user sets, loading show files created in versions prior to 2.0 containing macros that set MAtricks Speed To X and Speed From X properties will have different results. Please adjust these macros accordingly. |
Dimensions and Selection Grid
The MAtricks toolbar shows many settings that can be applied to the X, Y, and Z axes, which are the three dimensions used by the Selection Grid.
If the fixtures are in a 3-dimensional grid selection, then the MAtricks tool can be used in all three dimensions.
MAtricks Pool
The different settings that can be made in the MAtricks tool can be stored in the MAtricks Pool.
This pool can be created like any other window. You can find it under the Data Pools tab.
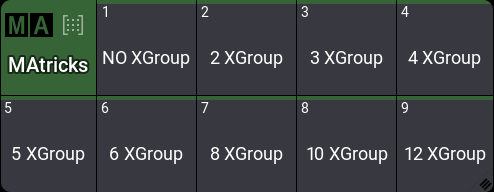
This pool works just like most pools in the grandMA3. The two most used functions are storing and recalling the MAtricks settings.
Store a New Pool Object
This is the process for storing a MAtricks pool object.
The easiest way to do this is by long-pressing an empty pool object. This stores the current MAtricks settings (even if no settings are stored).
The general syntax uses the Store Keyword and the MAtricks Keyword: Store MAtricks ["MAtricks_Name" or Matricks_Number]
|
|
Hint: |
| Tap, hold, and slide your finger across any value area to change the value. |
Tap the video below to see the example.
Simple Example
This simple example uses ten fixtures.
Select the ten fixtures without any specific grid information. Press Full to turn the intensity on.
This is how it looks in the Selection Grid and the MAtricks window:
These ten fixtures are now in one row on the X-axis.
Press Next. This is the same as tapping the + in the X setting.
This is the result:

Ten fixtures with X 1
The selection frame around the first fixture is the usual yellow. The rest have a darker yellow selection frame, indicating they are part of the bigger selection.
Try pressing Next to step through the selection. Pressing Prev (previous) goes through the selection in the opposite direction.
Notice how the X number in the MAtricks tool updates with the key presses. Tapping - and + buttons is the same as pressing Next and Prev.
A specific X number can be specified using the command line. For instance, if X needs to be 6, then the following command can be used:
|
|
User name[Fixture]>Set Selection MAtricks 'X' 6 |
When you are comfortable with Next and Prev, press Set.
When Set is pressed, all fixtures from the original selection are selected, and the MAtricks is deactivated.
Pressing Set again will reactivate the MAtricks.
Tap Active in the title bar to toggle the MAtricks tool On or Off without resetting the MAtricks settings.
Multiple Selection
Each user profile has two different fixture selections: selection 1 and selection 2.
Tap and hold ActiveSel at the bottom of the MAtricks window. This opens the dropdown menu, from which you can select 1 or 2.
The selection can also be changed using the Selection Keyword.
For example, the command needed to change to selection 2 is:
|
|
User name[Fixture]>Select Selection 2 |
The currently active selection can be copied to the other by tapping Copy Sel.
By tapping Copy Values, the values from the currently active selection can be cloned to the other selection.
A ClearAll command clears both selections. ClearSelection only clears the active selection.
Shuffle Selection
The Shuffle Keyword allows for the selection order to be sorted randomly.
By default, Shuffle will randomize the selection order on all three axes in the Selection Grid.
Each shuffle setting per axis can be set to 0 (=None) up to 32 767. Each value represents a different shuffled selection order. When repeatedly selecting the same amount of fixtures, the same shuffle value will result in the same shuffled selection order. This can be useful when a specific shuffled selection order is desired for the same number of fixtures. In this case, apply the same shuffle value in the MAtricks when the same number of fixtures are selected. The fixtures are then shuffled the same way.
Tapping Shuffle in the MAtricks tool shuffles all three axes in the Selection Grid by adding a random number in XShuffle, YShuffle, and ZShuffle.
To shuffle on a single axis, enter a shuffle value for the desired axis in the MAtricks tool or tap the + or - in the axis until there is a wanted shuffle result.
Tap ShuffleMode on the bottom right of the MAtricks tool to access the following modes:
- Auto:
When doing shuffle only for one dimension, this behaves like Linked. Shuffling on two or three axes behaves like Unlinked. - Linked:
All fixtures placed on the same position along the axis that will be shuffled but have a different position on the other axis will keep their alignment along the other axis. - Unlinked:
The fixtures placed on axes other than the axis that will be shuffled but have the same position on the shuffled axis will be shuffled independently.
|
|
Hint: |
| When deactivating or resetting the MAtricks, the original selection order will be restored. |
Since the shuffle is part of the MAtricks, they are also stored in a MAtricks pool object like any other MAtricks setting.
See shuffle examples in the Shuffle topic.
Shift Selection
The shift setting in the MAtricks tool allows the current selection to be shifted within the selection grid positions. This can be done per axis in the grid. Therefore, change the values for XShift, YShift, or ZShift.
Positive values shift to the right (x-axis), to the bottom (y-axis), and to the front (z-axis). According to this, negative values shift in the opposite direction.
Invert Options
Invert will define which axis in the selection grid the values should be inverted when turning the encoder or applying a range of values.
The inverted fixtures are displayed with a green font in the fixture sheet, a green body color in the 3D window, and a green border in the layout window and the selection grid window.
The following buttons can be found at the bottom left of the screen:
- InvertStyle: Defines if Invert shall be applied to Pan, Tilt, Pan and Tilt, or All attributes.
- InvertX: Inverts the overall invert of the current individual inverts per MAtrick property on the X axis.
- InvertY: Inverts the overall invert of the current individual inverts per MAtrick property on the Y axis.
- InvertZ: Inverts the overall invert of the current individual inverts per MAtrick property on the Z axis.
Grid properties can also be inverted by tapping  .
.
|
|
Hint: |
| When using Align in combination with Invert, the alignment is still based on the arrangement of fixtures inside the selection grid; however, the aligned values will be inverted. |
|
|
Restriction: |
| At the moment, Align only works with the X axis. |