grandMA3 User Manual Publication
Connect Ethernet
|
grandMA3 User Manual » First Steps » Connect Ethernet
|
Version 2.1
|
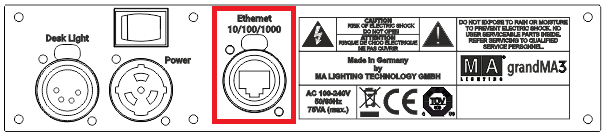
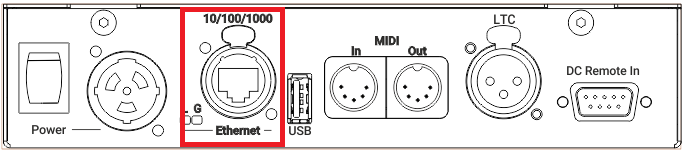
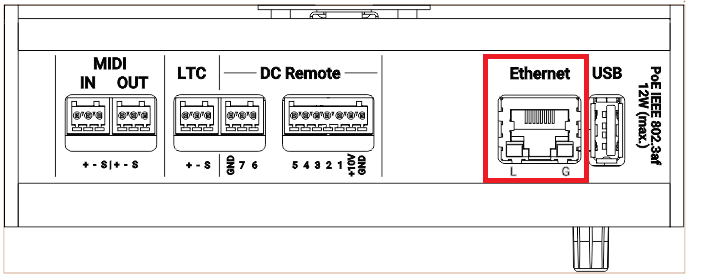
Depending on the type of grandMA3 device, there are up to three Ethernet ports on the rear panel.


|
|
Hint: |
| The naming of the Ethernet ports is individual, for example, Con1, Con2, and Con3 in the console. In the onPC software, the Ethernet ports are named by the operating system, for example Ethernet, Ethernet 2, etc. |
|
|
Hint: |
| All Ethernet ports can use Art-Net and sACN as DMX protocols. |
|
|
Important: |
| To avoid damage, the Ethernet ports must not be connected with Power over Ethernet (PoE) except for the grandMA3 devices qualified for PoE (for example, xPort Nodes PoE, onPC xPort Nodes PoE, or I/O Node PoE). |
Ethernet Ports 1-3
Requirement: Use STP (shielded twisted pair) cable with an RJ45 connector, at least CAT-5e.
To connect one of the three Ethernet ports:
- Connect one end of an Ethernet cable to the Ethernet 1, 2, or 3.
- Connect the other end to a suitable switch.
- Connect other grandMA3 equipment to the switch and the switch to the power supply.
Ethernet is connected to a port.
Ethernet LEDs
The L (link) LED flashes when the Ethernet connection is active.
The G (gigabit) LED flashes when a gigabit connection is available.