grandMA3 User Manual Publication
Insert Fixture Types
|
grandMA3 User Manual » Fixture Types » Build Fixture Types » Insert Fixture Types
|
Version 2.1
|
The following topics provide a step-by-step guide to building a fixture type of a basic moving head.
First of all, a fixture type has to be inserted.
|
|
Important: |
Always make sure to save the settings you made; otherwise, they will get lost. To back up data during or after the build of fixture types, leave the Fixture Type Editor and tap Export in the Fixture Types menu. An .xml file is exported. It is possible to import this file into a show file. |
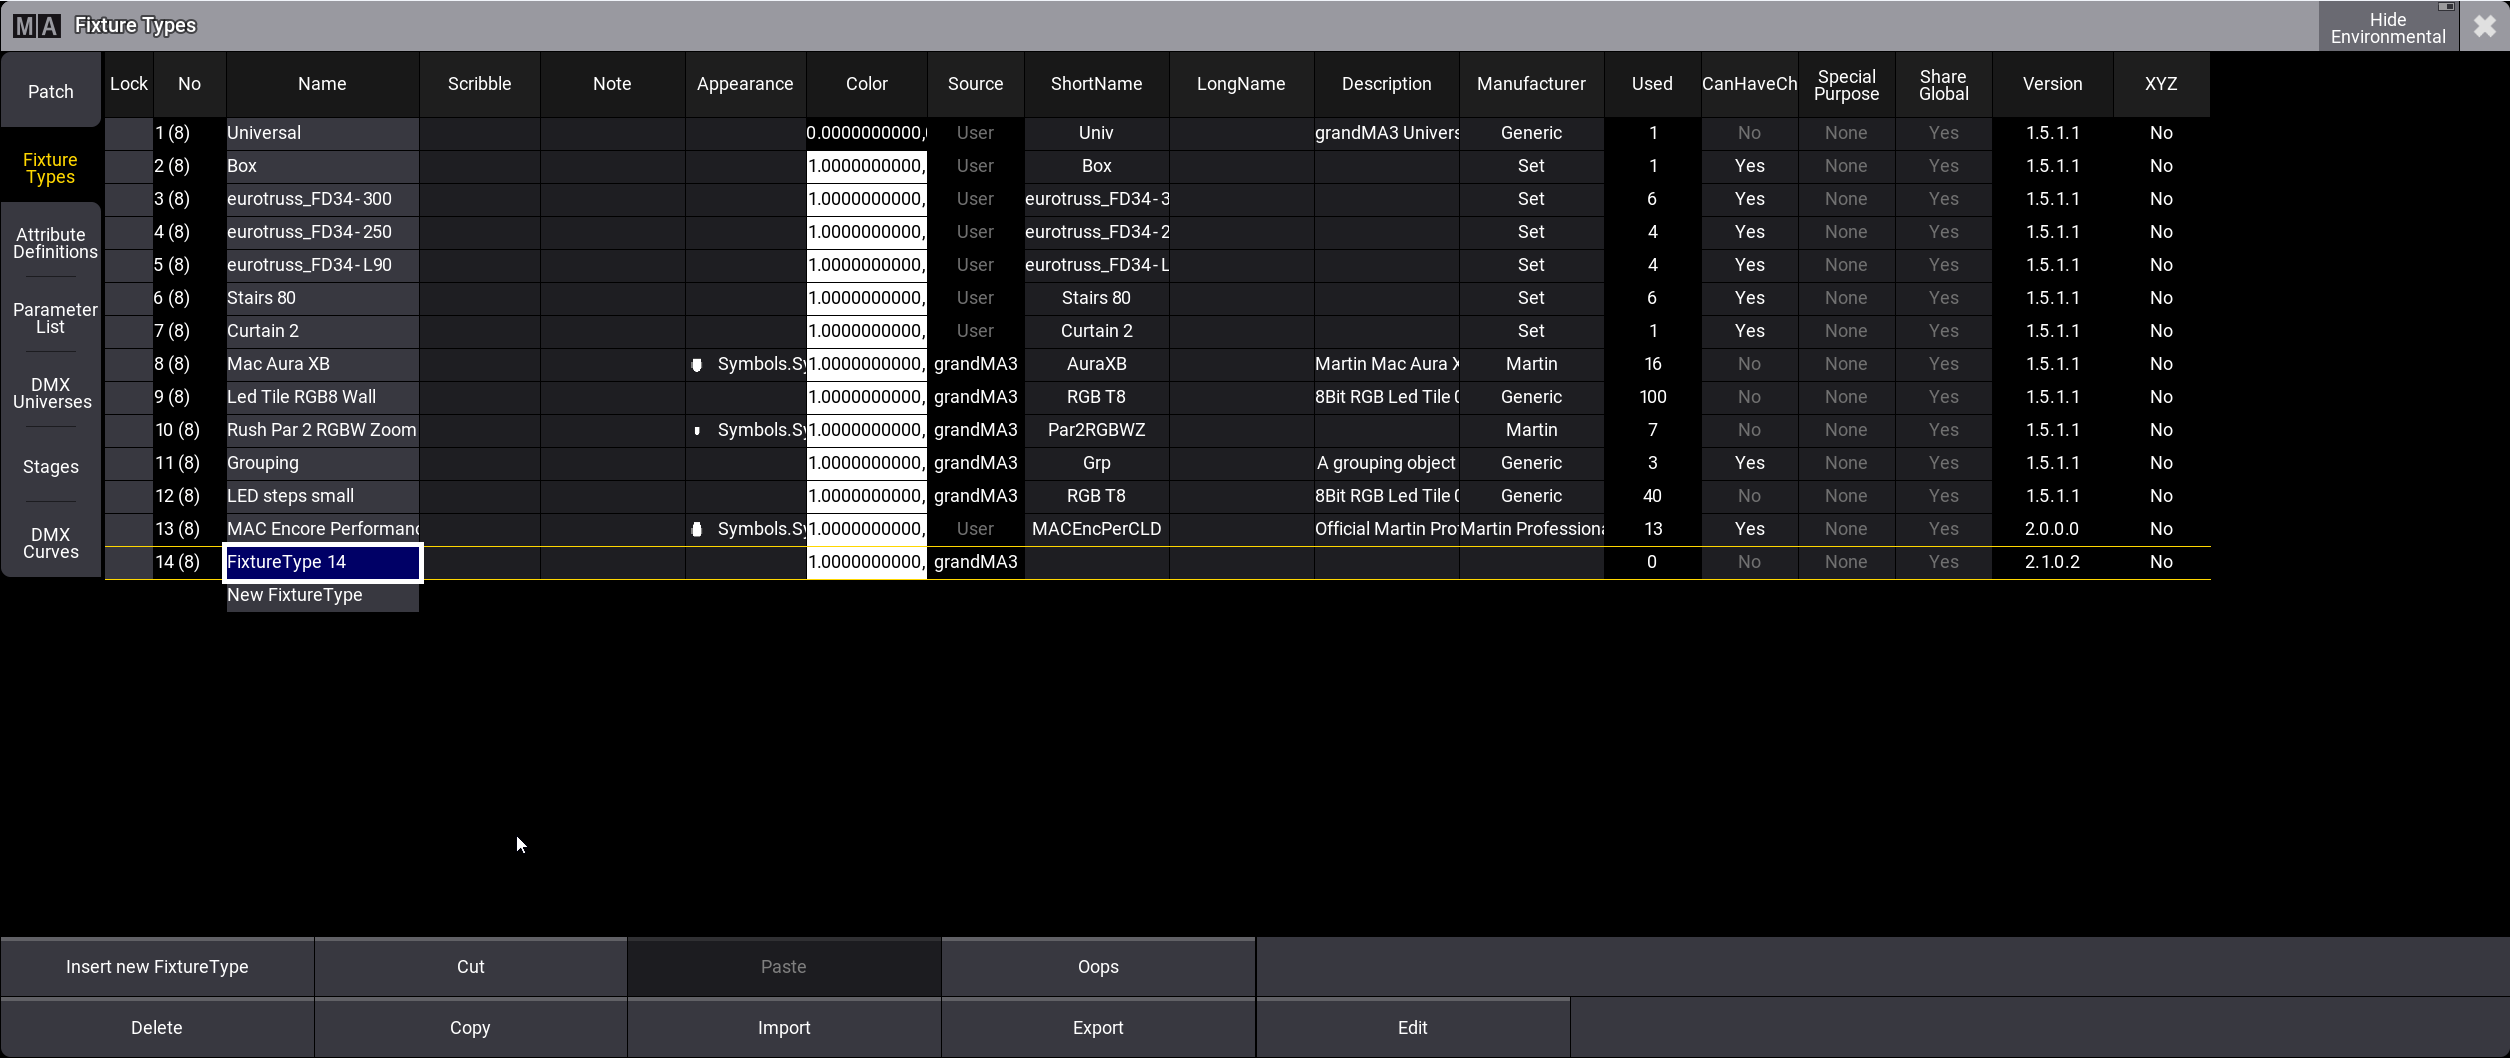
- Open the Fixture Types tab in the Patch menu. To exit the Fixture Types tab, see Import fixture types topic.
- In the Name column, tap New Fixture Type.
- Tap Insert New Fixture Type in the bottom left corner. A new fixture-type row is inserted into the sheet. In the example below, FixtureType 14.
- To edit or enter the basic data of the fixture type, fill out the following cells by right-clicking or tapping and holding the cell:
- Name
- Scribble
- Appearance
- ShortName
- Description
- Manufacturer
|
|
Hint: |
| To see a detailed description of every cell in the Fixture Types tab, see Import Fixture Types topic. |
The next step is to create individual geometries for your fixture type: Insert Geometries.