|
grandMA3 User Manual » Phasers » Create a Circle Phaser
|
Version 2.1
|
This topic presents an example of one method for creating a simple circle phaser. It uses absolute position values and will always move the lights in the specified circle. See the Create Circle Phaser Around Position topic for an example that covers creating a relative phaser circle, which can be used with different absolute base positions.
Requirements:
- Have a show with some moving lights patched - for instance, the demo show.
- An open Phaser Editor window is needed.
- Arranging the fixtures in the 3D window can be useful, but it is not a requirement.
|
|
Hint: |
| For phasers that use position values, it is recommended to use a slower speed than the default of 60 BPM, such as 20 BPM. Otherwise, the fixtures may not be able to move properly. |
Follow these steps to create a circle:
- Select the desired fixtures and bring their dimmers to full.
The Phaser Editor shows a white beam in the center of the blue 2D grid. - Tap the A+ button on the left of the editor.
- Tap somewhere in the blue grid; for instance, just below the center.
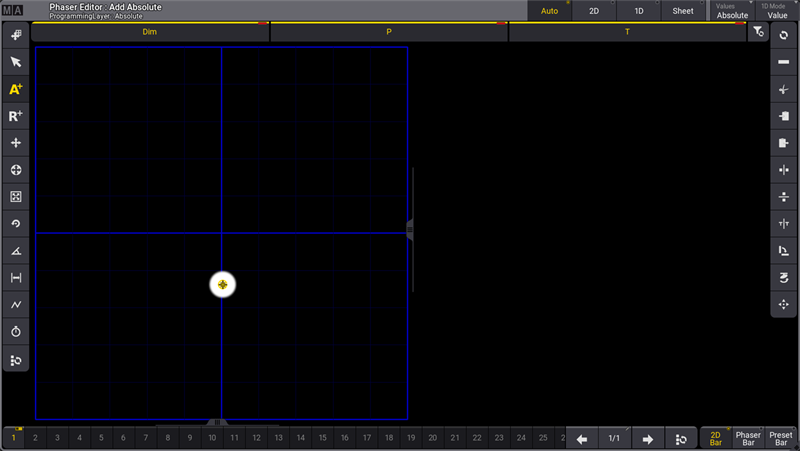
This creates the first absolute point. The selected fixtures move to this static position. This is an absolute position value in step one.
- Tap somewhere else in the blue grid to create a second absolute position. Please tap 90 degrees vertically to the first point and do not cross the horizontal blue line - otherwise, the circle becomes a figure 8.
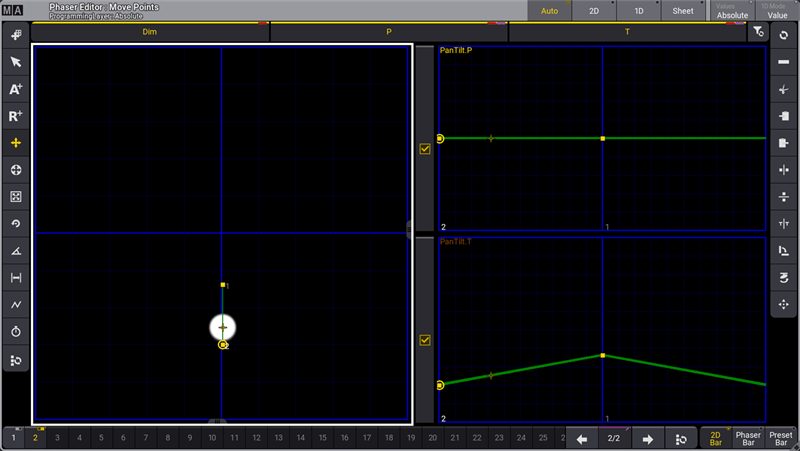
Now, the fixtures move between the two absolute points (two steps).
- Tap the Select All Steps button (
 ).
).
This selects both steps. - Tap the Move Handle button (
 ).
). - Tap one of the two points and drag horizontally.
- Release the screen when there is a nice circular movement.
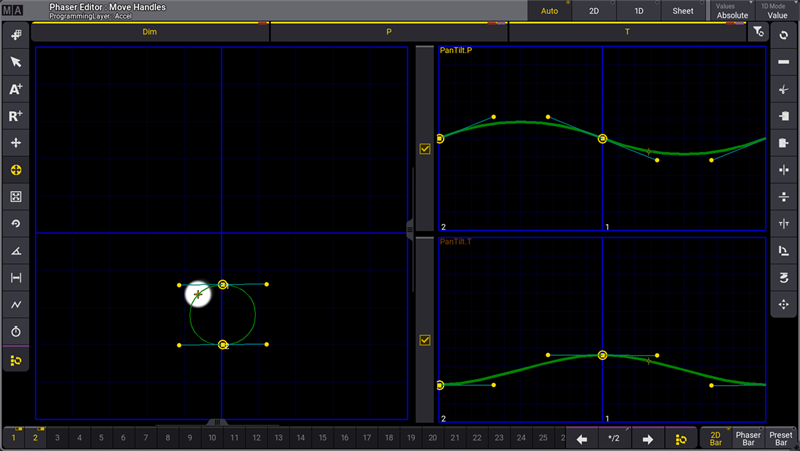
- Tap the Edit phase button (
 ) on the left menu.
 - Tap 360 in the menu on the right
This distributes the fixtures evenly along with the form.
The finished result could look like this:

The Change Phase part of the phaser editor represents each fixture as a yellow dot in a grid where the horizontal axis is the phase value.
The circle phaser is now finished and it can be stored into a cue or a preset.
|
|
Important: |
| Following the steps above exactly results in an active dimmer value in the first step of the phaser. If you prefer that your circle phaser only contain position values, deactivate the dimmer attribute before storing. |