Partial Show Read (PSR)
|
grandMA3 User Manual » Show Creator » Partial Show Read (PSR)
|
Version 2.1
|
The Partial Show Read menu transfers objects, especially objects containing fixture data, from a different show to the currently loaded show file.
For more information, See PSR.
| Important: | |
| The show file to be PSR'ed must have been saved to the same software version as the running show
file on the station where you performed the PSR. |
|
|
The partial show read can't be oopsed; it is strongly recommended that the loaded show file be renamed before proceeding with PSR. |
To access the PSR menu:
Press Menu, tap Show Creator, then tap PSR. The PSR menu opens:
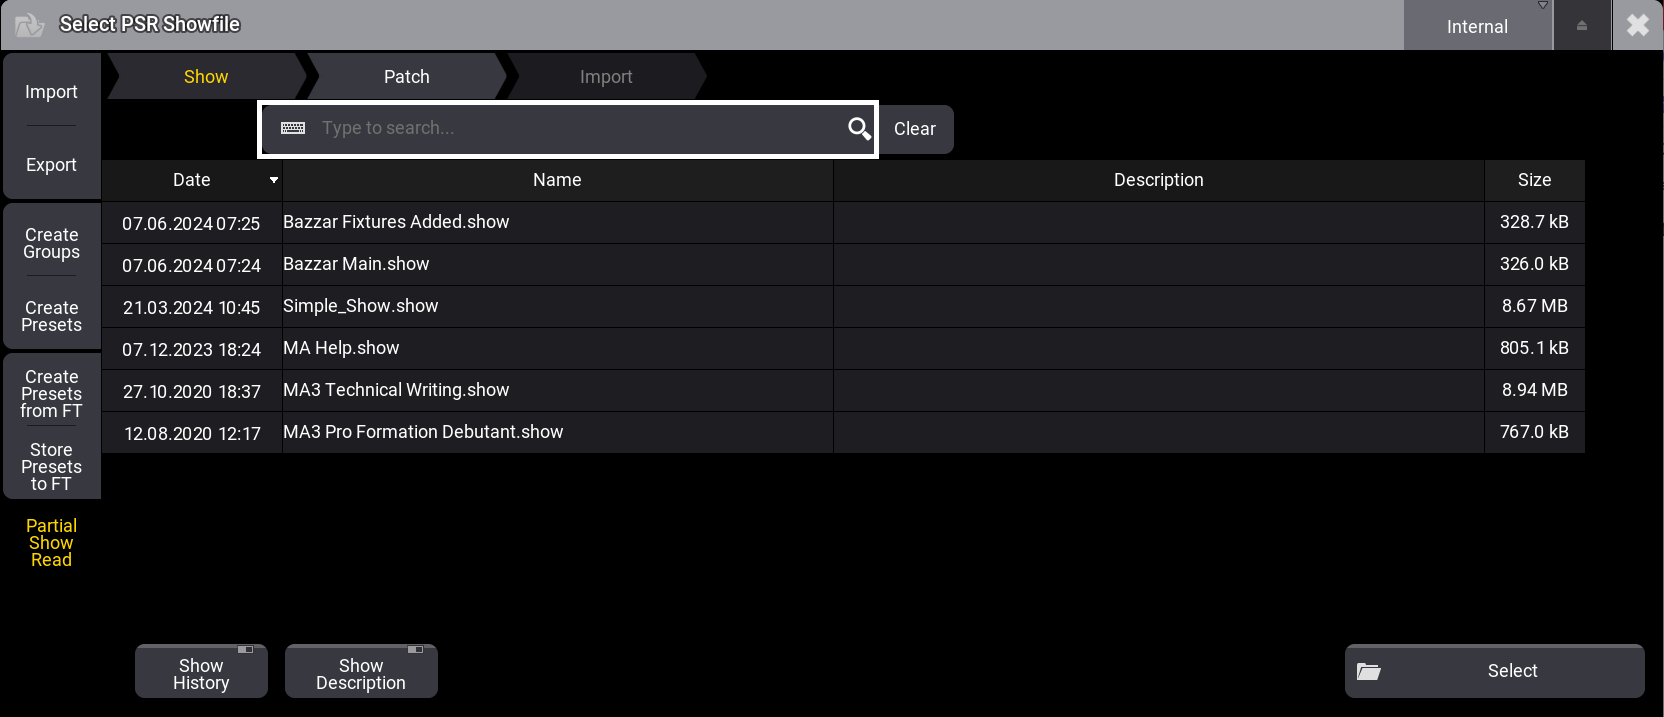
The arrow-shaped tabs at the top will guide you through the different steps.
- Tap the Show tab on the bar at the top of the menu.
- Select a drive (on the right side of the title bar)
- Select a show file.
- Tap Select at the bottom of the window or tap Patch in the arrow shape tab bar on top.
The Rename Show File pop-up opens:
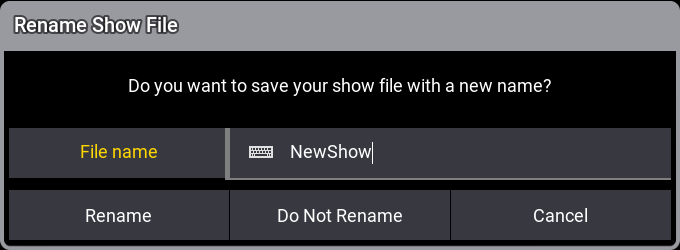
Enter the new name and tap Rename. Tap Do Not Rename if
you don't want to rename the show file.
If you don't enter a new name, tapping Rename will result in the same outcome as tapping Do Not
Rename.
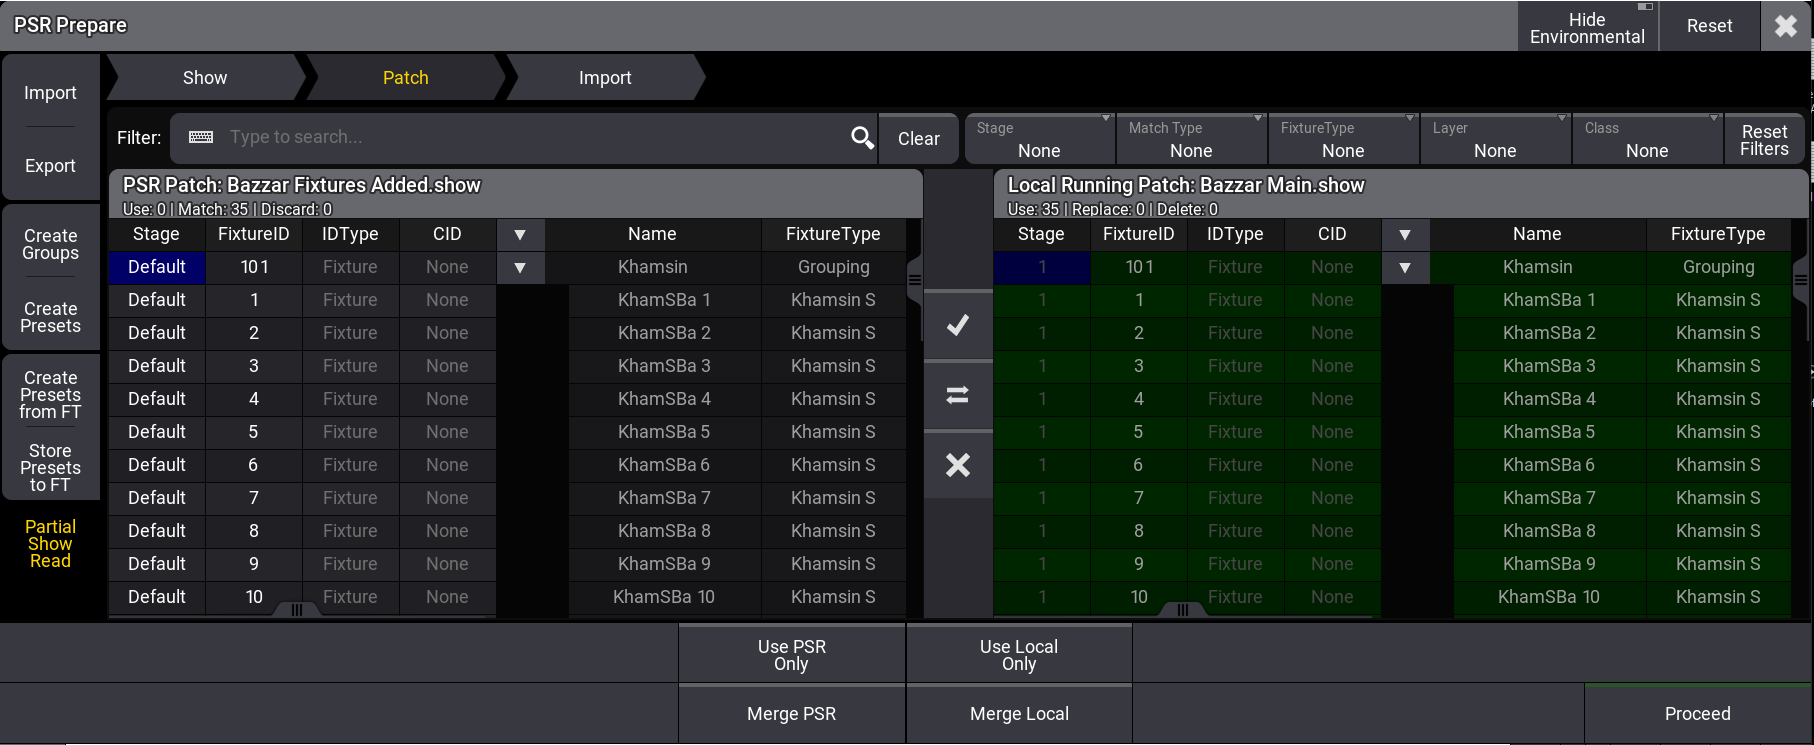
PSR Prepare Menu
If the selected file is suitable, the PSR Prepare menu will open.
When entering the PSR Prepare menu, the software matches the fixtures in the following order:
- Fixture ID
- Channel ID
- Name
- GUID
The menu is divided into two areas:
- On the left, PSR Patch displays the patch of the show file to be imported and its name in the title bar.
- On the right, Local Running Patch displays the currently loaded show file and its name in the title bar.
Editing the corresponding cell of the PSR Patch allows you to change the properties for
Stage, FixtureID, IDType, and CID.
Changed properties are
displayed in a cyan font. Cells that cannot be edited have a darker background color.
When an IDType is renamed in the PSR Show, two names may appear in one cell of the IDType of the PSR Patch. They are displayed with this naming scheme: Name in PSR Show (Name in Local Show). The names of the IDTypes of the PSR Show can't be taken over into the Local Show.
When fixtures are not set to the same IDType/CID combination or one of them has no Fixture ID, they will be set to the new IDType PSR and get a consecutive CID.
Rows with corresponding fixtures on both sides are called matched.
Use the tools between both patch areas to define which fixtures will be used:
 Use the
selected fixtures in the resulting patch.
Use the
selected fixtures in the resulting patch. Use the
fixtures from the opposite patch in the resulting patch.
Use the
fixtures from the opposite patch in the resulting patch. Remove the
selected fixtures from the resulting patch.
Remove the
selected fixtures from the resulting patch.
Marked fixtures have a green background. After the PSR Prepare process, they will exist in the currently loaded
show file with their respective fixture types.
Different fixtures can be used from the right and left
sides, but not fixtures on the same row.
Environmental fixtures can be hidden by tapping Hide Environmental in the title bar.
Use the search field to filter the patches by fixture names.
Other filters are available:
- Stage: Displays the fixtures of the selected stage.
- Match Type: Displays the fixtures depending on their matching state:
- None: No filters applied.
- Matched: Displays only fixture pairs that are matched together.
- Unmatched: Displays only fixtures that do not match together.
- Conflicted: Displays the conflicting fixtures.
- Fixture Type: Displays only the fixtures of the selected fixture type.
- Layer: Displays only the fixtures of the selected layer.
- Class: Displays only the fixtures of the selected class.
- Reset Filters: Resets all filters.
For a fast selection of fixtures to be taken, tap one of the four buttons at the bottom of the window:
- Use PSR Only: The resulting patch contains only fixtures from the PSR show file.
- Use Local Only: The resulting patch contains only fixtures from the Local show file.
- Merge PSR: Add all unmatched or unselected fixtures from the PSR show list to the resulting patch.
- Merge Local: Add all unmatched or unselected fixtures from the Local show list to the resulting patch.
Tap Reset in the menu title bar to reset all changes and filters.
When done, tap Proceed in the bottom right corner of the window or Import in the tab bar. The PSR Patch Summary pop-up opens:
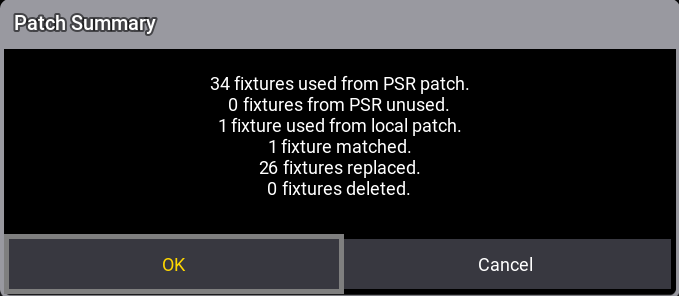
Tap OK to proceed with the PSR Import menu or Cancel.
PSR Import Menu
PSR Import Menu
The menu is divided into three areas:
- The left area (PSR) displays the different pools of the showfile to be PSR'ed, and the title bar
displays
the name of the show file. Navigate the object tree to the objects you want to import. Tap
 to
unfold a level in the tree. Mark the objects to be imported by tapping their checkboxes. Selected
objects
get a yellow checkmark and are displayed in the center area. Parent objects get a gray check mark to
indicate that some child objects are selected. When selecting an object that has a reference, the
reference is also marked for import and gets a purple checkmark. A number behind the checkbox indicates the hierarchy level of an object.
to
unfold a level in the tree. Mark the objects to be imported by tapping their checkboxes. Selected
objects
get a yellow checkmark and are displayed in the center area. Parent objects get a gray check mark to
indicate that some child objects are selected. When selecting an object that has a reference, the
reference is also marked for import and gets a purple checkmark. A number behind the checkbox indicates the hierarchy level of an object.
The colors of the indicator bar indicate the following states:
- Green: This element contains newer data than the local show file.
- Orange: The children of this element are a mixture of older and newer data in the PSR show file.
- Red: This element contains only older data in the PSR show file.

PSR
Import menu
- The center area displays the last selected object type in the left area and allows the
definition
of the Import Index (which spot in the pool it will be imported to). Edit a cell in the Import
Index column or tap a pool object in the right area (Local). When the Import Index is set to
<Auto>, the same object exists in both show files, and the object will be merged with the matching
object in the locally running show file.
- The right area (Local Running) displays the corresponding pool in the local show file. The title bar also displays the name of the show file. The orange collected frames indicate where the objects will be imported. When tapping into the pool in the Local Running area, only selected objects in the PSR area will be imported.
Import non-default DataPool
To import a data pool other than the default one, select a non-default data pool by tapping its checkboxes. Then tap on the referring parent DataPools object in the tree structure. The right area (Local Running) now displays DataPools.
Select a free pool object in the right area. A pop-up window appears:
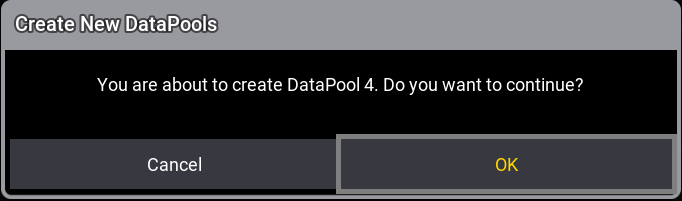
Confirm by tapping OK. A new DataPool with the non-default Datapool of the PSR is now created in the locally running showfile.
Tap Import to transfer the selected object into the local showfile. Objects that were imported are marked as imported in the object tree.Tap Cleanup to remove imported items from the PSR.
System-locked objects can't be imported. For example, world 1 or filter 1.
|
|
Known Limitation: |
|
|
|
Hint: |
|
Use the PSR keyword in the programmer to select fixtures of the ID type PSR. For more information, see PSR keyword. |