|
grandMA3 User Manual » Operate Fixtures » Align
|
Version 2.0
|
There is a dedicated Align key, an Align Keyword, and an Align Bar that can be created as a window. Align is accessible on the left side of the encoder bar.
Align is used to distribute attribute values between two or more values. There are five different align modes and Off. Read about them below.
If align is used a lot, then this is a convenient window. Read the descriptions below to understand the different modes.
The default is a linear transition between the values, which can also be adjusted. There are four different Align Transition options:
- Linear (default):
Spreads the values with the same spacing. - Sinus:
Spreads the values as if the fixtures were placed on a sinus curve. The values themselves will not represent the sinus form. Depending on the Align mode, this results in smaller value gaps at the beginning and end of the range and bigger gaps towards the center of the range, or vice versa. - Slow:
The gaps between the values will be small at the beginning of the range and increase toward the end of the range. - Fast:
The gaps between the values will be big at the beginning of the range and decrease toward the end of the range.
These can be accessed using the AlignTransition keyword, the Align key, or the Align Bar.
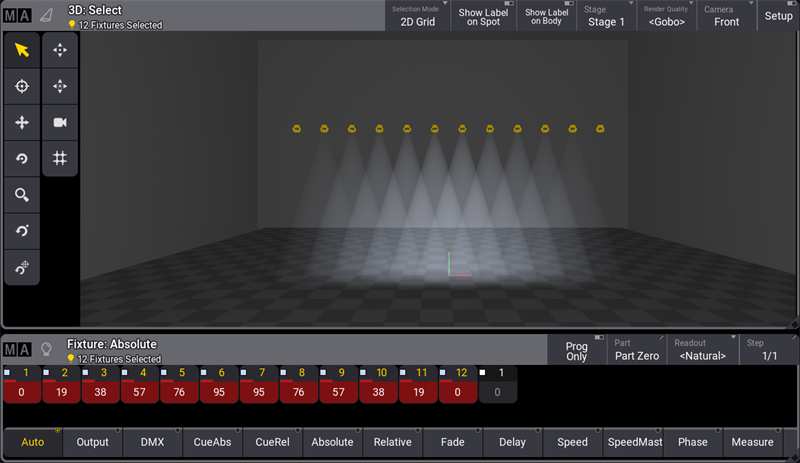
The Align function can be used for different attributes. Dimmer, position, and color are the most common. The examples below use tilt or dimmer attributes.
By default, the align mode is set to Off, and the transition is Linear. The result is the encoder will adjust all the selected fixtures equally.
|
|
Important: |
| The selected order of the fixtures is important. The attribute will be adjusted proportionally to the selected order. |
The align mode is active until a new attribute is adjusted.
Align Bar
The Align Bar Window gives fast access to all the align functions. It has both the align modes and the align transitions.
It can be created like any other window using the Add Window pop-up. It can be found in the More tab.

Align Bar window

Align Bar window half-height
For the following examples, fixtures 1 thru 12 were patched from left to right. For more information, see Patch and Fixtures Setup.
Align /
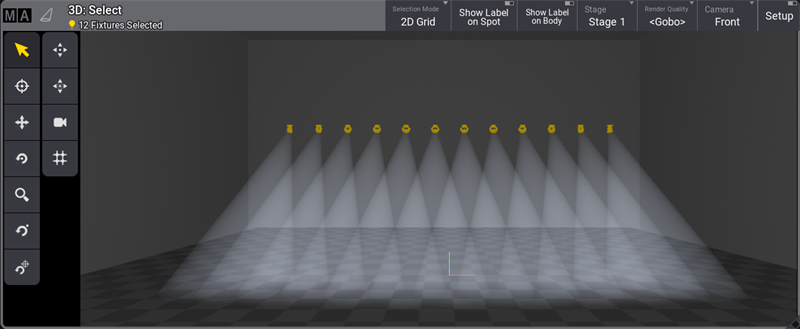
This mode is great for fanning fixtures. Follow the steps below to create a linear fan out.
- Select fixtures 1 thru 12.
- Set the dimmer to full.
- Tilt the fixtures up using the encoder wheel.
- From the Encoder bar, tap Position.
- Tap and hold Align on the left side of the encoder bar. This will open the align dropdown menu, then select /.
- Turn the Pan encoder wheel clockwise to fan the fixtures out and counterclockwise to fan the fixtures in.
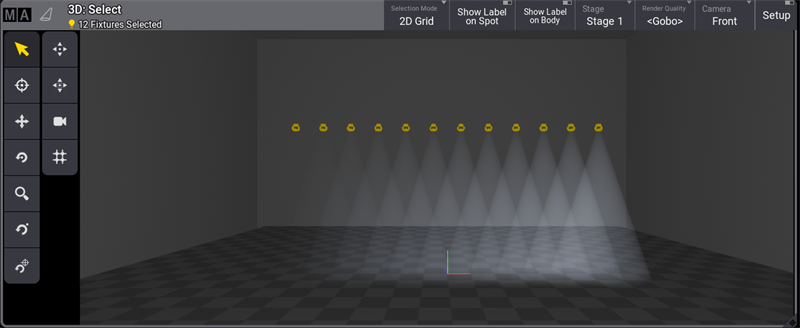
Align <
This align mode increases the values from the first selected fixture.
- Select fixtures 1 thru 12.
- From the Encoder bar, tap Dimmer.
- Tap and hold Align on the left side of the encoder bar. This will open the align dropdown menu, then select <.
- Turn the Dimmer encoder wheel clockwise.
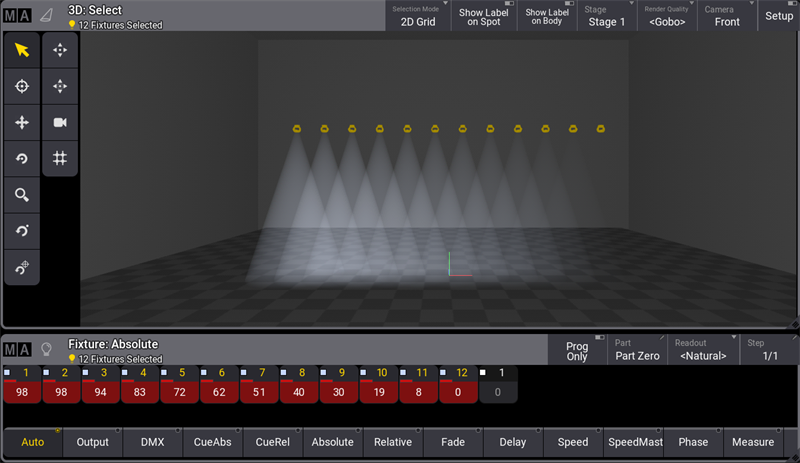
Align >
This align mode increases the values from the last selected fixture.
- Select fixtures 1 thru 12.
- From the Encoder bar, tap Dimmer.
- Tap and hold Align on the left side of the encoder bar. This will open the align dropdown menu, then select >.
- Turn the Dimmer encoder wheel clockwise.
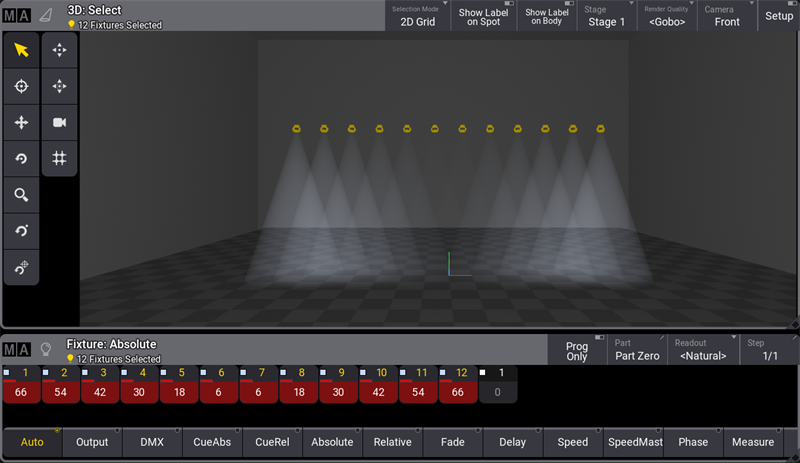
Align ><
This align mode Increases the values from the center of the selection.
- Select fixtures 1 thru 12.
- From the Encoder bar, tap Dimmer.
- Tap and hold Align on the left side of the encoder bar. This will open the align dropdown menu, then select ><.
- Turn the Dimmer encoder wheel clockwise.
Align <>
This align mode increases the values from the first end last fixture of the selection.
- Select fixtures 1 thru 12.
- From the Encoder bar, tap Dimmer.
- Tap and hold Align on the left side of the encoder bar. This will open the align dropdown menu, then select ><.
- Turn the Dimmer encoder wheel clockwise.
XY Rotation
It is possible to set rotation values for an alignment, for example, across the selection grid. For more information, see Selection Grid.
To set the degree:
- Tap the XY Rotation column. A pop-up opens.
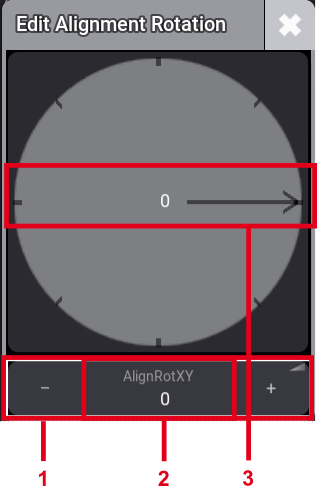
Pop-up - Edit Alignment Rotation
- Drag and drop the on-screen fader.
- Click AlignRotXY to open the calculator.
- Tap, hold, and drag the arrow.
|
|
Hint: |
| Rotation can be set in 5° increments between 0° and 360°. |
Align in Other Ways
Getting the same align functions with the Calculator or by the command line is possible.
Tap the encoder belonging to the attribute that shall be aligned, and the calculator appears. It is now possible to enter the align values like the example below.
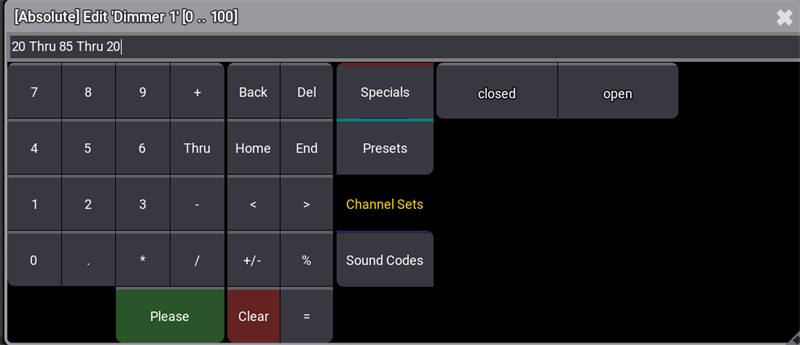
Another way to align attributes is from the command line. Select the fixtures and set the dimmer value, as in the example below.
|
|
User name[Fixture]>At 75 Thru 10 Thru 75 |