|
grandMA3 User Manual » Agenda » Create an Agenda Entry
|
Version 2.1
|
Create an Agenda Entry Using the Sheet View Mode
- Tap and hold View Mode in the title bar, then slide your finger into the list and select Sheet.
- To create a new agenda event, right-click or tap and hold New AgendaEvent.
A new entry is created with the system date and time.
|
|
Hint: |
| You can also create an entry from the Sheet View mode by pressing Edit and then tapping New AgendaEvent. |

The following is a list of the properties to be defined by the user:
- Name: Enter the name of the event that will be displayed in all layout modes.
- Appearance: Assign an appearance to define how the entry looks in the calendar views.
- Note: For more information, see Note.
- Mode: When set to Absolute, the agenda uses the entered start date and time. Twilight times like Dawn, Sunrise, Sunset, and Dusk can also be used. See Date and time to learn how to configure the grandMA3 software to calculate the correct twilight time for your location.
- StartDate: Tap and hold a cell to open the Edit StartDate pop-up, then edit the day, month, and year. Use Today in the title bar to quickly enter today's date.
- StartTime: Tap and hold a cell to open the Edit StartTime pop-up, then edit the hours, minutes, and seconds. Use Now in the title bar to quickly enter the current time.
- Daylight Offset: When a twilight time is set in the mode column, it defines an offset for an event. For example, if you want an event to start 15 minutes before dawn. See Date and time to learn about twilight times.
- Valid Duration: Enter a duration value to allow the backcasting of events if the console is not switched on or the agenda is disabled during a scheduled entry.
- Enabled: To enable or disable an agenda entry. Disabled entries are displayed with a red color font.
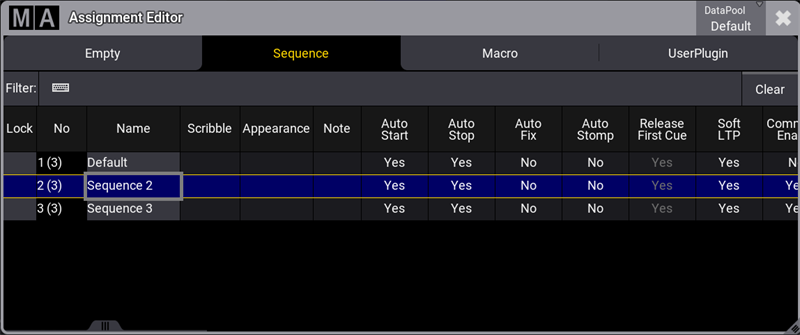
- Object: Tap and hold a cell to open the Assignment Editor pop-up, and select a Plugin, Macro, or Sequence to be executed.
- Action: Tap and hold a cell, then select an action to use when the defined object is executed.
- Command: Define a command here to be executed instead of defining an object to be triggered. E.g., Go+ Executor 101.
- Repeat: This field defines whether an entry is repeated and, if so, how often. Tap and hold a cell to open the Edit Repeat of Agenda pop-up.
There are two main settings to define the repetition of an agenda entry, Schedule and Iterations.
Schedule Settings
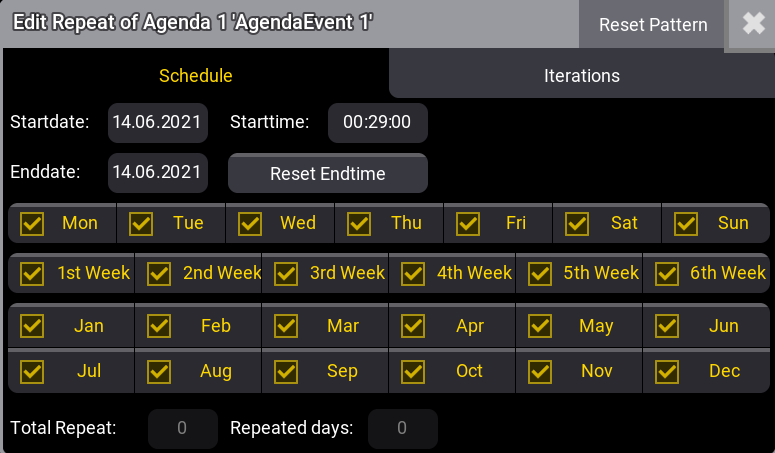
The start date and time are linked to the agenda event and, therefore, are identical. To get repetitions, at least a different end date or end time must be set.
- Tap Reset Pattern in the title bar to reset the repeat settings you made previously.
- Tap Reset Endtime to reset the end date back to the agenda event date.
Tap a day, week, or month cell to enable or disable it. This will define at which days, weeks, or months the event will be repeated.
|
|
Hint: |
| The week settings are the weeks within a full month and not the weeks from the start date onwards. |
Iterations Settings
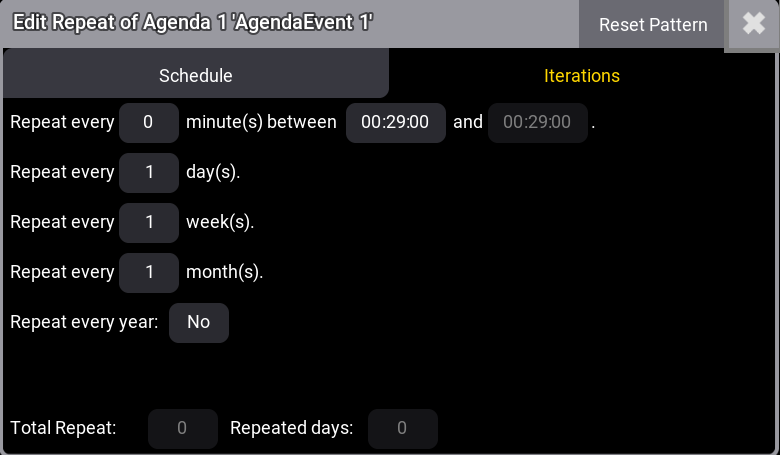
Iterations settings allow defining repeat per minute, days, weeks, and months.
These settings are counted from the start date onward.
To repeat an event every year again, set Repeat every year to yes.
The following describes the last five columns of the agenda window in the title bar when ViewMode is set to Sheet. (These columns can not be edited.)
- Countdown: Displays the remaining days or time until the next launch of an event.
- Planned Date: Displays the next date when the event will be launched.
- Planned Time: Displays the next time when the event will be launched,
- Repeat Count Days and Repeat Count Total: These two columns are similar to the edit repeat pop-up. This is a quick way to verify the repeat pattern.
Tap Delete Old in the title bar to erase all preceding events, including the valid duration.