The next step is to insert DMX
modes and DMX channels and linking them to the geometries.
Specific functions and attributes can only be executed by specific physical parts of a fixture. The pan movement for example is executed by the yoke of the basic moving head.
Therefore you have to link DMX channels with their specific functions and attributes to the
corresponding geometrical parts of the fixture type.
A DMX mode consists of one or several DMX channels.
The DMX channel defines different attributes and functions of the fixture.
The DMX mode is the parent, and the DMX channel is its child.
Important:
The build of a fixture type is based on the hierarchic structure of parent-child. A
parent
comes first, and the child follows its parent. There may be several children.
Hint:
Many manufacturers provide DMX charts that define channels. It is possible to
download the DMX charts for a specific fixture type from the manufacturer's website in
most
cases. Use a DMX chart to enter the channels in the fixture type table.
Preparation
This basic moving head is based on the following DMX chart, showing a relative patch address and the
related function:
Relative
Patch Address
Function
1
Pan (8 bit)
Pan movement by 540°
2
Pan Fine (16 bit)
3
Tilt (8 bit)
Tilt movement by 270°
4
Tilt Fine (16 bit)
5
Dimmer
6
Red
7
Green
8
Blue
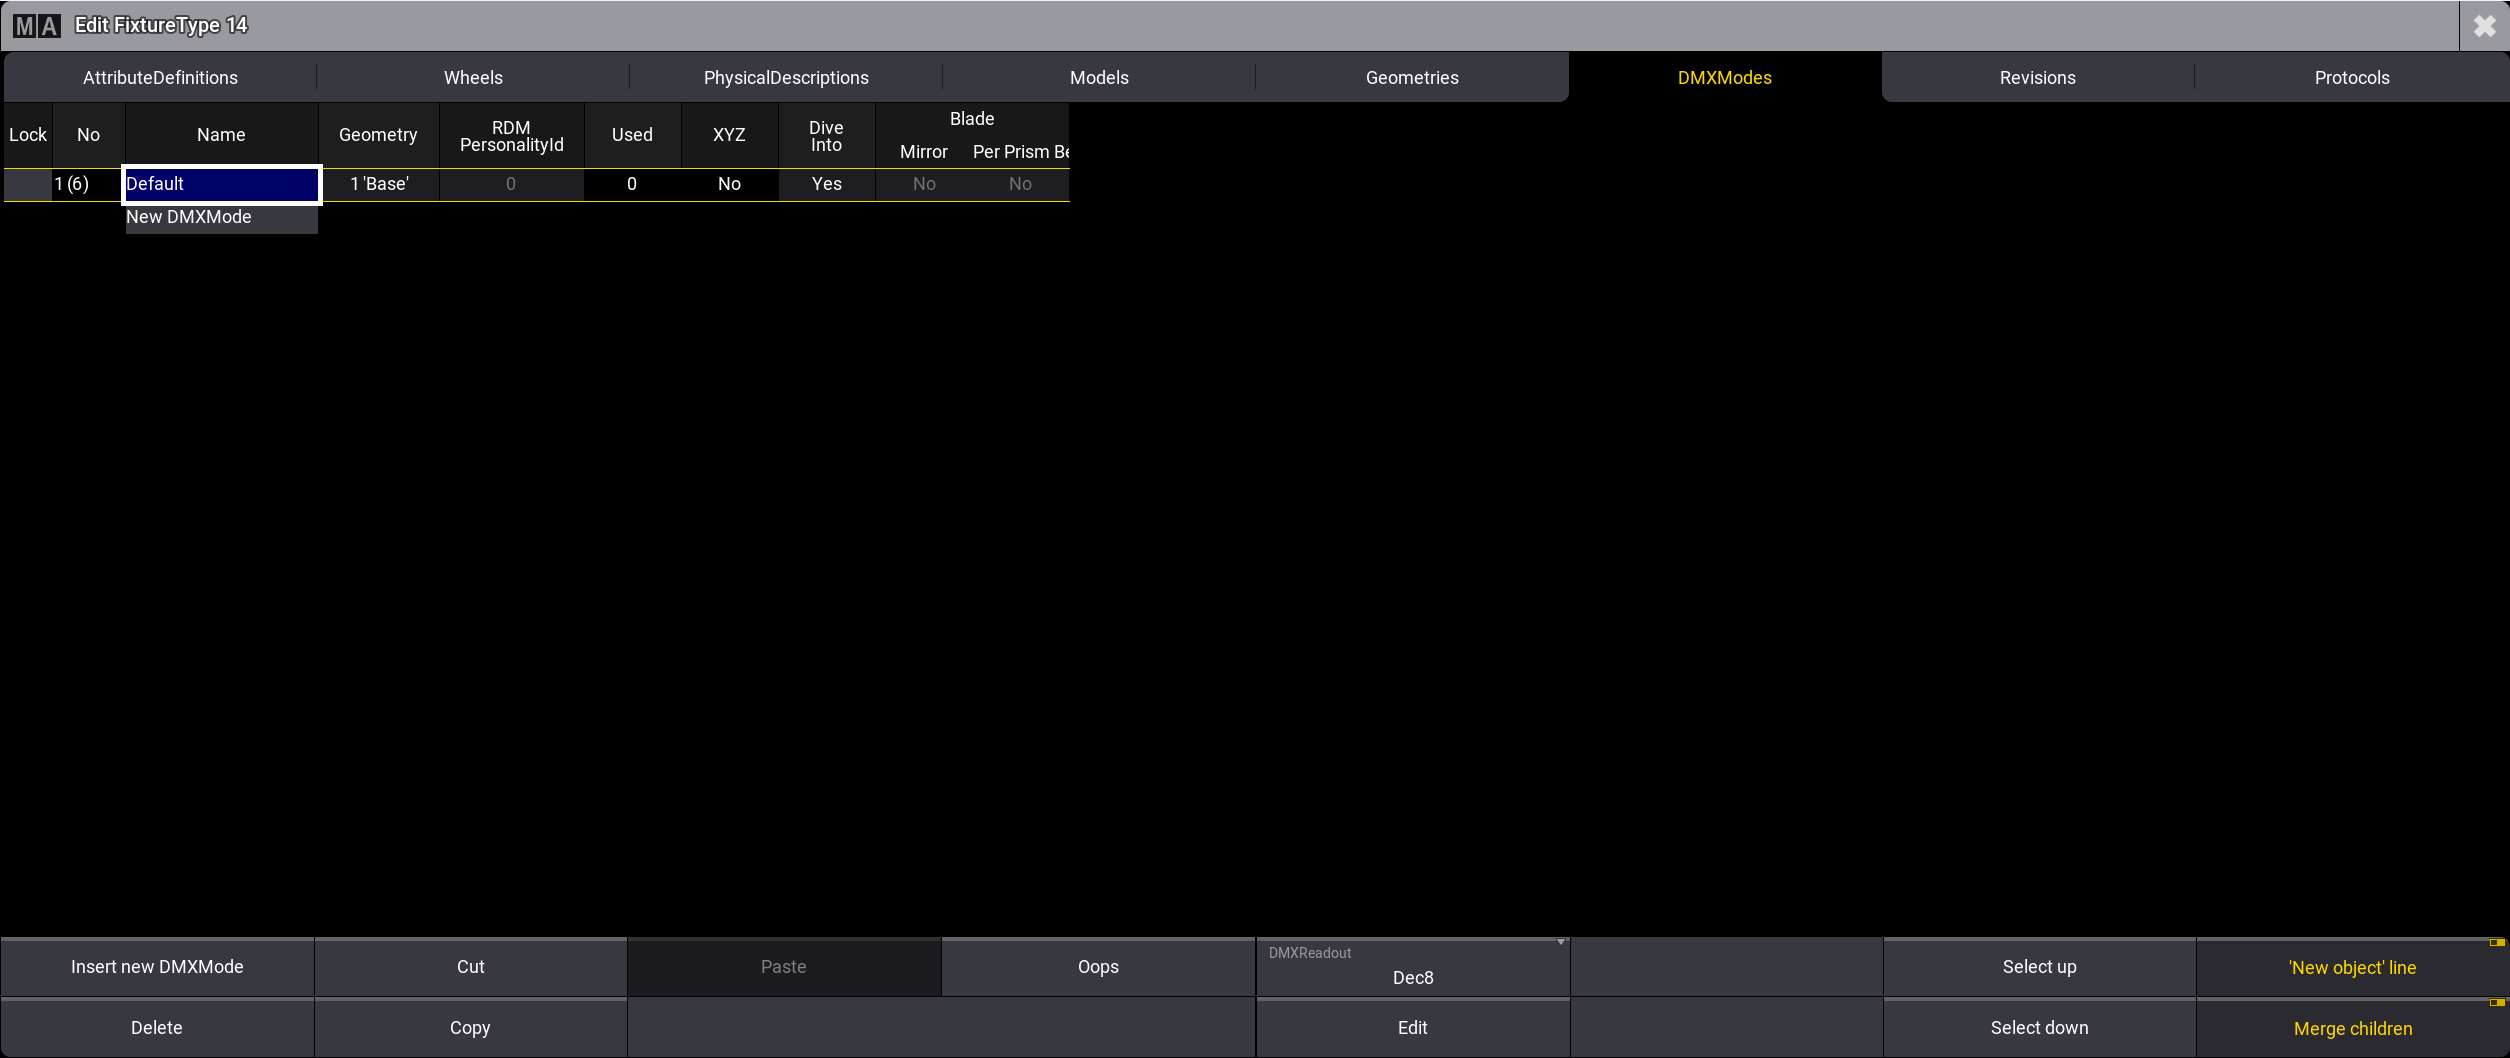
Tap the tab DMXModes.
The editor for building a fixture
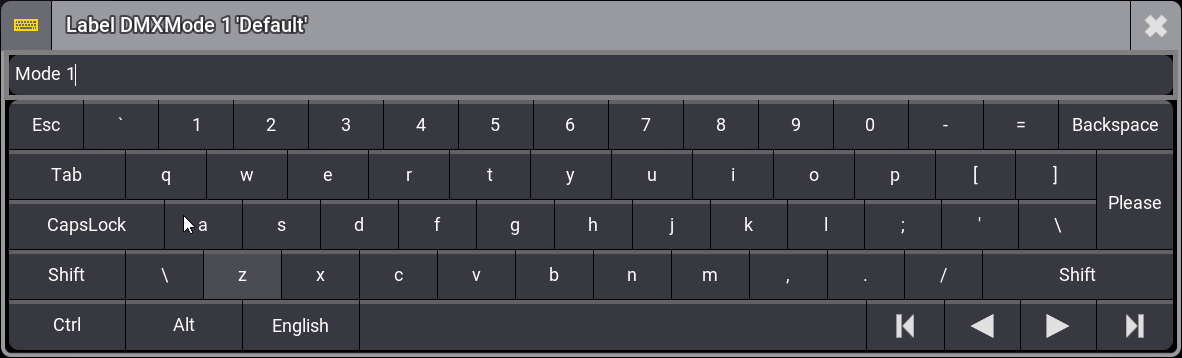
To change the name of the cell, tap and hold or right-click the cell labeled Default. A text editor opens.
Rename Default to Mode 1 as shown in the image below:
This is the text editor
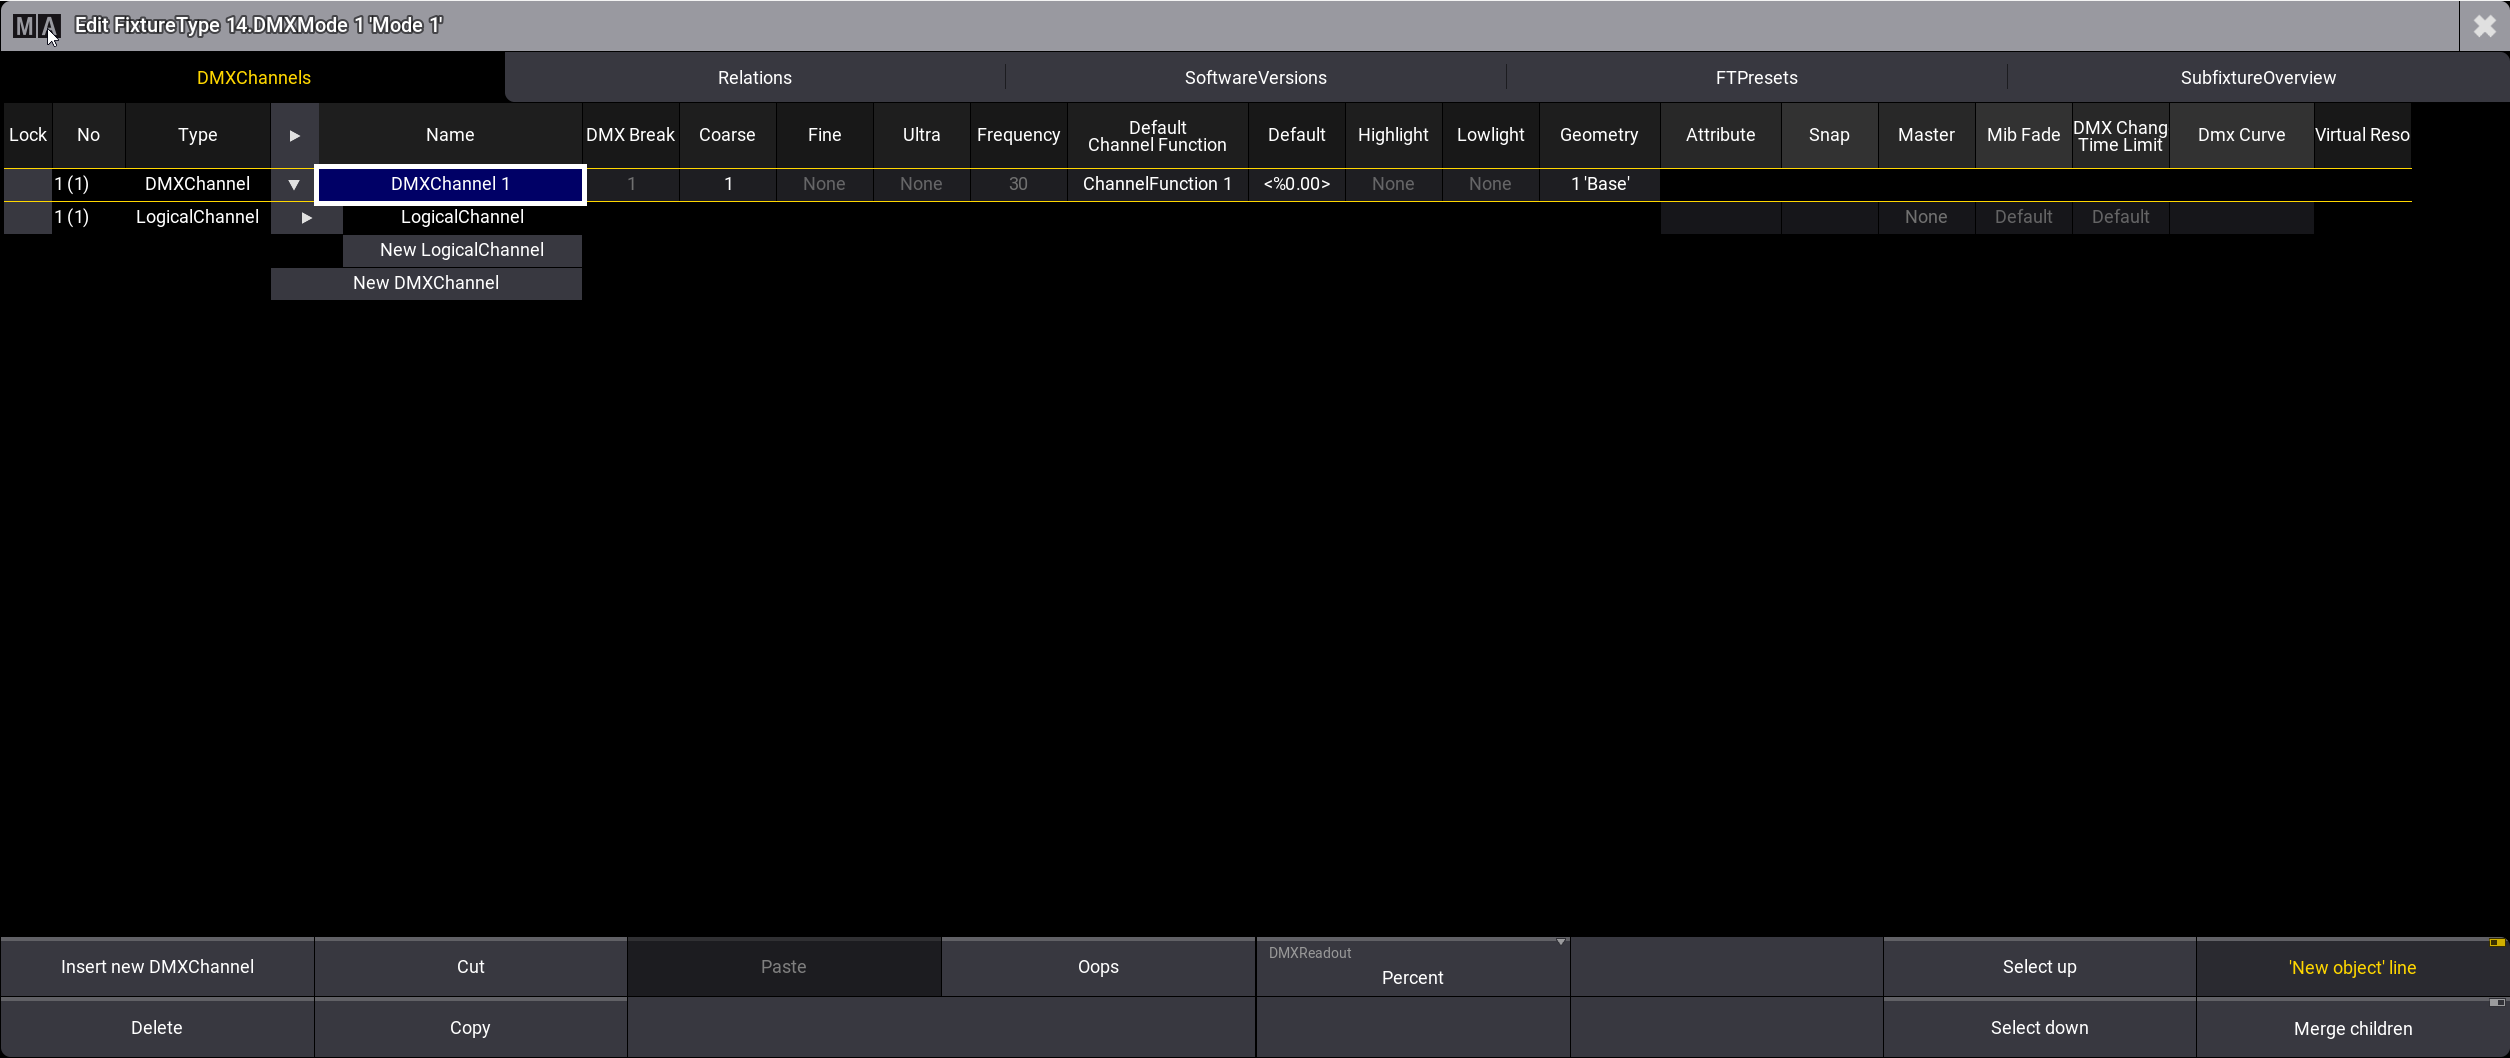
To insert DMX channels, select Mode 1 and
tab
Edit again. The DMX Channel Editor with a tree structure opens:
DMXMode Editor with one DMX channel
The most important columns in this editor are:
Coarse, Fine, Ultra, Default,
Highlight:
See Parameter List topic.
Attribute:
This displays the functionality of the DMX channel.
Master:
This defines if the value of the channel is affected by a group master or the grand master.
Physical From:
This displays the physical value of a fixture. Physical From can not be changed in the Live Patch.
Physical To:
This displays the physical value of a fixture. Physical To can not be changed in the Live Patch.
DMX From:
Sets the DMX value from the lower end of the DMX range on the channel function. DMX From can not be
changed in the Live Patch.
DMX To:
DMX To in the channel function is automatically calculated depending on the DMX From value of the
following channel function or the end of the DMX channel.
The example of a basic moving head requires 6 DMX channels for all of its different
Attributes (Pan; Tilt; Dimmer; Red; Green; Blue)
Enter DMX Channel 1 – Pan
Hint:
For the following example, it makes sense to change the DMXReadout from Dec8 to Percent, as there are only 50 % and 100 % values in this example.
Since it is more accurate, for other cases it can make more sense to use Dec8 or Dec16.
To enter the first channel:
In the row DMXChannel 1, enter:
- Coarse: 1
- Fine: 2
- Default: 50 %
- Highlight: none
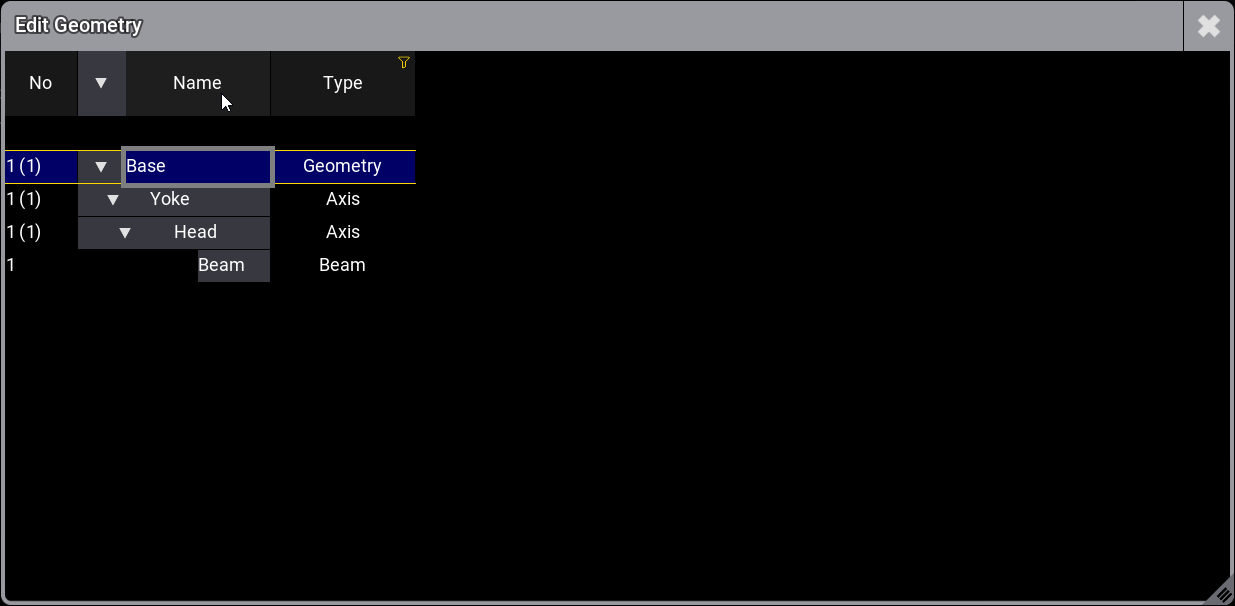
Edit the column Geometry In the row DMXChannel 1, tap and hold or press Edit and tap the cell. The pop-up Edit Geometry opens. Edit Geometry pop-upSelect geometry Yoke.
Make sure the Merge children button is disabled.
Expand DMXChannel 1 for further entries in
LogicalChannel:
- Tap in
the
row DMXChannel 1.
In the row LogicalChannel select:
- Attribute: Pan
The DMXChannel 1 is renamed to Yoke_Pan.
- Master: none
Expand LogicalChannel, now called Pan, for
further
entries in ChannelFunction:
- Tap in
the
row LogicalChannel.
In the row ChannelFunction select:
- Attribute: Pan
- Physical From: -270
- Physical To: 270
Hint:
As soon as you select an attribute, the DMX channel is renamed after the
attribute: Geometry_Attribute.
DMX channel 1 is entered.
Enter DMX Channel 2 – Tilt
To enter the second channel:
Tap Yoke_Pan.
To enable NewDMXChannel, tap 'New object' line button.
Tap New DMXChannel and tap Insert
new DMXChannel.
New DMXChannel is renamed to DMXChannel 2.
To enter the second channel, enter in the row DMXChannel 2:
- Coarse: 3
- Fine: 4
- Default: 50 %
- Highlight: none
Edit the column Geometry and select Head.
Open LogicalChannel. For more information, see step 4 in
description for the first DMX channel.
- Attribute: Tilt
DMXChannel 2 is renamed after the attribute.
- Master: none
Open ChannelFunction. For more information, see step 7 in
description for the first DMX channel.
- Attribute: Tilt
- Physical From: -135
- Physical To: 135
DMXChannel 2 is entered.
Enter DMX Channel 3 – Dimmer
To enter the third channel:
Tap New DMXChannel and tap Insert new DMXChannel. New
DMXChannel is renamed to DMXChannel 3.
To enter the third channel, enter in the row DMX Channel 3: - Coarse:
5 - Default: 0 % - Highlight: 100 %
Edit the column Geometry and select Beam.
Open LogicalChannel. For more information see step 4 in
description for the first DMX channel.
- Attribute: Dimmer
DMXChannel 3 is renamed after the attribute.
To control the value of the attribute using the Grand Master, tap in the column
Master.
- The pop-up Select Master opens Select Master pop-up- Tap Grand.
Open ChannelFunction. For more information, see step 7 in
description for the first DMX channel.
- Attribute: Dimmer
- Physical From: 0
- Physical To: 1
DMXChannel 3 is entered.
Enter DMX Channel 4 – Red
Tap New DMXChannel and tap Insert new DMXChannel. New
DMXChannel is renamed to DMXChannel 4.
To enter the fourth channel, enter in the
row DMXChannel 4: - Coarse:
6 - Default: 100 % - Highlight: 100 %
Edit the column Geometry and select Beam.
Open LogicalChannel. For more information, see step 4 in the
type LogicalChannel.
- Attribute: ColorRGB_R
DMXChannel 4 is renamed after the attribute.
Master: none
Open ChannelFunction. For more information see step 7 in the
type ChannelFunction.
- Attribute: ColorRGB_R
- Physical From: 0
- Physical To: 1
DMXChannel 4 is entered.
Enter DMX Channel 5 – Green
Tap New DMXChannel and tap Insert new DMXChannel. New
DMXChannel is renamed to DMXChannel 5.
To enter the fifth channel, enter in the
row DMXChannel 5: - Coarse:
7 - Default: 100 % - Highlight: 100 %
Edit the column Geometry and select Beam.
Open LogicalChannel. For more information, see step 4 in the
type LogicalChannel.
- Attribute: ColorRGB_G
DMXChannel 5 is renamed after the attribute.
Master: none
Open ChannelFunction. For more information see step 7 in the
type ChannelFunction.
- Attribute: ColorRGB_G
- Physical From: 0
- Physical To: 1
DMXChannel 5 is entered.
Enter DMX Channel 6 – Blue
Start with steps 1 to
3, as described in DMXChannel 2.
To enter the sixth channel, enter in the row DMXChannel 6:
- Coarse: 8
- Default: 100 %
- Highlight: 100 %
Edit the column Geometry and select Beam.
Open LogicalChannel. For more information, see step 4 in the
type LogicalChannel.
- Attribute: ColorRGB_B
DMXChannel 6 is renamed after the attribute.
Master: none
Open ChannelFunction. For more information, see step 7 in the
type ChannelFunction.
- Attribute: ColorRGB_B
- Physical From: 0
- Physical To: 1
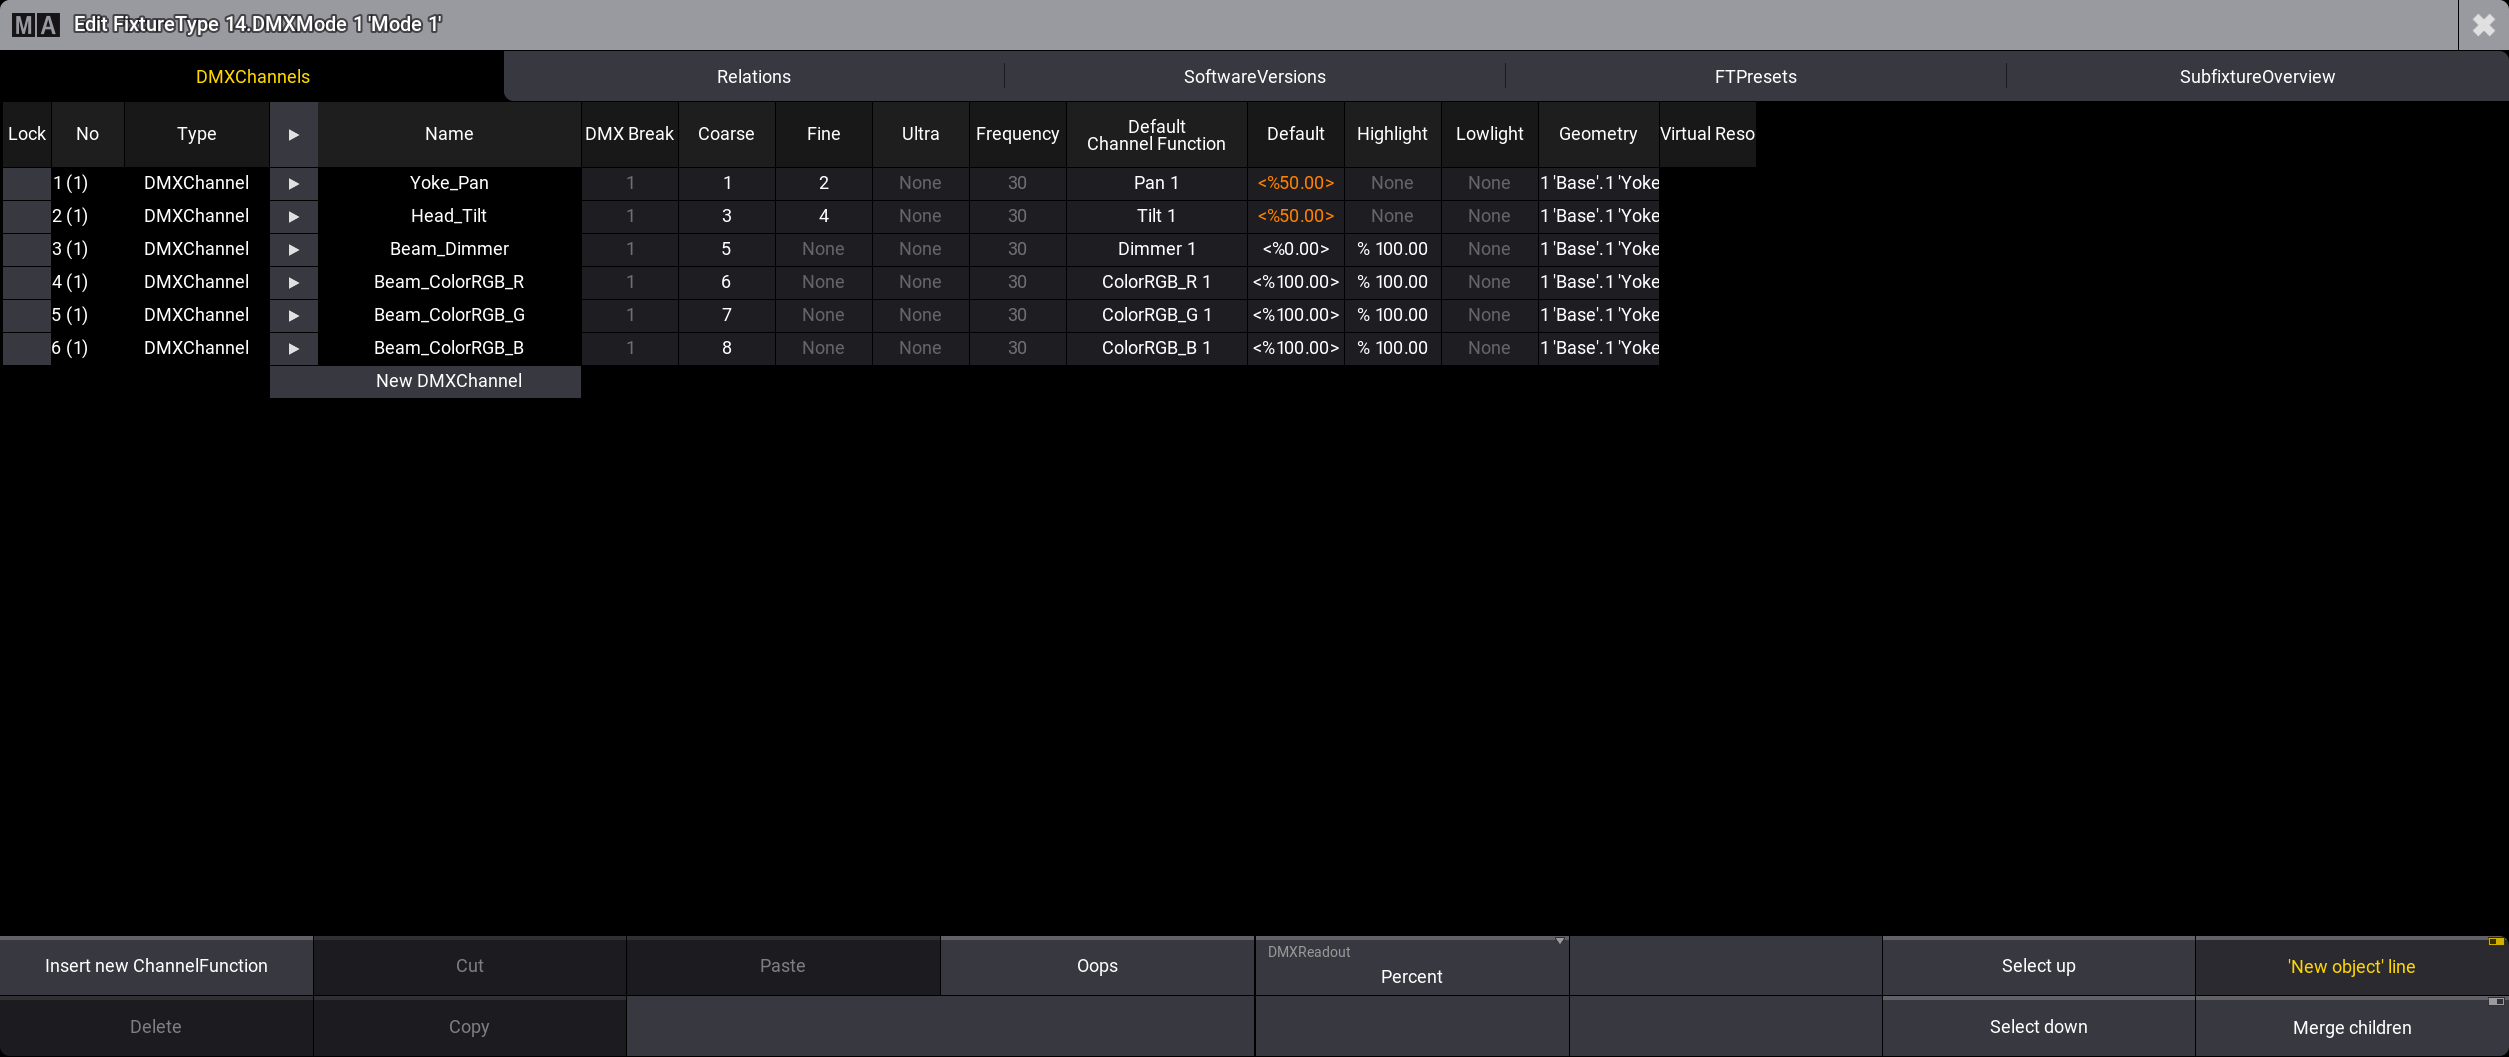
DMX channel 6 is entered, and DMX Mode 1 is inserted. The DMX Mode Editor should look like this:
DMXMode Editor with six Channels: Pan; Tilt; Dimmer; Red; Green; Blue
Now all attributes of the basic moving head are covered with these six channels.
The example of building a basic moving head with all its attributes (Pan; Tilt; Dimmer; ColorRGB) and
geometries (Base; Yoke; Head; Beam) is now completed.
Hint:
The SubfixtureOverview tab on the right side shows a preview of all attributes
for
every subfixture. With this tool the user can see if all attributes of a fixture type are
covered.
Hint:
Check whether your fixture type is displayed and working correctly. To do this open the Fixture Sheet and 3D Viewer and try out all
the
implemented functions.
 in
the
row DMXChannel 1.
in
the
row DMXChannel 1.