Stages in grandMA3
|
grandMA3 User Manual » Patch and Fixture Setup » Stages in grandMA3
|
Version 2.1
|
In grandMA3 there are virtual stages. The fixtures added to the patch are placed in a stage. The fixtures can be positioned in this 3D virtual stage.
It is possible to create more stages. This could be useful in a house with several physical stages, a television station with several studios, a theme park with several different areas, or for adding a festival rig to a touring show.
The stages have location and dimension information.
Add a Stage in the Patch
- Press Menu.
- Tap Patch in the menu pop-up.
- Tap Stages on the left side.
- Tap Insert new Stage at the bottom.
A new stage has now been added above the line that had focus.
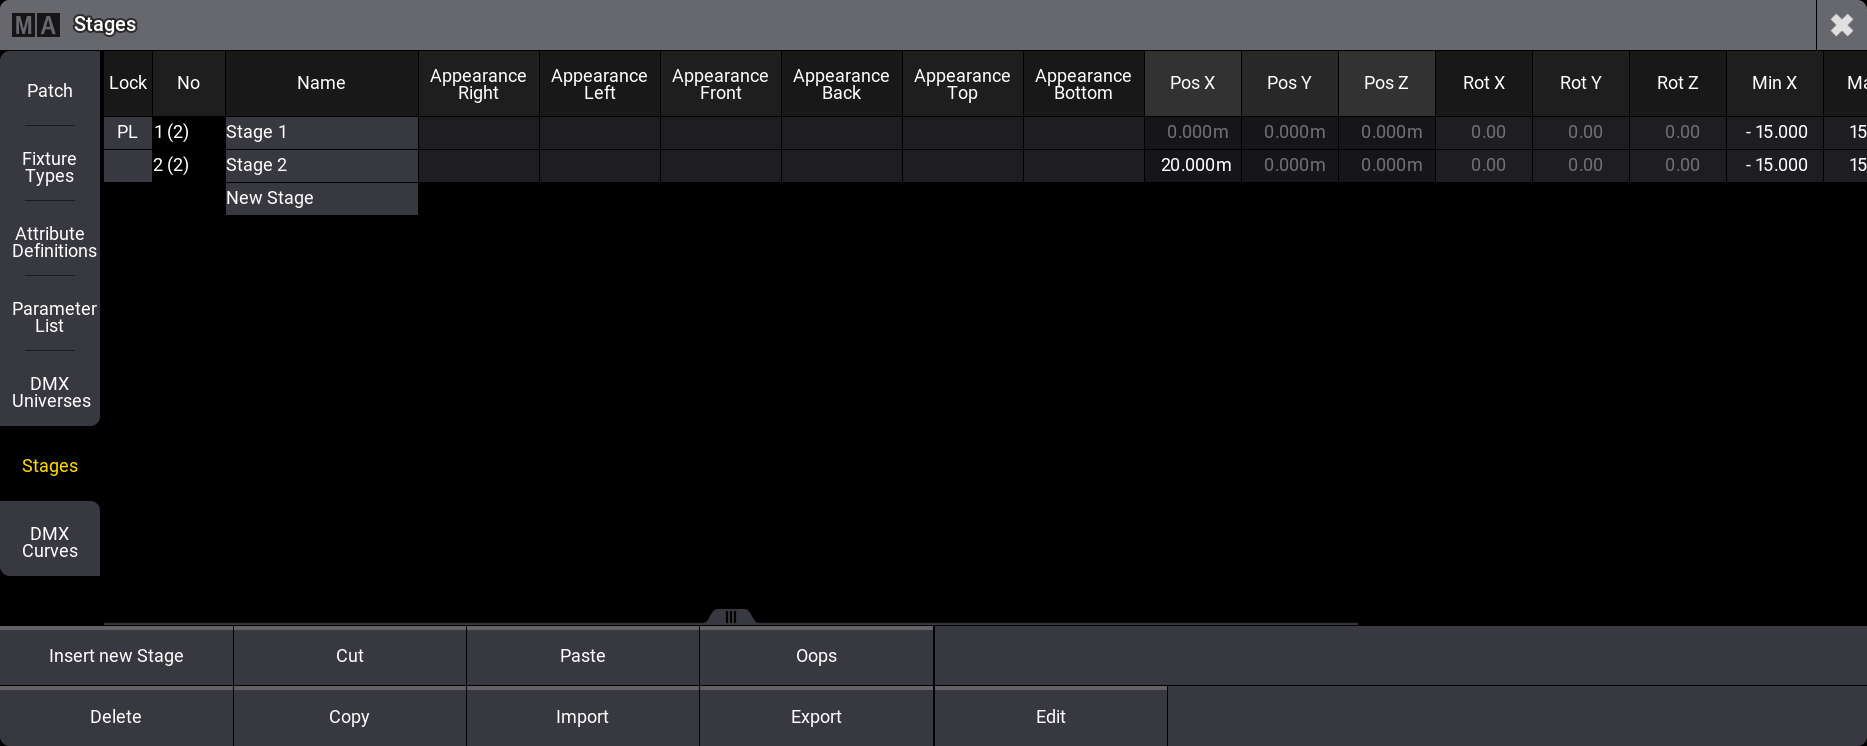
The stages can be named for organizational purposes.
The standard size for a new stage is 30 meters wide (X) and deep (Y), with a zero in the middle. The height (Z) is from zero to 15 meters high.
The stage displayed in the 3D window will automatically expand the visible box but will not change the dimension defined for the stage object.
The stage setup allows for changing the positions and rotation of the stages. A 3D Viewer can show one or all of them.
The buttons at the bottom make it possible to insert new stages.
The stages can also be deleted. Be careful with this!
|
|
Important: |
| Fixtures are patched inside stages. Deleting a stage also deletes all the fixtures in that stage, including all the information programmed about those fixtures. |
If the stages need to be reorganized, they can be copied, cut, and pasted to move them in the list.
A stage can also be exported and imported. Remember that the stage contains the fixtures. The exported stage object contains the patched fixtures and any other stage objects inside the stage.
For more information about adding fixtures to the stage, please follow the first link at the top.
Edit a Stage
A selected stage in the stage menu can be edited by tapping Edit at the bottom. This opens the Edit Stage menu.
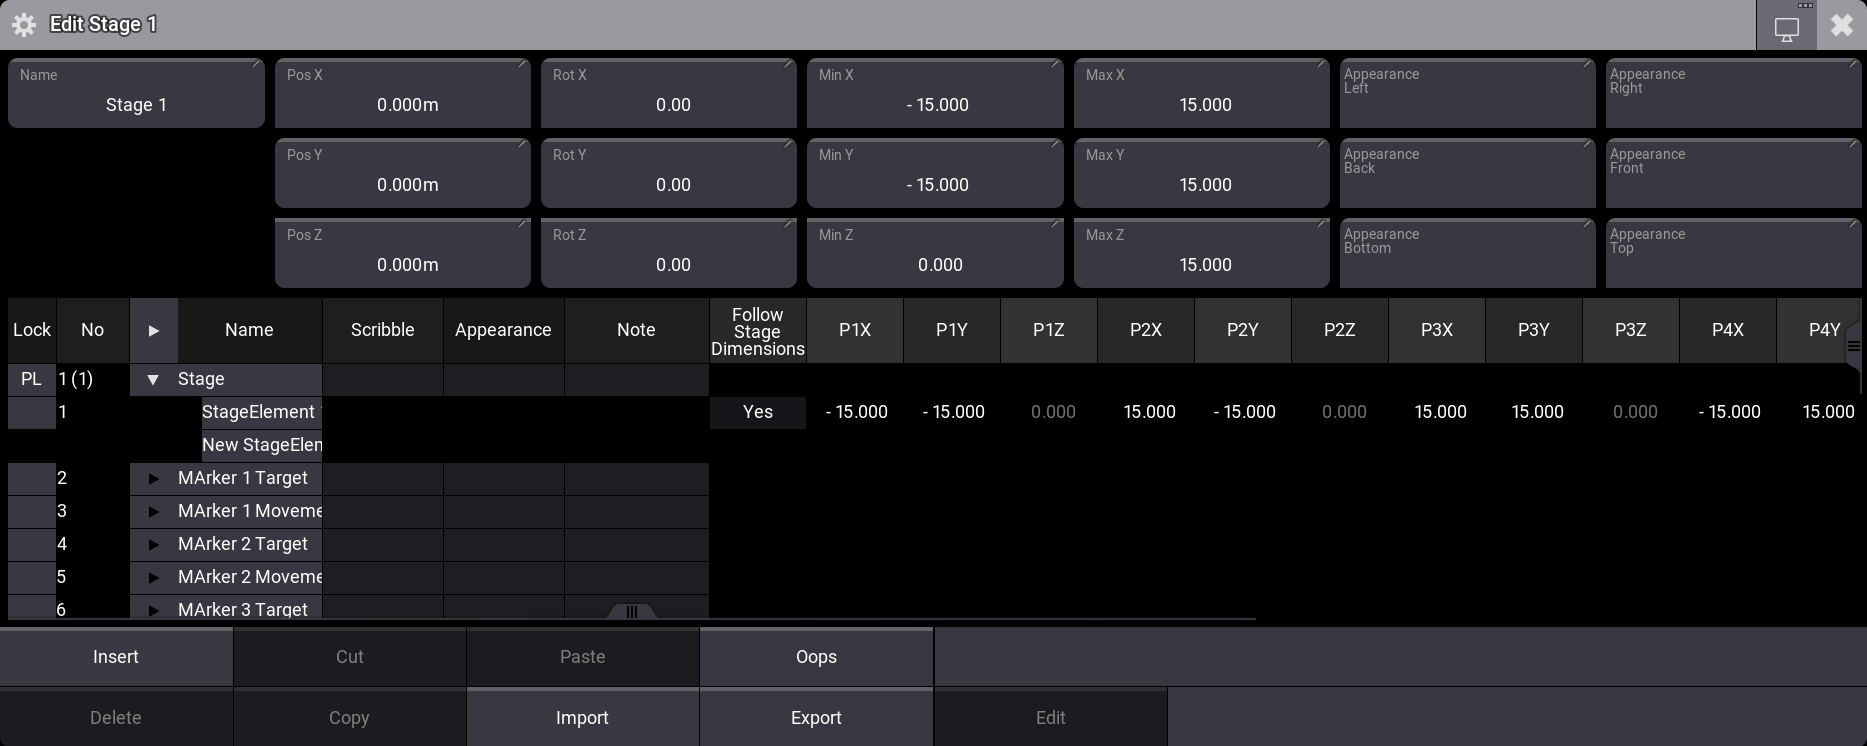
The top part of this edit has input fields for the same settings as the Stage menu.
The lower part is used to add and edit a stage Space object and stage Elements. The elements are flat surfaces that can be combined to create boxes or areas that the light can hit.
A stage space defines a volume in the stage. This space is relevant when using XYZ programming. It defines the size of the space the fixtures can point to. Read more about this in the XYZ section.
A stage space can have multiple stage elements inside. These elements are defined by four corners, each with an X, Y, and Z coordinate.
Stage spaces and elements can be created, deleted, copied, cut, pasted, oopsed, imported, and exported like many other objects.
Export and Import are especially nice if a lot of time has been spent on creating a 3D set.
|
|
Hint: |
| More complex 3D objects can be added to the Patch. They are found in the "Set" manufacturer. |
A new stage always has a Stage Space and a default Stage Element (the "floor").
Adding MArker fixtures automatically adds stage spaces for Target and, if needed, for the Movement. Read more about this in the MArker Fixture topic.