|
grandMA3 User Manual » Phasers » Create a Sinus Dimmer Phaser
|
Version 2.1
|
This topic details a couple of examples of how to create a sinus dimmer phaser using keys and buttons as well as the phaser editor and encoder bar. There are many ways to reach the same goal in grandMA3. Many of the steps in the examples below are interchangeable while producing identical results. These examples use a combination of keys and the calculator interface. If you are working with the onPC software, it might be easier to type commands into the command line rather than use the on-screen keys.
It is recommended to read the Phasers topic and the Phaser Editor topic before this topic.
Requirements:
- Have a show with some lights patched.
- An open Phaser Editor window with the Step Bar enabled is recommended, though it is also possible to use the temporary Phaser Editor.
- Arranging the fixtures in the 3D window can be useful, but it is not a requirement.
- As it is highly recommended to use presets while programming, an open Dimmer preset pool is recommended with presets for dimmer values of 100% and 0%.
Quickly Create Steps and Apply Adjustments with the Phaser Editor
- Select the desired fixtures. For example: Fixture Thru Please
- Choose a dimmer preset for step one: Press and hold Step and tap the preset with the 0% dimmer value.
- Choose a dimmer preset for step two: While still holding Step, tap the preset with the 100% dimmer value.
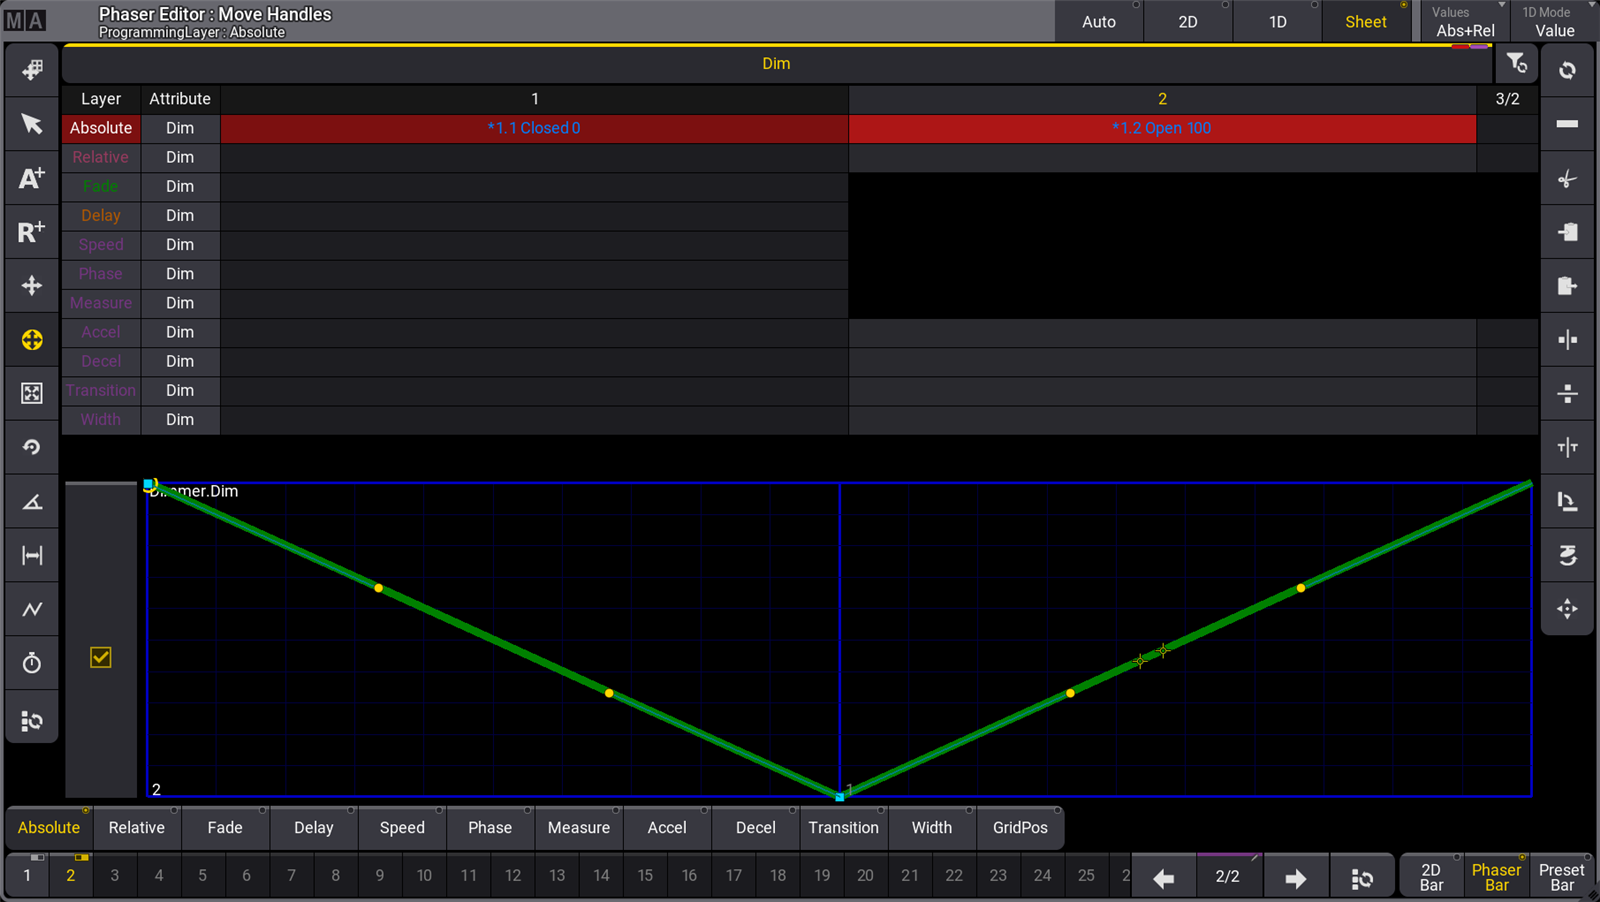
This is the base for the phaser. There are now two steps with a dimmer preset of 0% in the first step and a preset of 100% in the second step. All of the fixtures are changing together from step one to two with a linear fade (not yet using a sine curve). The Sheet view mode of the Phaser Editor shows:
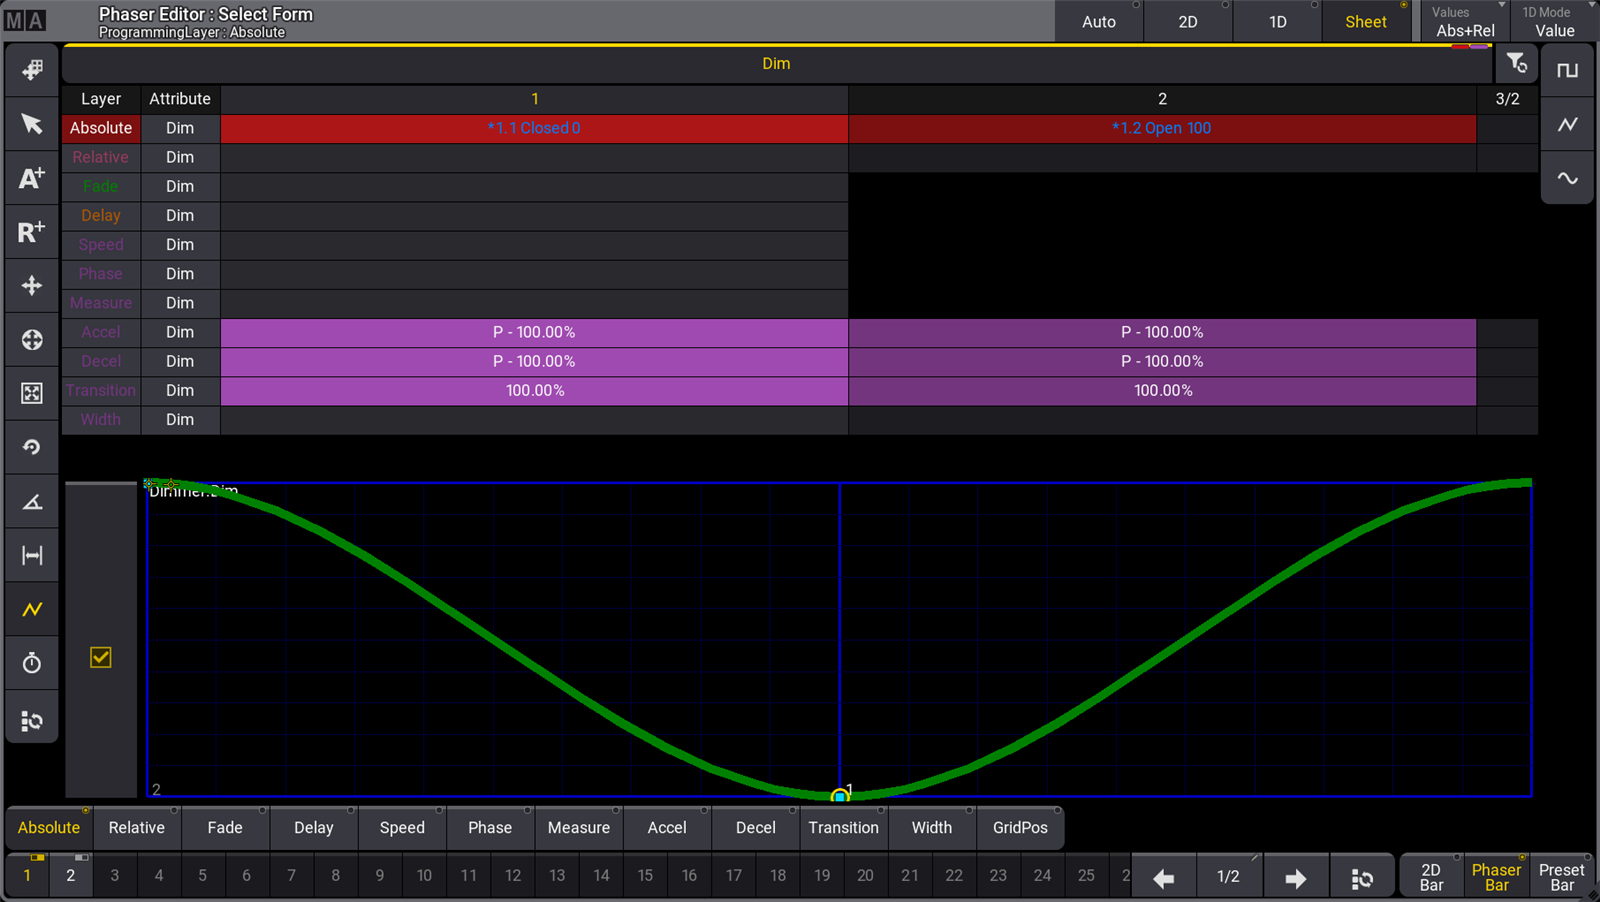
Adjust the curve of both steps using tools in the Phaser Editor:
- Select all steps by tapping the
 button at the right end of the Step Bar or at the bottom of the left-hand tool bar.
 - Tap to select the Select Form tool (
 ) in the left-hand tool bar.
 - In the right-hand tool bar, tap the sine wave button (
 ) to select the sine wave form.
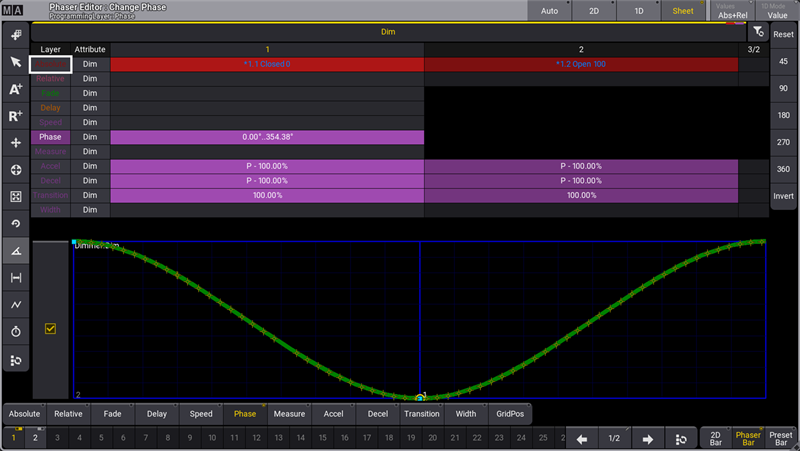
Adjust the phase of all fixtures using tools in the Phaser Editor:
- Tap to select the Edit Phase (
 ) tool in the left-hand tool bar.
 - In the right-hand tool bar, tap the 360 button to evenly distribute the selected fixtures over the wave form.
Store the phaser into a preset or a cue.
Alternate Methods to Create a Sinus Dimmer Phaser
Follow these steps to create a sinus dimmer phaser:
- Select the desired fixtures. For example: Fixture Thru Please.
- Set them at a dimmer value of 0: At 0 Please.
- Create step 2 and select it: MA + Next (Next Step).
- Set the fixtures at full: Full.
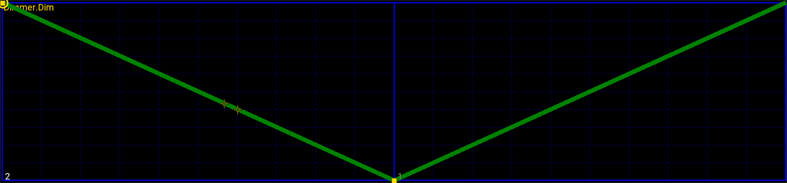
This is the base for the phaser. There are now two steps with a dimmer value of 0 in the first step and a value of 100 in the second step. All the fixtures are changing together from step one to two in a linear direction and do not fade using a sine curve. It looks like this in the Phaser Editor:
The curve is corrected by adjusting the acceleration and deceleration in both steps.
- Select both steps: MA + Set (Step Toggle).
- The steps need to have an accelerate value of -100. This is done using the Encoder Toolbar.
- Tap Dimmer to make sure it is selected.
- Tap Accel to select the acceleration layer.
- Tap the left attribute encoder to open the calculator.
- Tap +/- 1 0 0 Please. This gives a known and precise value. If Handles are used then it might not be as precise as typing a value.
- Do the same for the Decel layer.
Now the attribute accelerates out of and decelerates into each step. The curve now looks like this:
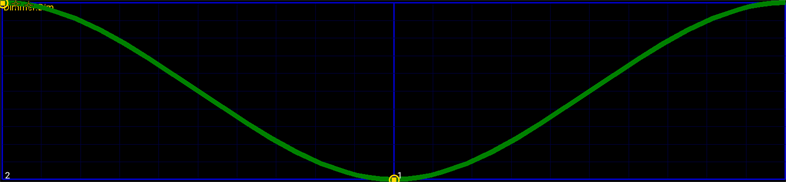
- The final thing to do is to spread out the fixtures using the phase value. This is also done from the encoder toolbar.
- Tap Phase to select the phase layer.
- Tap the left attribute encoder to open the calculator.
- Tap 0 Thru 3 6 0 Please.
Now the fixtures are spread out equally over the entire phase of the phaser loop.
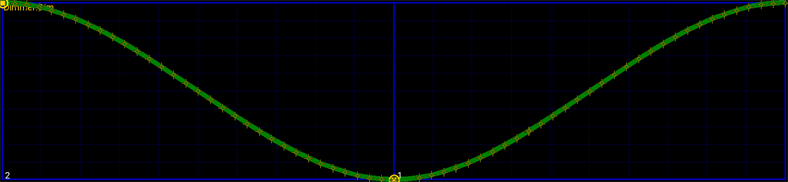
This is a sinus phaser that can be stored in a cue or preset.
It is created using a specific selection of fixtures so remember to select the desired Preset Mode when storing a preset.