Create Color Rainbow Phaser
|
grandMA3 User Manual » Phasers » Create Color Rainbow Phaser
|
Version 2.1
|
This topic presents an example of one possible workflow for creating a rainbow color phaser. This example creates the rainbow chase using three steps with a primary color in each step. An additional example at the end shows an easy way to change the color used in one of the steps.
Requirements:
- Have a show with some fixtures that have a color mixing system (not color wheels with static colors). The steps below reference fixtures and presets included in the demo show.
- Have three color presets with Red, Green, and Blue colors stored using the color mixing system. The additional example also uses a White preset. These presets exist in the demo show file.
- An open Phaser Editor window is needed.
- An open Color preset pool for quickly calling the desired presets.
- Arranging the fixtures in the 3D window can be useful, but it is not a requirement.
Follow these steps needed to create the phaser.
- Select the desired fixtures. The following screenshots use fixtures 1 thru 8 in the demo show.
- Bring the dimmers to full so the beams are visible.
- Press and hold the X5 | Step key, and tap the red color preset.
- While still holding the X5 | Step key, create the second step by tapping the green color preset.
- While still holding the X5 | Step key, create the third step by tapping the blue preset.
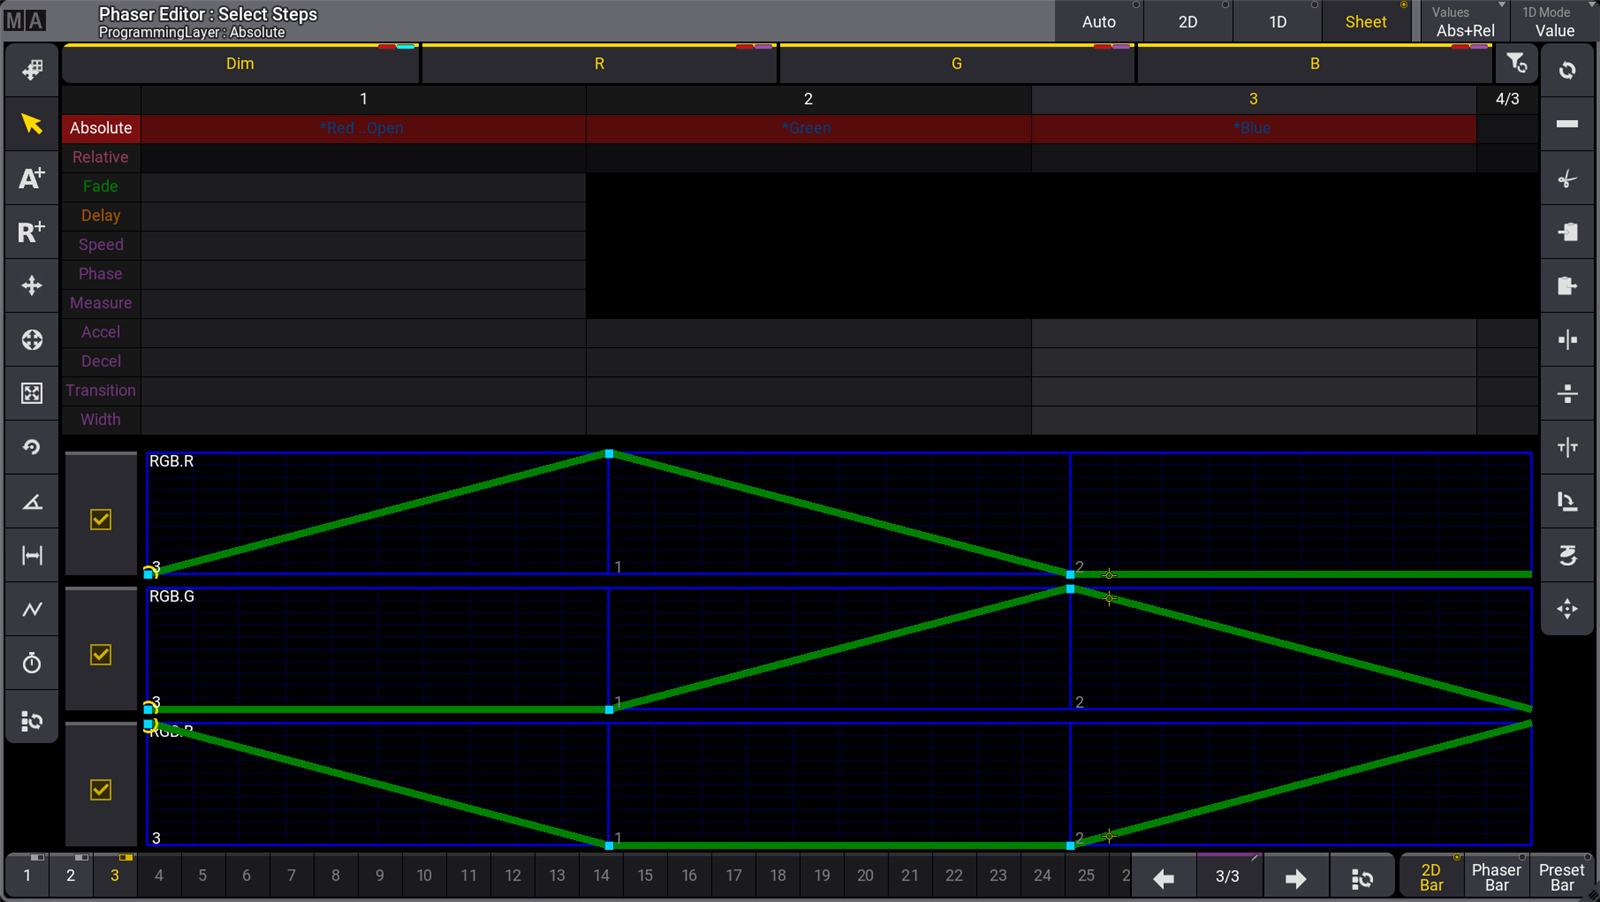
The phaser editor shows the three steps and all referenced presets.
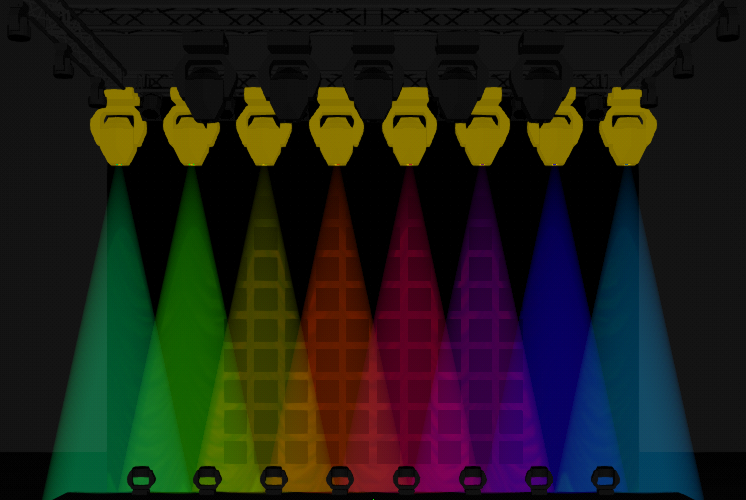
All the fixtures now change color together through the rainbow colors. If this is the desired result then store this in a cue or preset.
|
|
Important: |
| Following the steps above exactly results in an active dimmer value in the first step of the phaser. If you prefer that your rainbow phaser only contain color values, deactivate the dimmer attribute before storing. |
To spread the rainbow across the selected fixtures, adjust the Phase:
- Tap the Change Phase (
 ) button on the left menu in the Phaser Editor.
 - Tap 360 on the right menu in the Phase Editor to spread the fixtures evenly.
The 3D window shows the result:
This can be stored as a preset or in a cue.
Quick Workflow for Changing the Preset Referenced in a Step
In the case that a different combination of colors is desired, the following workflow allows for such adjustments to be made quickly. With the rainbow from the above example still active in the programmer, use the following command to change the preset used in step two from green to white, so that the fixtures transition from red to white, then to blue: Press X5 | Step then 2 and tap the white preset.
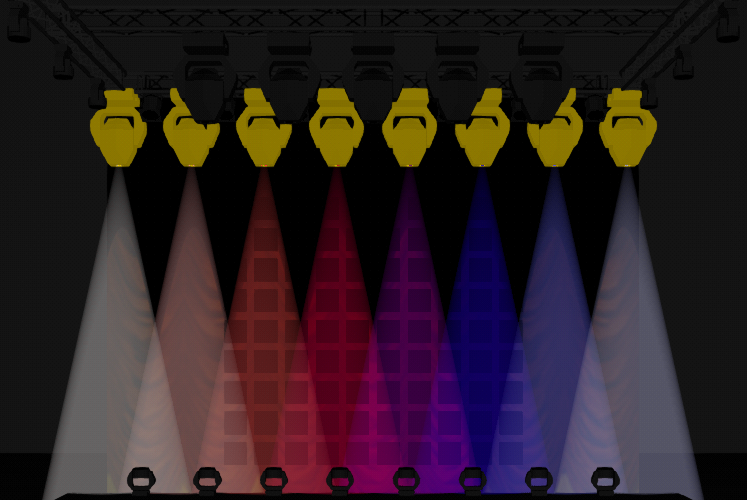
The resulting phaser now references the red, white, and blue presets.