Encoder Bar Pool
|
grandMA3 User Manual » Workspace » Encoder Bar » Encoder Bar Pool
|
Version 2.3
|
The Encoder Bar Pool can be used to create customizable encoder bars. The customization can be made in an editor, for example, defining the functionality per encoder, and defining the number of encoder banks and their encoder objects.
To always have a backup with the original feature group structure, the encoder bar pool object 1 is set as default and can not be deleted or edited, as it is system locked. For more information, read the Feature Group Control Bar topic.
| Hint: | |
| Copy the default encoder bar to an empty pool object to use it as a template. Simply press Copy, tap the default encoder bar pool object and then tap an empty pool object. |
When tapping on a pool object, the Encoder Bar and the Encoder Bar window change the user interface according to the settings previously made for those pools.
- To address Encoder Banks and Encoder Pages directly, use the EncoderBank Keyword.
- To switch between encoder bars, use the EncoderBar Keyword.
Encoder Bar Structure
The following graphic and the numbered list displays the basic structure and terminology of the encoder bar:
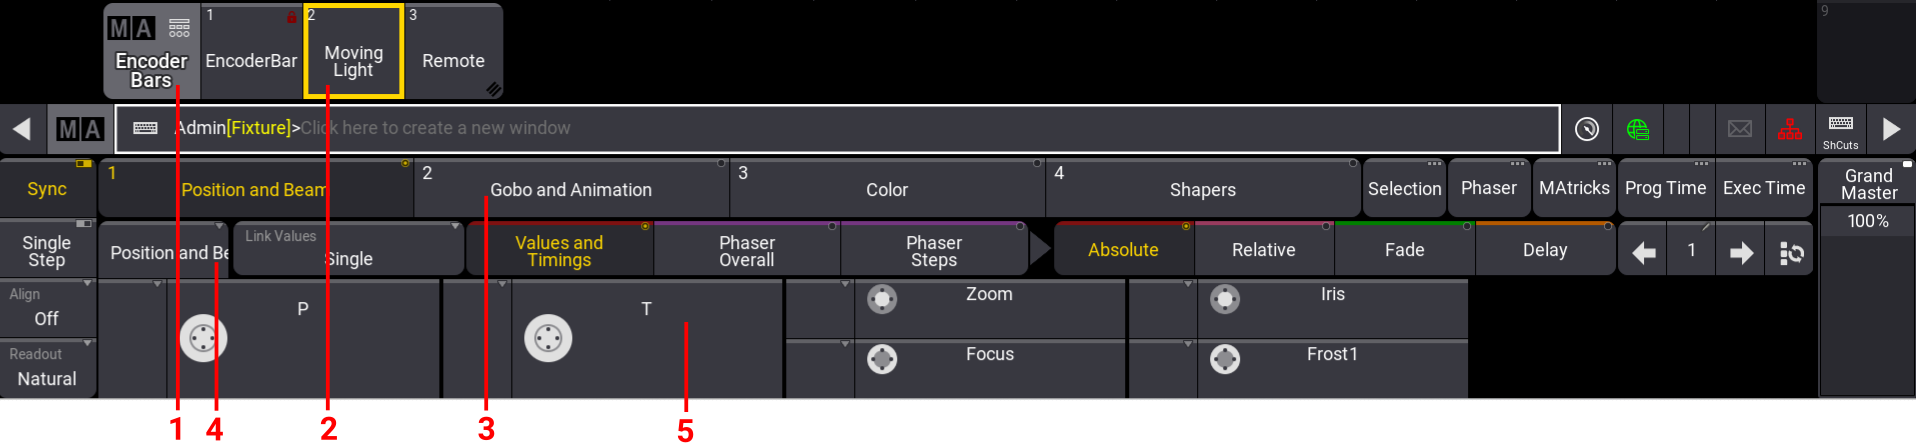
- Encoder Bar Pool: This pool contains all the encoder bar pool objects. Each user profile has its own encoder bars pool.
- Encoder Bar Pool Object: A pool can have several pool objects. For more information on how to setup pool objects, see Pool Windows.
- Encoder Bank Button: There can be several encoder banks inside an encoder bar pool object. Allows to link to Special dialog tap.
- Encoder Page: Each encoder bank can have several encoder pages. Encoders get arranged in Encoder Pages.
- Encoder: An encoder page can contain up to five dual encoders.
Create New Encoder Bar Pool Object
To open the Encoder Bars pool:
- Open the Add Window dialog.
- Tap Pools and then tap Encoder Bars. The Encoder Bars pool is open.
To create a new Encoder Bar Pool object:
- Press Edit and tap an empty encoder bar pool object. A pool object is added and the Encoder Bar editor opens.
To copy the default encoder bar pool object to an empty pool object:
- Press Copy, tap Encoder BarPool Object 1 and then tap an empty encoder bar pool object in the Encoder Bars Pool.
To assign an Encoder Bar pool object to a ViewButton:
- Press Assign, tap an encoder bar pool object, and then tap an empty view button.
To enable settings in the title bar of a pool object:
-
Press Edit and tap an encoder bar pool object. The editor opens. Enable Settings in the title bar to see the six horizontal buttons on top of the editor:
- Name: Opens the name field.
- Scribble: Set a scribble. For more information, see Scribbles.
- Appearance: Opens the appearance dropdown. For more information, see Appearances.
- Note: Opens the note pop-up. For more information, see Notes.
- Tags: Opens the tags pop-up. For more information, see Tags.
- Lock: Locks the pool object. For more information, see Lock and Unlock Pool Objects.
Create an Encoder Bank
To create a new Encoder Bank:
- Edit an encoder bar pool object, for example, empty encoder bar pool object 4. The editor opens and the focus is set to New Encoder Bank in the Name field.
-
Tap Insert New Encoder Bank to create a new encoder bank.
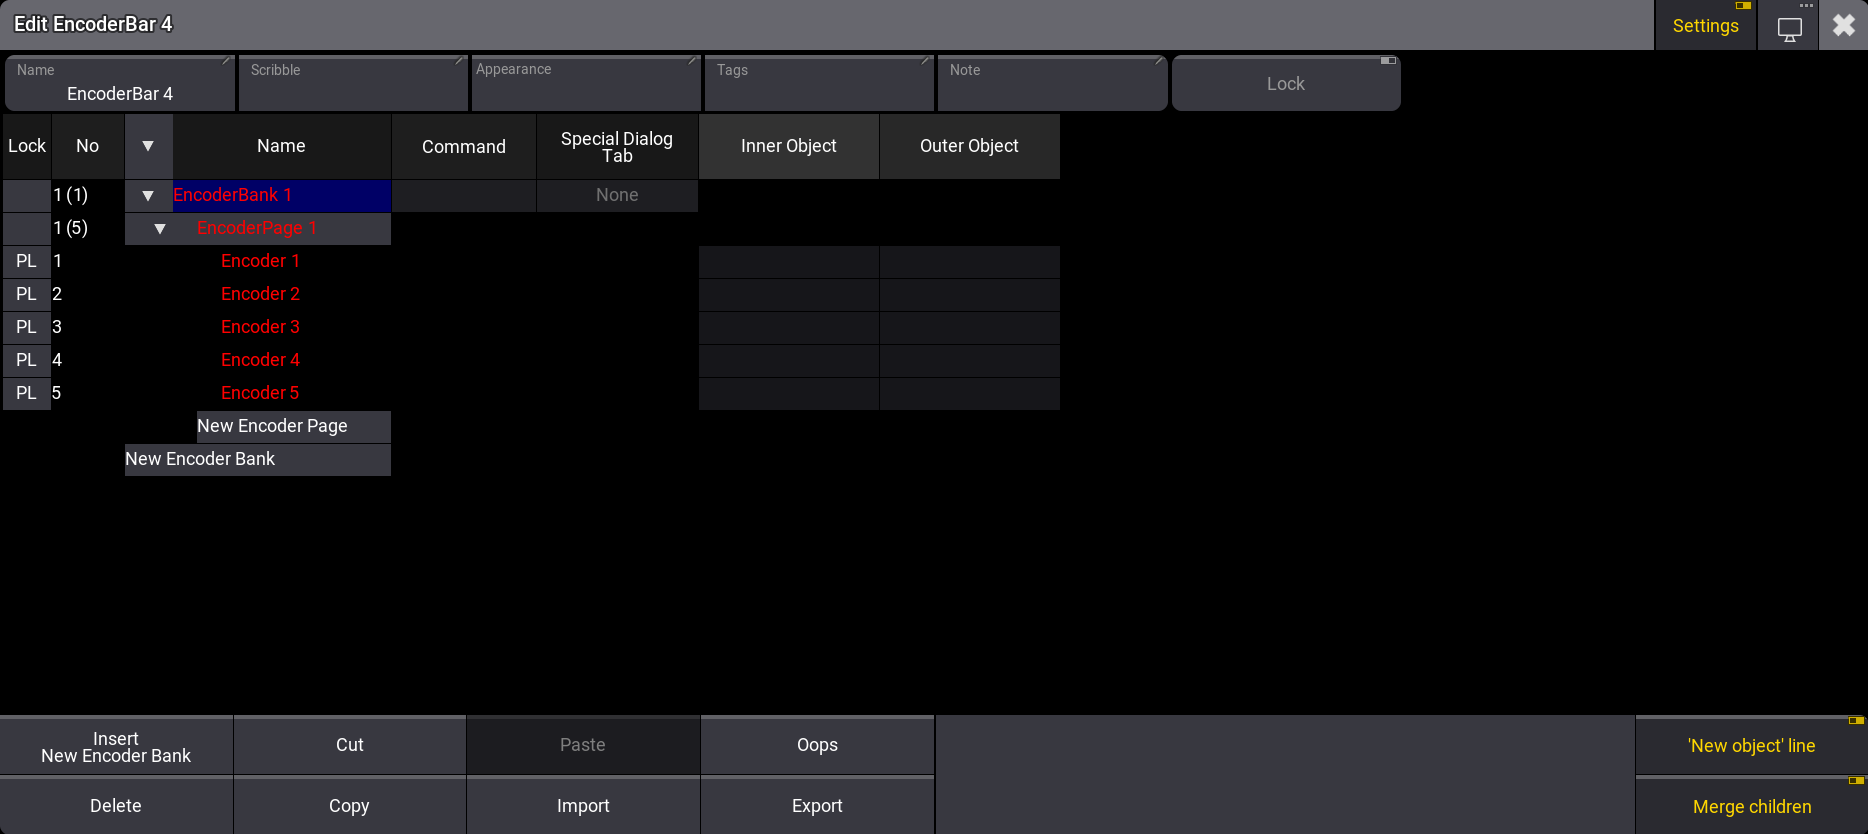
Encoder Bar Pool - Edit EncoderBank 1. The keyboard opens.
- Rename the encoder bank, for example, Dimmer. Press Please.
- Rename EncoderPage 1, for example, to Dim. The next step is to assign functions to encoders.
Assign Functions to Encoders
To assign functions to an encoder object:
-
Two-finger edit the Inner Object of the Encoder 1 row. The assignment editor opens.
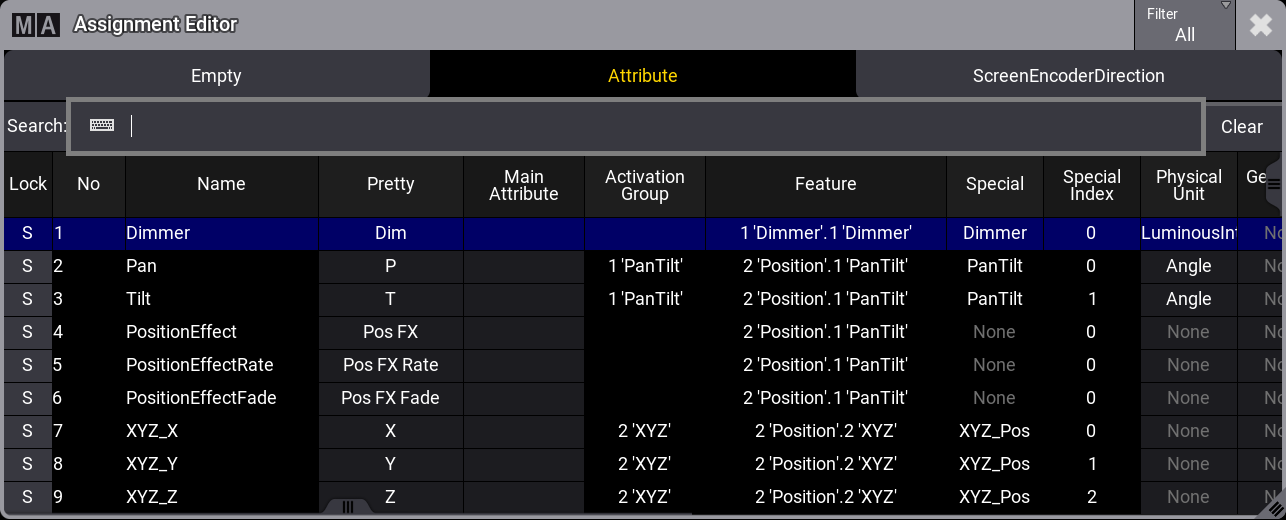
Assignment Editor -
Select an Attribute, for example, Dimmer. The assignment editor closes and the Inner Object is assigned to Dimmer.
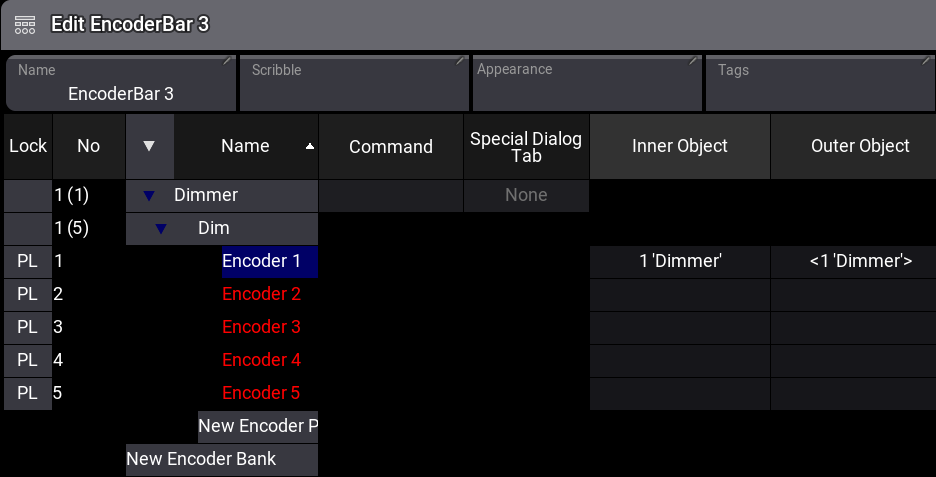
Encoder Bar Editor
| Hint: | |
|
Selecting an attribute for the inner object automatically sets the same attribute for the outer object (<Attribute>) and vice versa. It is possible to change the attribute afterward. |
Using the Assignment Editor
To filter the assignment editor, tap and hold Filter in the Assignment Editor. A drop-down menu opens with the following options.
- All: Shows all attributes.
- Used: Shows all attributes used in the show.
- Unused: Shows all attributes not used in the show.
- Selection: Shows the attributes of the selected fixtures.
Another way to look for attributes is to use the search bar in the assignment editor.
To clear the assignment of an encoder, tap Empty in the assignment editor.
To use encoders to scroll through the screens, tap ScreenEncoderDirection and select Screen Y for vertical scrolling and Screen X for horizontal scrolling.
If the inner and outer objects have the same attribute, the encoder is displayed in white:

If the inner and outer objects have different attributes selected, the encoder is separated:
Red Text in the Editor
- An empty / newly created encoder bank is not functional, which is indicated by red text. A functional encoder bank is achieved by assigning an encoder configuration line to an attribute that exists in any patched fixture.
- A non-functional assignment occurs when the encoder configuration line is set to an attribute that is not used by any patched fixture, which is indicated by red text.
- Red text on encoder pages indicates that no functional assignment has been made to any corresponding encoder configuration line.
Encoder Bank Command
It is possible to trigger a command when entering a pre-defined encoder bank.
See the video below to get an overview of this feature:
To set an encoder bank command:
- Press Edit and tap an encoder bar pool object.
-
Edit the Command row next to an encoder bank. A pop-up opens.
- Type a command, for example, Call View "Dimmer Presets" /Screen "6" and then press Please.
-
The pop-up closes and the command is set.
| Hint: | |
| If an encoder bank is already active, tapping the active encoder bank again will not execute the command. |
For more information about the Edit Command pop-up, see the Command Editor topic.
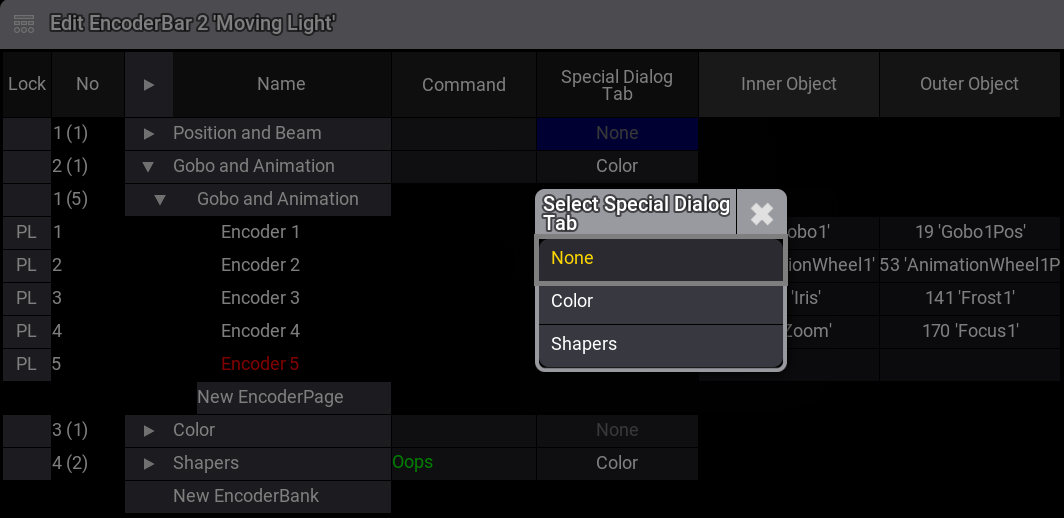
Special Dialog Tab
To automatically switch the Special Dialog to a specific tab when entering the defined encoder bank:
- Two-finger edit Special Dialog Tab in the grid. A dropdown menu opens.
- Select a Special Dialog tab, for example, Color. The dropdown menu closes.
- Open the Special Dialog window.
- Enable Link Encoder Bank in the Special Dialog Window Settings - Display tab. For more information about this setting, see Special Dialog.
- Enter the previous defined encoder bank, for example, Gobo and Animation. The Special Dialog tab switches to Color.