grandMA3 User Manual Publication
Insert Models
|
grandMA3 User Manual » Fixture Types » Build Fixture Types » Insert Models
|
Version 2.0
|
Each geometry has a separate description of the model.
A mesh is a .3ds file (3D image format used by Autodesk 3D Studio) or a .gltf/.glb file (open standard 3D image format).
Meshes are stored in the Meshes pool after they have been imported to the show.
- For more information about importing meshes, see Meshes.
|
|
Important: |
| After they have been imported, meshes must be linked to a model of a fixture type. |
|
|
Hint: |
| Meshes are automatically added to the mesh pool after importing an MVR file or when a fixture type is imported to the show. For more information, see MVR. |
Requirement:
Models are built upon Geometries.
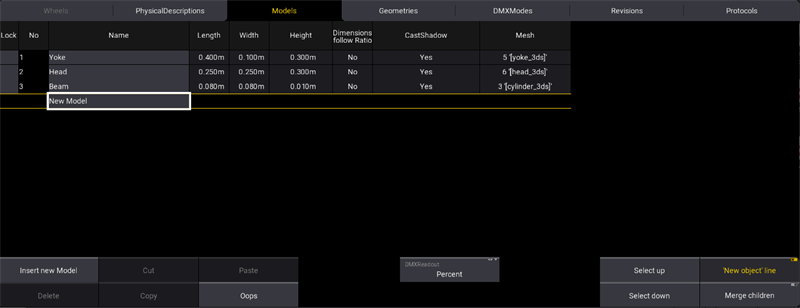
- Tap the tab Models.
The menu Models opens.

- Select New Model and tap Insert new Model.
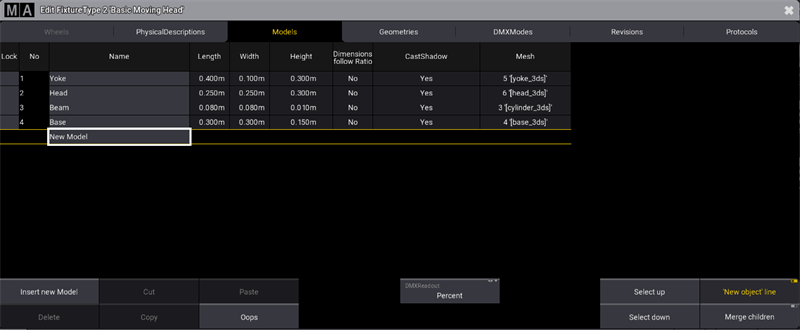
- Model 4 is added.
- Rename Model 4 into Base and set its Mesh to [base_3ds].
- Rename Base/Axis1 into Yoke and set its Mesh to [yoke_3ds].
- Rename Base/Yoke/Axis 1 into Head and set its Mesh to [head_3ds].
- Rename Base/Yoke/Head/Beam 1 into Beam and set its Mesh to [cylinder_3ds].
- Enter the measurements of the fixture, as shown in the table below.
|
|
Important: |
| To avoid the models to automatically resize themselves, set the Dimensions follow Ratio column to No before entering the measurements. |
| Name | Length | Width | Height |
|---|---|---|---|
| Yoke | 0.4 m | 0.1 m | 0.3 m |
| Head | 0.25 m | 0.25 m | 0.3 m |
| Beam | 0.08 m | 0.08 m | 0.01 m |
| Base | 0.3 m | 0.3 m | 0.150 m |

The models are automatically taken over to the Geometries in the column Model, except for Base as it was inserted directly in the models.
- Link Base to the model Base.
For more information, see Link Models to Geometries.