|
grandMA3 User Manual » Layouts » Layout View Settings
|
Version 2.1
|
To open the Layout View window, follow the instructions under Add windows.
In the Add Window pop-up:
- Tap Tools.
- Tap Layout Viewer.

Open Layout View Settings
-
To open the Layout View Settings, tap
 in the upper left corner of the layout window.
The Layout View Settings pop-up opens.

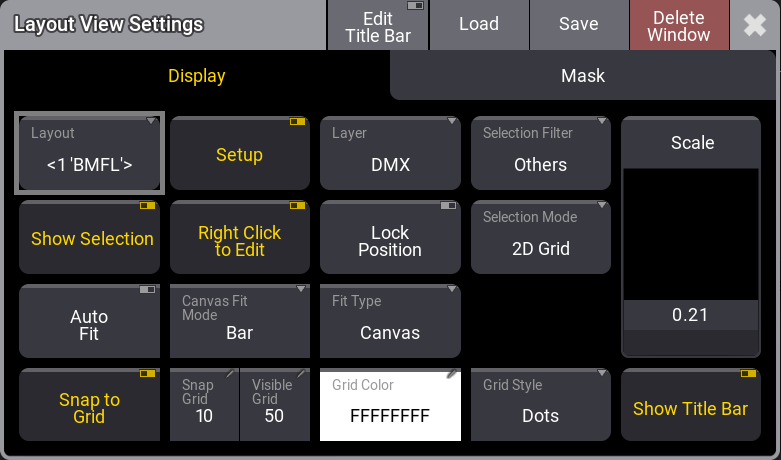
This is a description of each button in the layout view settings:
-
Layout:
Link selected, select an existing layout, or create a new one. -
Setup:
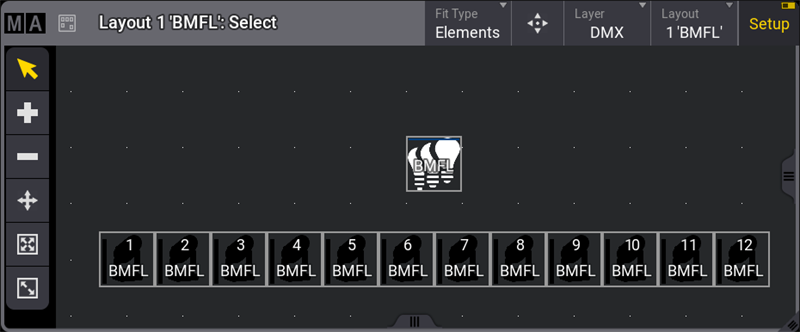
Opens the setup toolbar. For more information, see Layout View Toolbar. -
Layer:
Select the layer readout between DMX, Value, or Output. -
Selection Filter:
Specifies which type of layout element will be selected when a lasso selection is made.- All: All layout elements will be selected.
- Fixtures: Only fixtures will be selected.
- Others: Everything but fixtures will be selected.
-
Show Selection:
Displays the selected fixtures by a yellow frame in the layout view, or not. Show Selection is not available in the Setup mode. -
Right Click To Edit:
When this button is toggled on, it will allow editing of objects assigned to layout elements by right-clicking or using the two-finger edit gesture.
Toggle this button off to disable the right-click and two-finger edit gesture to prevent accidental editing of objects.
|
|
Hint: |
|
To edit an object when this button is toggled off, press Edit and tap the assigned object you wish to edit.
|
-
Lock Position:
Toggle on to protect the layout arrangement. - Selection Mode:
This defines how the fixtures are selected and positioned in the Selection Grid. The selection mode has two different options:- 2D Grid: Using the lasso selection adds them as a two-dimensional selection to the Selection Grid.
- Linearize: The selection is linearized to only the X-axis of the Selection Grid.
-
Auto Fit:
Toggle on to fit elements according to the window size. -
Canvas Fit Mode:
There are 3 fit modes, Bar will fit the entire canvas, Crop fits the canvas to its total width, and Stretch fits the canvas to its total height. -
Fit Type:
Toggle to fit the Elements, the Canvas, or Both. -
Snap To Grid:
Toggle on for objects to snap to the grid when in setup mode. -
Snap Grid:
Tap to open the calculator, then enter a snap value between 1 and 14 000 pixels.
Make this number smaller to be as precise as possible when moving elements in the layout view. -
Visible Grid:
Tap to open the calculator, then enter a value for the visible grid size. -
Grid Color:
Use the edit grid color popup to create the desired grid color. -
Grid Style:
Select the grid style between Off, Lines, or Dots. -
Scale:
When Auto Fit is off, the fader can be used to scale the layout. -
Show Title Bar: Displays or hides the title bar in the layout view.
Layout View Title Bar
-
 :
:
Transfers the currently selected arrangement of fixture positions in the layout to the Selection Grid. - Zoom to fit:
Tap to zoom out to see the entire canvas.
|
|
Hint: |
| If no values are set for Dimension H and Dimension W, Zoom to fit is not available. |