|
grandMA3 User Manual » Layouts » Create a Layout
|
Version 2.1
|
It is possible to create layouts for every need and taste.
|
|
Important: |
|
Create a layout in the layout pool and edit the layout in the layout window. For more information, see Edit layout.
|
To add a layout pool window, follow the instructions under Add Window.
To add fixtures to the layout:
- Open the Add Window dialog. tap Data Pools and then Layouts. The Layouts window opens.
- Select fixtures using the fixture sheet or select a group.
|
|
Hint: |
|
The selection grid position of the selected fixtures is assigned to layouts. For more information, see Selection Grid.
|
Fixture Sheet, Layouts Pool and Groups Pool
-
To add the selected fixtures to a layout, press Assign and tap a cell in the layout pool or tap the area in the layout window to which you would like to assign the fixtures. The fixtures are added to the layout.
Layout pool window
|
|
Hint: |
| Select sub fixtures additionally to assign them to a layout. |
Pool Elements
To add pool elements in the layout window, press, for instance, Assign Group 3 and then tap the area of the layout window to which you would like to assign this group. The pool element is added to the layout window.
To set up defaults for various layout elements, see Layout Element Defaults.
|
|
Hint: |
|
To operate the layouts faster and to have them all at a glance, arrange the layout pool and the layout window on one screen.
|
Layout view
Layout View Toolbar
Tap Setup in the title bar to enable the toolbar on the left side of the layout view.
|
|
Hint: |
|
When Setup is enabled, the layout encoder bar is also enabled. See, Layout encoder bar.
|
Select an Element
-
To select an element, tap
 .
.
- Tap the element you wish to select or use the lasso command to select multiple elements.
- The element is selected.
Add an Element
The upper left corner of a layout element is set to the insertion point.
-
To add an element in the layout window, tap
 .
.
- Tap an empty space in the layout window.
- The element is added.
- To add an object to the element, see Edit layout view.
Delete an Element
-
To delete an element in the layout window, tap
 .
.
- Tap the element you want to delete.
- The element is deleted.
Move an Element
-
To move an element within the layout window, tap
 .
.
-
Tap, hold and drag the element to move it.
The element is moved.
Resize an Element
-
To resize an element, tap
 .
.
- Select the element you would like to resize.
-
Tap, hold and drag to resize.
The element is resized.
Resize an Element with Fixed Ratio
-
To resize an element and preserve the actual size ratio, tap
 .
.
- Select the element you would like to resize.
-
Tap, hold and drag to resize.
The element is resized with a fixed ratio.
Auto Tool
-
To use the auto tool, tap
 .
.
- Tap the element you wish to select or use the lasso command to select multiple elements. A yellow responsive frame appears around the selected items.
The following functions can be used depending on where the layout element is tapped:
- Tap, hold, and drag inside a layout element to move it.
- Tap, hold and drag one of the outer edges to change the size of the layout element for that particular edge.
- Tap, hold, and tap one of the outside corners to resize that layout element without taking proportions into account. Pressing MA additionally takes proportions into account.
Layout View Fit Options
In the title bar, tap Fit Type and select the fit option you wish to perform.
- Select Elements to fit all layout elements in the window.
- Select Canvas to fit the entire canvas in the window. If some elements are assigned far outside the canvas, they will not be displayed.
- Selecting Both will fit the canvas and all elements.
-
Tap
 to execute "Zoom to Fit" depending on the selected Fit Type.
|
|
Hint: |
|
The canvas fit mode can be modified. For more information, see Layout View Settings.
|
- Create a layout with the command line using the layout keyword. For more information, see Layout keyword and Assign keyword.
|
|
User name[Fixture]>Assign Layout 1 |
Cloning in Layouts
It is possible to clone fixtures into a layout using a clone syntax. For more information about cloning, see Clone keyword and Clone topic.
Requirements:
- Some patched fixtures. For more information, see Patch and Fixture Setup.
- Layout Viewer window, Fixture Sheet and Layout Pool are open.
To clone fixtures into a layout, follow the steps in the example below:
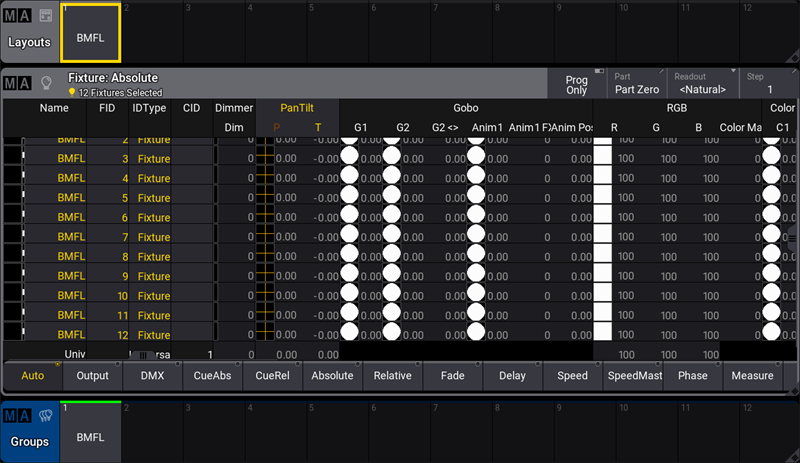
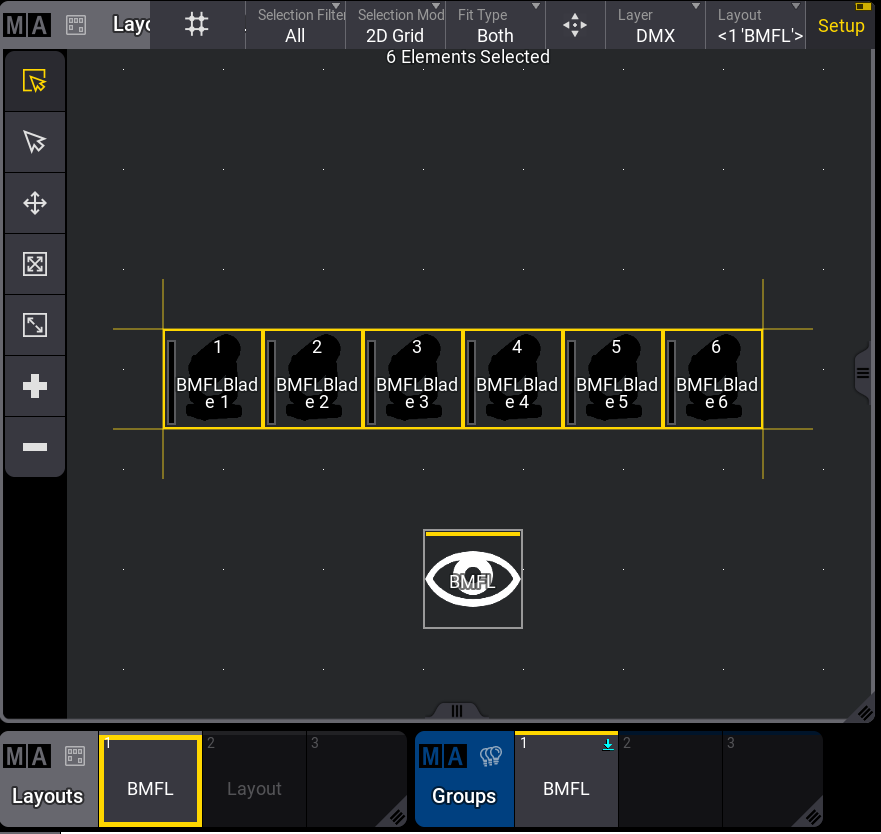
- Tap the BMFL pool in the Layout Pool window. The BMFL layout is shown in the Layout Viewer window as shown in the image below:
Layout Viewer - Clone
- To clone new fixtures into the first layout pool, type the following command into the command line:
|
|
User name[Fixture]>Clone Fixture 1 Thru 6 At Fixture 7 Thru 12 If Layout 1 |
- The Clone pop-up appears, offering the choices of Low Priority, High Priority, Overwrite, and Cancel. Press Please. To learn more about the clone priority options, see Clone Keyword.
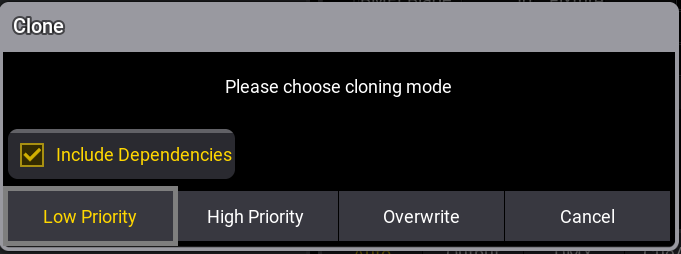
Clone pop-up
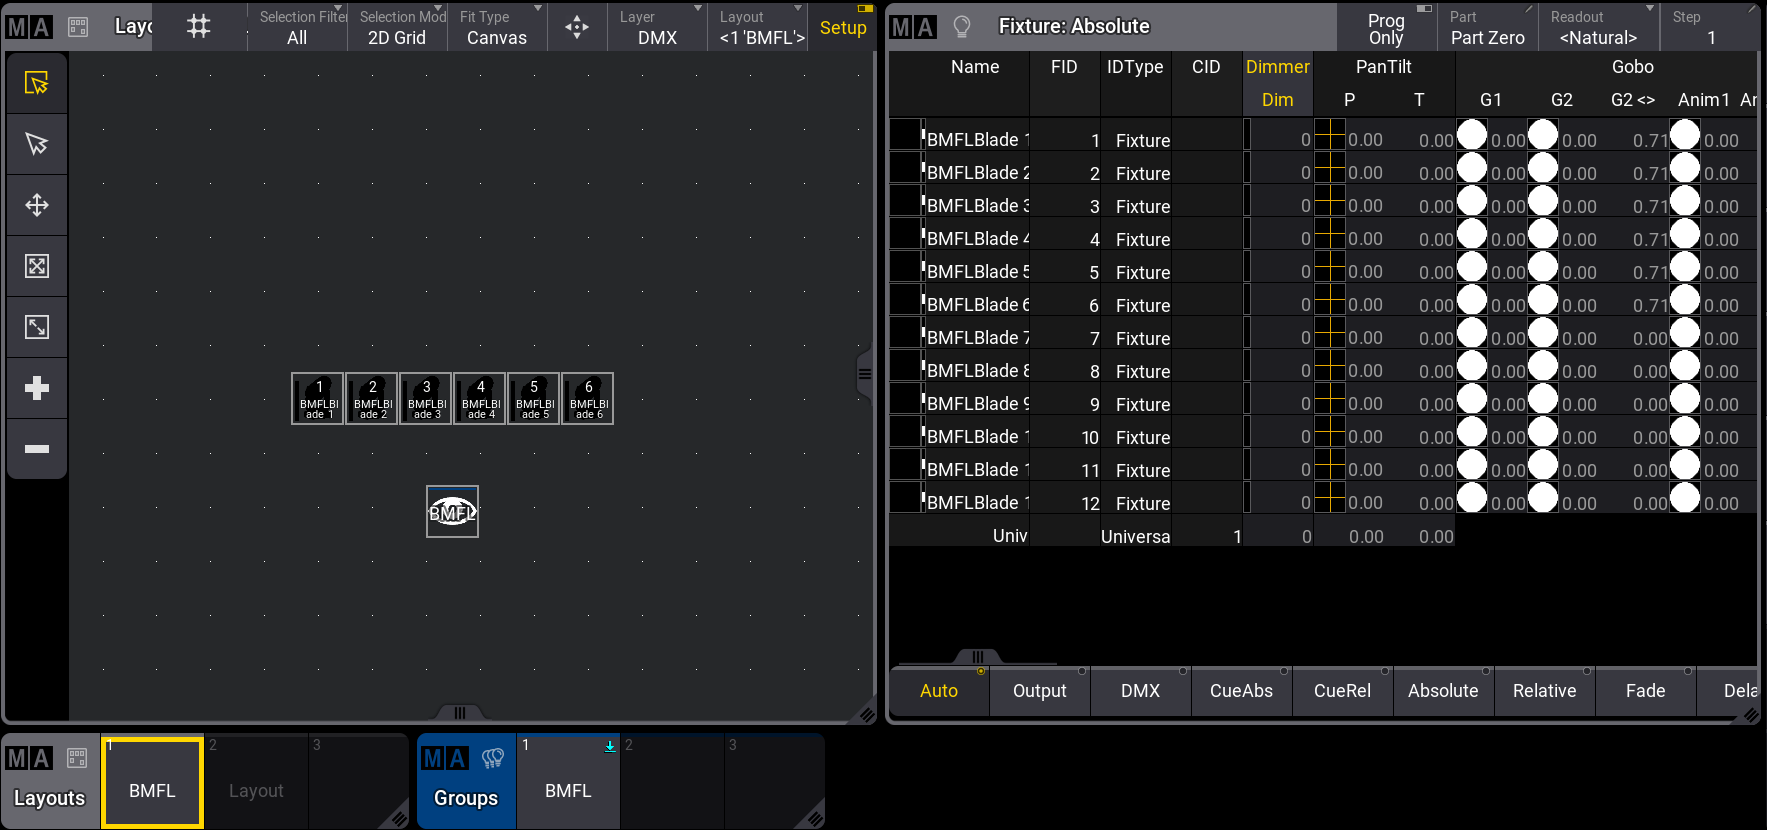
- The new layout elements will be placed with a small offset to the existing layout elements. All settings of the layout element will be cloned, too:
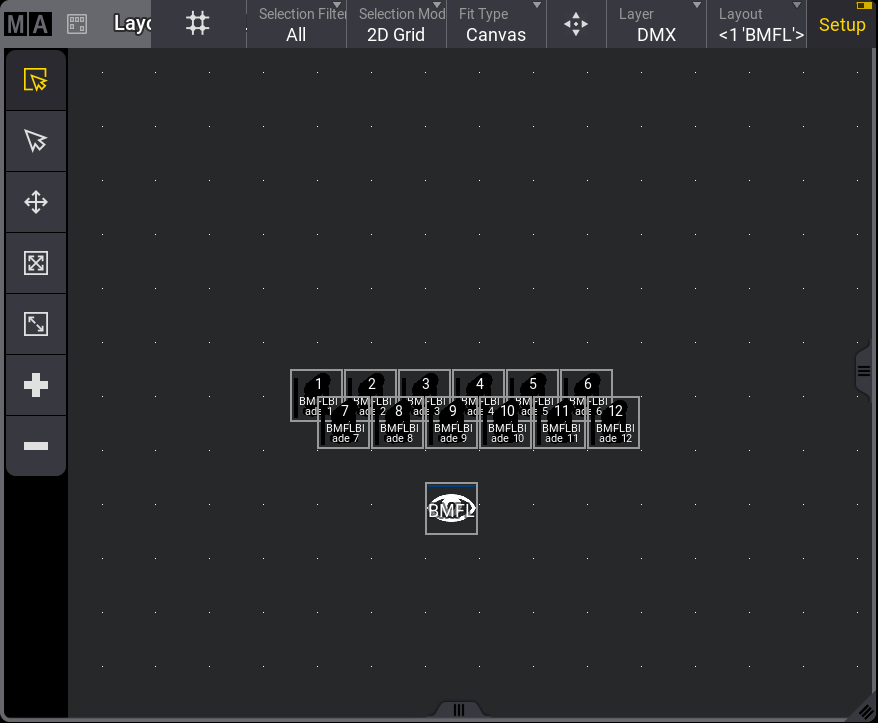
Fixtures are placed with an offset in the Layout Viewer window