|
grandMA3 User Manual » Worlds and Filters » Create a Filter
|
Version 2.3
|
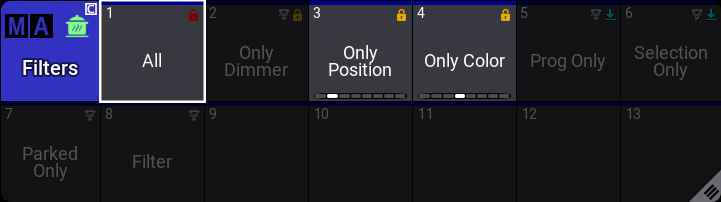
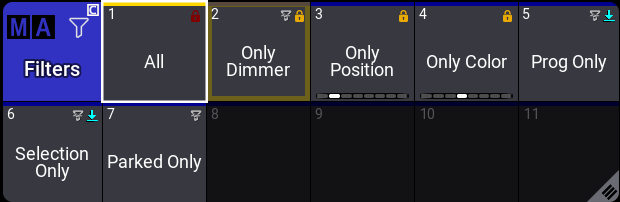
Filters are stored in the filter pool. All, Prog Only, Only Dimmer, Only Position, Only Color, Selection Only, and Parked Only are the default pool objects.
There are three main ways to create filers:
- Create a filter using the pool by editing one of the empty pool objects. This opens the Edit Filter menu.
- Store a new filter pool object using the current filter settings.
- Assign an object, such as a group object, to a filter pool object.
The At Filter window is a nice tool for seeing the current filter settings.
Create Filter from the Pool
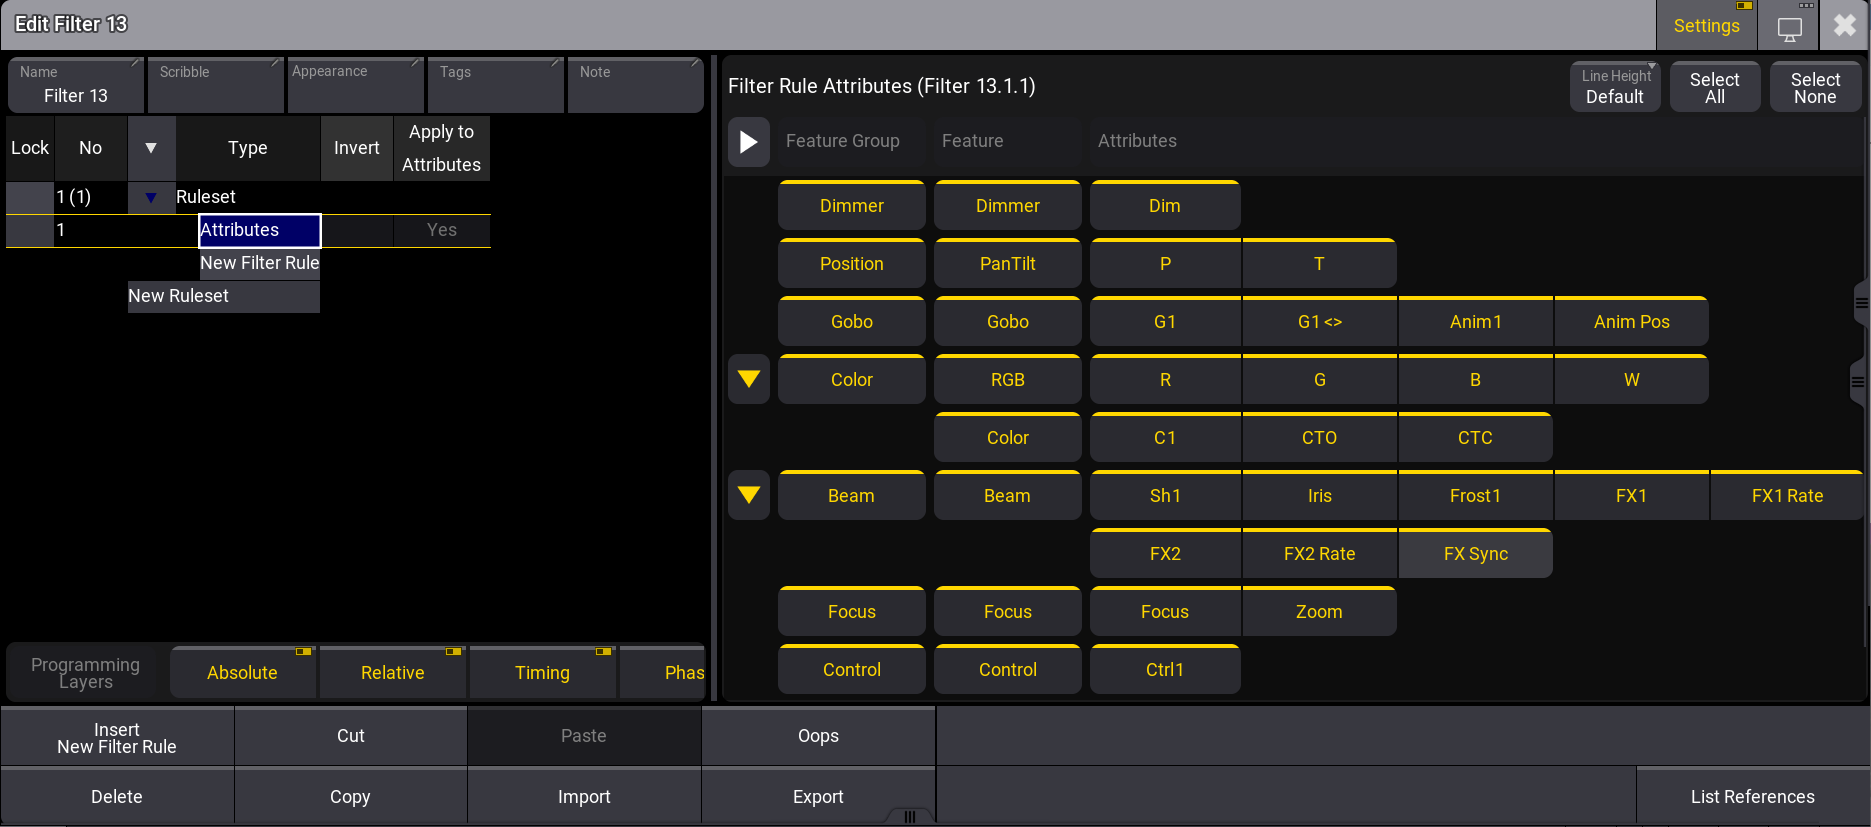
The filter editor is divided into two sections: left and right. An adjustable bar separates them.
To rearrange the size of each section:
- Use the two-finger tab and hold by placing one finger on each side of the menu.
- Drag your fingers to the left or the right side. The size of the sections is rearranged.
Enabling Settings in the title bar lets you add object information, such as name, scribble, appearance,
tags,
and notes.
The ![]() allows the filter editor to be moved to a different display.
allows the filter editor to be moved to a different display.
If an filter object has a lock, the lock icon is displayed next to the object name in the title bar. If the
object has dynamic filter rules, ![]() Dynamic Filter is displayed underneath the object name. If it is static,
no
text appears.
Dynamic Filter is displayed underneath the object name. If it is static,
no
text appears.
At the bottom of the editor, filter rules can be imported and exported using Import and Export. Cut, Paste, Ooops, Delete, and Copy can be used for a selected filter rule configuration line. List References shows the related elements to the filter object. For instance, if the filter is assigned to a preset.
|
|
Important: |
| Importing filter objects that were exported in version 2.2.5.2 or earlier is not fully supported. Fixture patch information filters will be discarded after import. To migrate these settings, first import the filter objects into a show file in version 2.2.5.2, and then migrate them to the current version. |
Filter Rules
The left section in the filter editor is dedicated to filter rules. When creating a new filter object, the filter rule Attributes is set and selected per default. For more information about the attributes rule type, read the Filter Rule Attributes section below. For more information on how to use filters for sheet masking, see the Sheet Masking section.
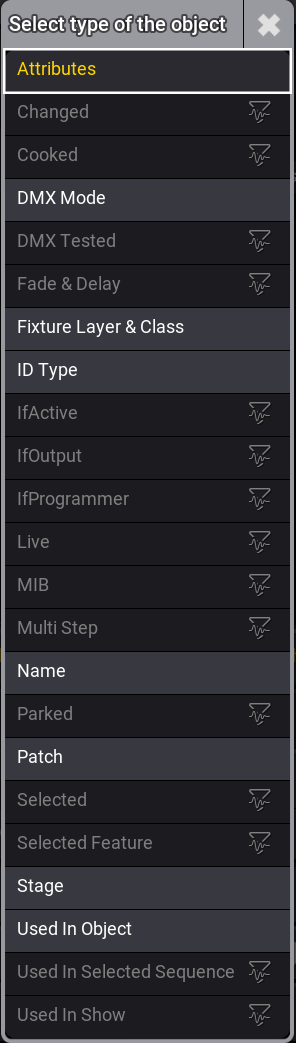
Filter rules are configurable by multiple parameters per configuration line. Each parameter will be explained, starting with the Type. To open the list of types, tap Insert New Filter Rule. A dropdown menu with a list of object types opens:
|
|
Hint: |
|
A few filter rule types have specific options that only apply to them. Columns in the grid that do not
apply to a specific filter option have a darker background in the corresponding configuration line and
cannot be edited. In the object type list, the individual filter options that are marked in
bold.
|
- Attributes: Filters the attributes. For more information, see the Filter Rule Attributes section.
-
Changed(
 ): Shows
changed values and hides cues, if they do not contain any changed values.
): Shows
changed values and hides cues, if they do not contain any changed values.
-
Cooked():
Filters
cooked values.
- DMX Mode: Filters a predefined DMXMode of a certain fixture type.
-
DMX Tested():
Filters
attributes and fixtures with values currently in the DMX tester.
-
Fade & Delay():
Filters
values with individual fade and delay timings.
- Fixture Layer & Class: Filters fixtures by fixture Layer and Class.
- ID Type: Filters fixtures by ID Type within a defined From and To range.
-
IfActive():
Filters active values.
-
IfOutput():
Filters
fixtures that have output on stage with a dimmer value above 0%.
-
IfProgrammer():
Filters
fixtures and attributes in the programmer.
-
Live():
Filters
fixtures with a dimmer value above 0% or with a stored 0% value in the current cue.
-
MIB():
Filters
fixtures and attributes in an MIB state.
-
Multi Step():
Filters
fixtures and attributes with more than one phaser step.
- Name: Filters the predefined fixture name in the Name Filter.
-
Parked():
Filters
parked fixtures and attributes.
- Patch: Filters fixtures that are patched within a defined From and To address range.
-
Selected:()
Filters selected fixtures. The filter rule can
be
set to Ignore in the If Empty column.
-
Selected Feature(): Filters the selected feature group.
- Stage: Filters a predefined Stage.
- Used In Object: Filters predefined Objects. Objects can be groups, worlds, presets, or sequences.
-
Used In Selected Sequence: ()Filters
fixtures and attributes in the selected sequence.
-
Used In Show ():
Filters
fixtures and attributes that are stored in any
object.
The ![]() displayed next to the filter types indicates a dynamic filter rule. The
displayed next to the filter types indicates a dynamic filter rule. The ![]() is also
displayed in the top left corner of a filter pool object.
is also
displayed in the top left corner of a filter pool object.
|
|
Important: |
|
Dynamic filters deviate from the sources where query data often changes. These rules are based on
individual sheets and users. Because these filter rules are subject to frequent changes, they can only
be
used for sheet masking.
|
|
|
Important: |
Any filter with a fixture selection created in v2.2.5.2 or a prior version will be migrated to the new version with the correct selection information. However, the fixture selection will be lost as soon as the filter is edited.
|
The Invert option reverses the filter rule if set to Yes. Two-finger tapping the corresponding configuration line toggles Invert between blank (default) and Yes. With invert, the values can be used as a positive or negative filter. For example, if the ID Type has Fixture values and Invert is blank, then the filter allows fixtures with this ID type to pass the filter. If Invert is set to Yes, then all other ID types are shown and Fixture is blocked. These filter options make it possible to have very precise filters.
Apply to Fixtures set to No does not apply the filter rule to fixtures. Apply to Attributes set to No does not apply the filter rule to Attributes. The default for both parameters is Yes.
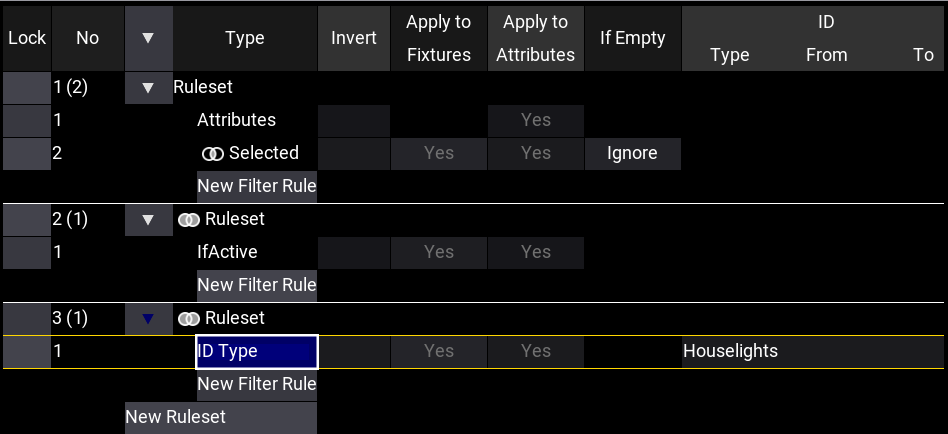
Filter rules depend on a hierarchical structure based on multiple filter rules and rulesets:
-
Multiple filters are logically connected by the AND logic. And is indicated by an
 in front of the
filter
rule. AND means that all conditions must be met
to
display an object.
in front of the
filter
rule. AND means that all conditions must be met
to
display an object.
- Filter rules are collected inside a Ruleset. To create a new ruleset, tap Insert New Ruleset.
-
Multiple rulesets are logically connected by the OR logic. Or is indicated by
an
 in
front of the
ruleset. OR logic means one condition must be met to display an object.
in
front of the
ruleset. OR logic means one condition must be met to display an object.
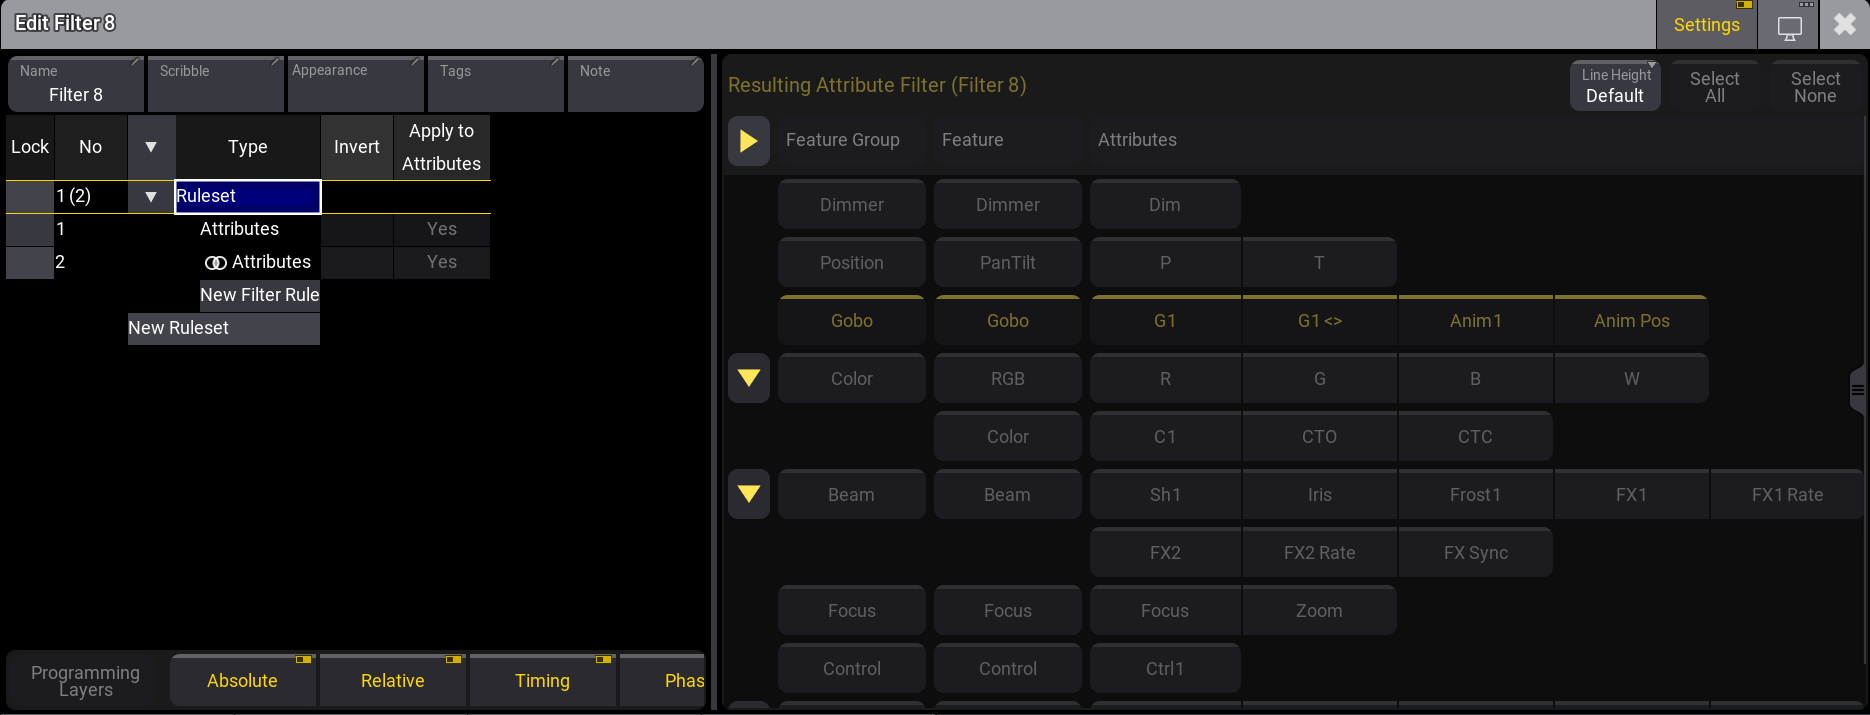
Filter Rule Attributes
The right section of the filter editor looks almost the same as the At Filter Window. To enable the user interface for editing, select the corresponding Attributes rule type, as described in Filter Rules above. If other filter rules are selected, the user interface is grayed out. The color theme called Resulting Attributes defines the color for the resulting attributes filter. The default color is yellow. For more information on colors, see Color Theme.
|
|
Hint: |
| The functionality for Programming Layers (prior Layers) has not changed. Please note that programming layers are not compatible with sheet masking or input and output filtering. |
Multiple Attributes filter rules can be added within a ruleset using the And logic. When clicking the parent Ruleset, the Resulting Attribute Filter is dispalyed. For example, if you have a Attributes ruleset with Positon and Gobo, and a second Attributes ruleset with Gobo and Color, the resulting attribute filter shows the Gobo filter.
|
|
Hint: |
| If you add a dynamic filter to the ruleset, the Resulting Attribute Filter remains grayed out. |
Values can be added to each element type. For more information on Layers, see Layer Toolbar.
Follow these steps to create a new filter by editing the pool object:
- Edit an empty filter pool object using swipeys, typing a command (Filter keyword), or using the keys (Group key).
- Make sure the desired attributes and layers are active.
- Add the desired patch information filter values.
- Optionally give it a name by editing the Name input field.
- Optionally assign an Appearance and Scribble by editing the input fields.
- Optionally add a Note about the filter.
-
Close the editor by tapping the
 in the upper right corner. A
new
filter is set.
in the upper right corner. A
new
filter is set.
The edit function is the easiest way to update or change an existing filter. Another option is using the At Filter Window.
Delete a Filter
Filters can be deleted like most other pool objects by using the Delete Keyword.
Deleting the filter does not delete the attributes from the show. It is only the filter that is deleted.
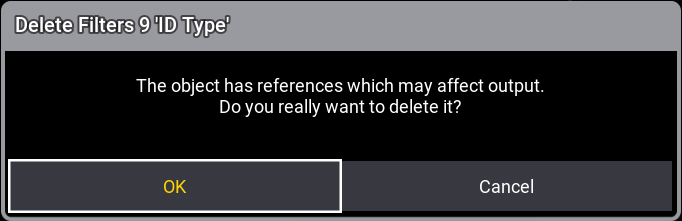
If a filter is assigned as an input or output filter to a sequence or preset or as a sheet mask, then this
is
also removed when the filter is deleted. A pop-up indicates an existing reference.
Oopsing the deletion brings back the filter and also the filter settings for the sequence and preset.
The general syntax for deleting a filter is:
Delete Filter ["Filter_Name" or Filter_Number]
It can also be a range of filters.
Filter number 1 is locked from the factory and cannot be deleted.
Assign Object to a Filter
|
|
Important: |
Any object that can be used in the filter rule Used in Object can be assigned to a filter. For example, Assign Group X at Filter Y. The copy function for the corresponding objects to a filter is disabled. |
Objects from the groups, worlds, presets, and sequences pool can be assigned to filter objects. There are two ways:
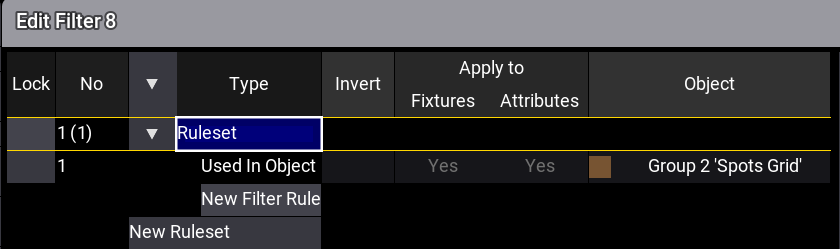
- Assigning an object to an already existing filter pool object will create a new ruleset and a Used In Object filter rule which links to the assigned object.
- If an object is assigned to an empty filter pool object, the Used In Object rule type is created in a ruleset and links to the assigned object.
Example
To assign a group to an empty filter object:
- Open the demo showfile.
- Assign Group 2 At Filter 8. The filter object is created with object linked to group 2.
Static Filter Rules
|
|
Known Limitation: |
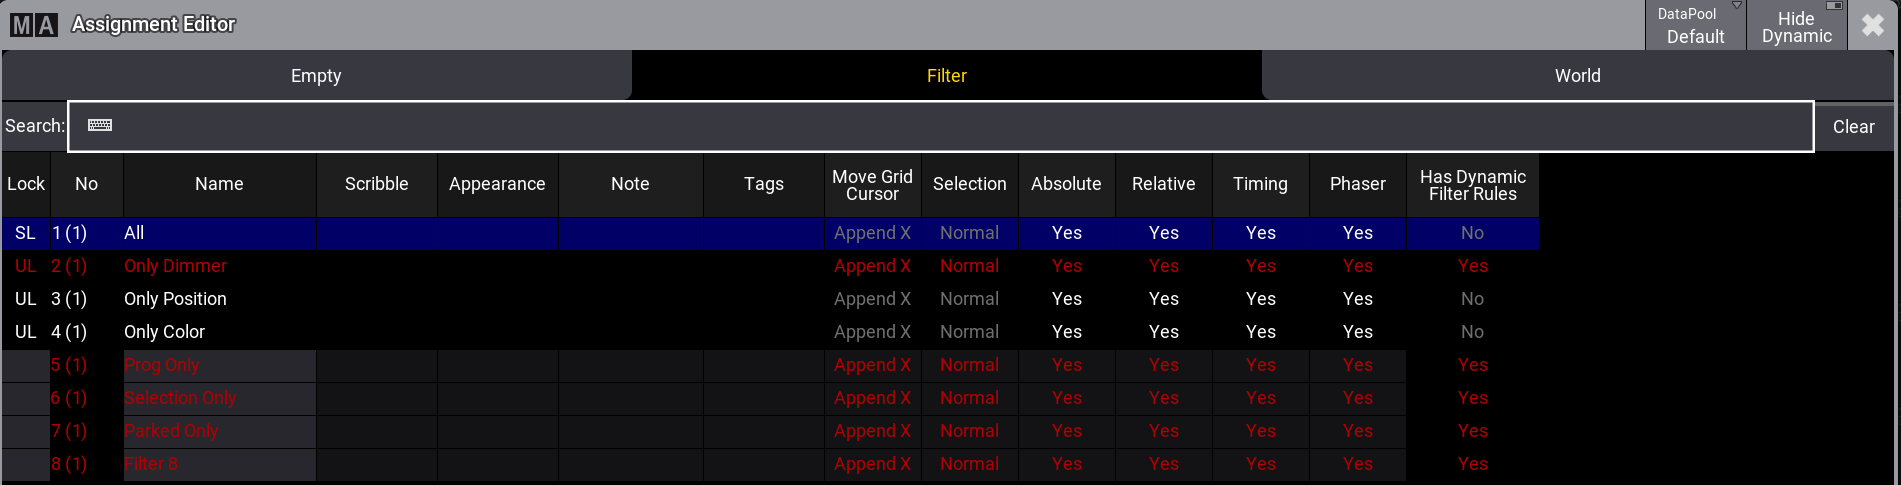
| Only if the filter's Has Dynamic Filter Rules column in the assignment editor displays No, the filter can be used as an input/output filter. Additionally, the filter pool object uses the dynamic filter icon ( |
In the assignment editor, such as in the Output Filter of the sequence sheet,
dynamic filters can be hidden by
enabling Hide Dynamic in the title bar. Disabling Hide
Dynamic shows dynamic filters in red text.
If Edit Recipes is enabled, dynamic filter objects will be grayed out in the
filter pool.