Sheet Masking
|
grandMA3 User Manual » Worlds and Filters » Sheet Masking
|
Version 2.3
|
Sheet masks are used to show or hide fixtures and attributes in specific sheets. Sheet masks can be used in the Fixture Sheet, the Content Sheet, and the Track Sheet. Filter and world objects can be assigned to mask sheets.
|
|
Hint: |
| The functionality for Programming Layers (prior Layers) in filter objects has not changed. Please note that programming layers are not compatible with sheet masking or input and output filtering. |
Create a Sheet Mask
A filter pool object including filter rules is required. For more information, see the Filter Rules section.
|
|
Hint: |
|
For this section, we will use the fixture sheet as an example, but the process for setting up sheet masks is the same for the content sheet and the track sheet.
|
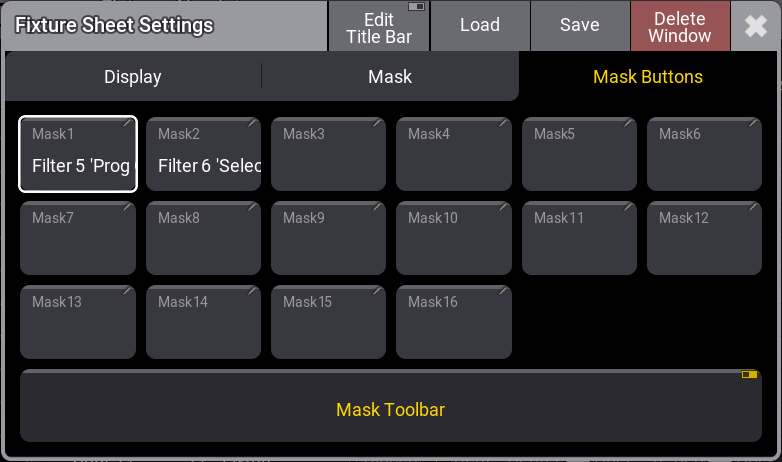
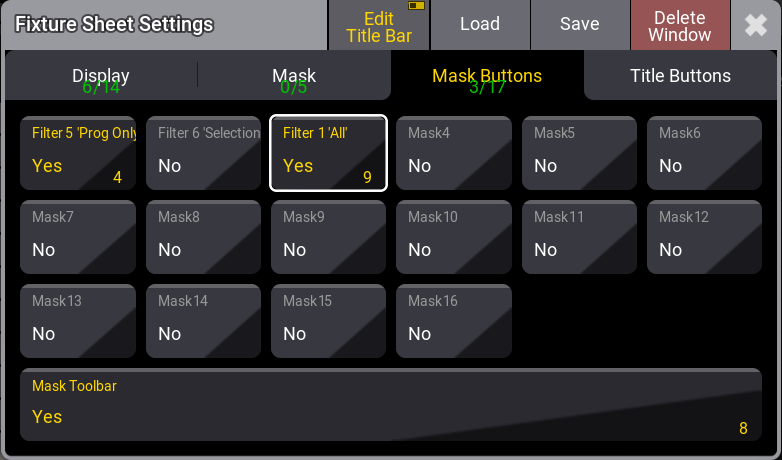
Fixture Sheet Settings - Mask Buttons
-
Mask1-16:
This displays the assigned object for sheet masking. Tapping a sheet mask button, for example Mask 1, opens the Assignment Editor. -
Mask Toolbar:
This enables the Mask Toolbar in the sheet. To display the mask toolbar in the sequence sheet, Track Sheet must be enabled.
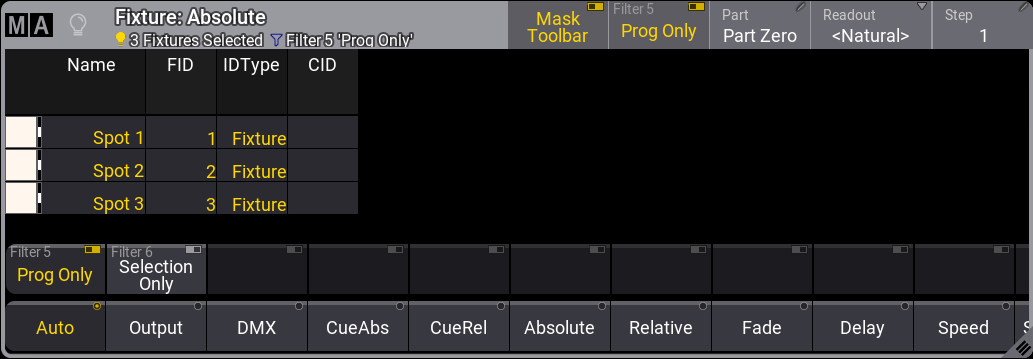
Masks are toggle buttons. Tapping a mask button enables or disables it. Tapping another mask button deactivates the currently active one. An active mask is displayed in yellow.
To enable mask button in the title bar of the corresponding sheet, see the Title Bar Configuration topic.
The fixture sheet uses the Prog Only and Selection Only filter objects as default sheet mask. The content and the track sheet use the Selection Only filter object as a default sheet mask. The image below shows an enabled mask toolbar with the default fixture sheet mask buttons and an active mask:
- Filter and world objects can be assigned directly to the mask toolbar, for example, by using the swipey command.
- To delete a mask from the mask toolbar, press Delete and tap a filter in the corresponding mask toolbar.
- To edit an existing mask, press Edit and tap a mask in the mask toolbar. The filter editor opens.
Assigning a Mask Button
The assignment editor of a mask button has five tabs. To open the assignment editor, tap a mask button, such as Mask 1 ,in the corresponding sheet.
- Emtpy: No mask is active.
- <Selected>: Links to the selected filter.
- <Called>: Links to the called filter.
- Filter: Select a filter from the filter pool.
- World: Select a world from the world pool for masking.
To assign a filter or a world object to a fixture sheet:
-
Add Window - Fixure Sheet .
 Paste to Command Line
- Tap MA on the top left corner of the fixture sheet window to open the settings.
- Tap Mask Buttons. The mask buttons tab opens.
- Tap an empty mask button, for example, Mask3. The assignment editor opens.
- Tap Filter and select a filter, for example, Parked Only. The filter is selected, and the assignment editor closes.
- Enable Mask Toolbar.
- Tap
 to close the settings pop-up.
 - Tap the filter in the mask toolbar, for example, Parked Only. The sheet mask is set.
To assign a filter object to the mask toolbar in the fixture sheet directly:
- Use the swipey command on a filter object, for example, Filter 1.
- Tap Assign. The command is set into the command line
- Tap an empty slot in the mask toolbar of the fixture sheet. The filter object is assigned.
To enable a filter object to the title bar of the fixture sheet:
- Tap MA on the top left corner of the fixture sheet window to open the settings.
- Enable Edit Title Bar.
- Tap Mask Buttons .The mask buttons tab opens.
- Tap on an empty mask button, for example Filter 1 All. The button is enabled in the title bar.