MVR-xchange
|
grandMA3 User Manual » Remote In and Out » MVR-xchange
|
Version 2.4 |
The MVR menu provides a way to exchange and manage MVR files over a network connection instead of using a USB drive. For more information about MVR files in general, see My Virtual Rig (MVR).
The MVR-xchange is specified in the DIN SPEC 15801:2023-12. For more information, see the external link https://www.beuth.de/en/technical-rule/din-spec-15801/373968511.
The idea behind the MVR menu is to send MVR files from a station to a defined network and share them with other stations. For more information about the appropriate keyword, see SendMVR Keyword.
To open the MVR menu:
- Press Menu. The menu opens.
- Tap In & Out.
- Tap MVR. The MVR menu opens.
The three elements on top of the menu are described as follows:
- Group: The standard group name is Default. The group name can be edited. Stations with identical group names share the same exchange group.
- Interface: Defines the network interface.
|
|
Hint: |
|
To share data between devices, they need to be on the same network.
|
|
|
Hint: |
| To share data between devices, a network connection must be established. For more information, see Enabling or Disabling the Network Connection. |
- Enable: To exchange MVR files, make sure it is activated. For more information about station and session communication, see Station Control.
The main area of the MVR is separated into three tabs: Local, Services, and Files. Selecting a tab updates the grid below it, and the selected tab's font color changes to yellow.
Local
- Local: Shows all MVR files that have been locally committed into an exchange group. Files can be deleted or Oopsed in the menu, too.
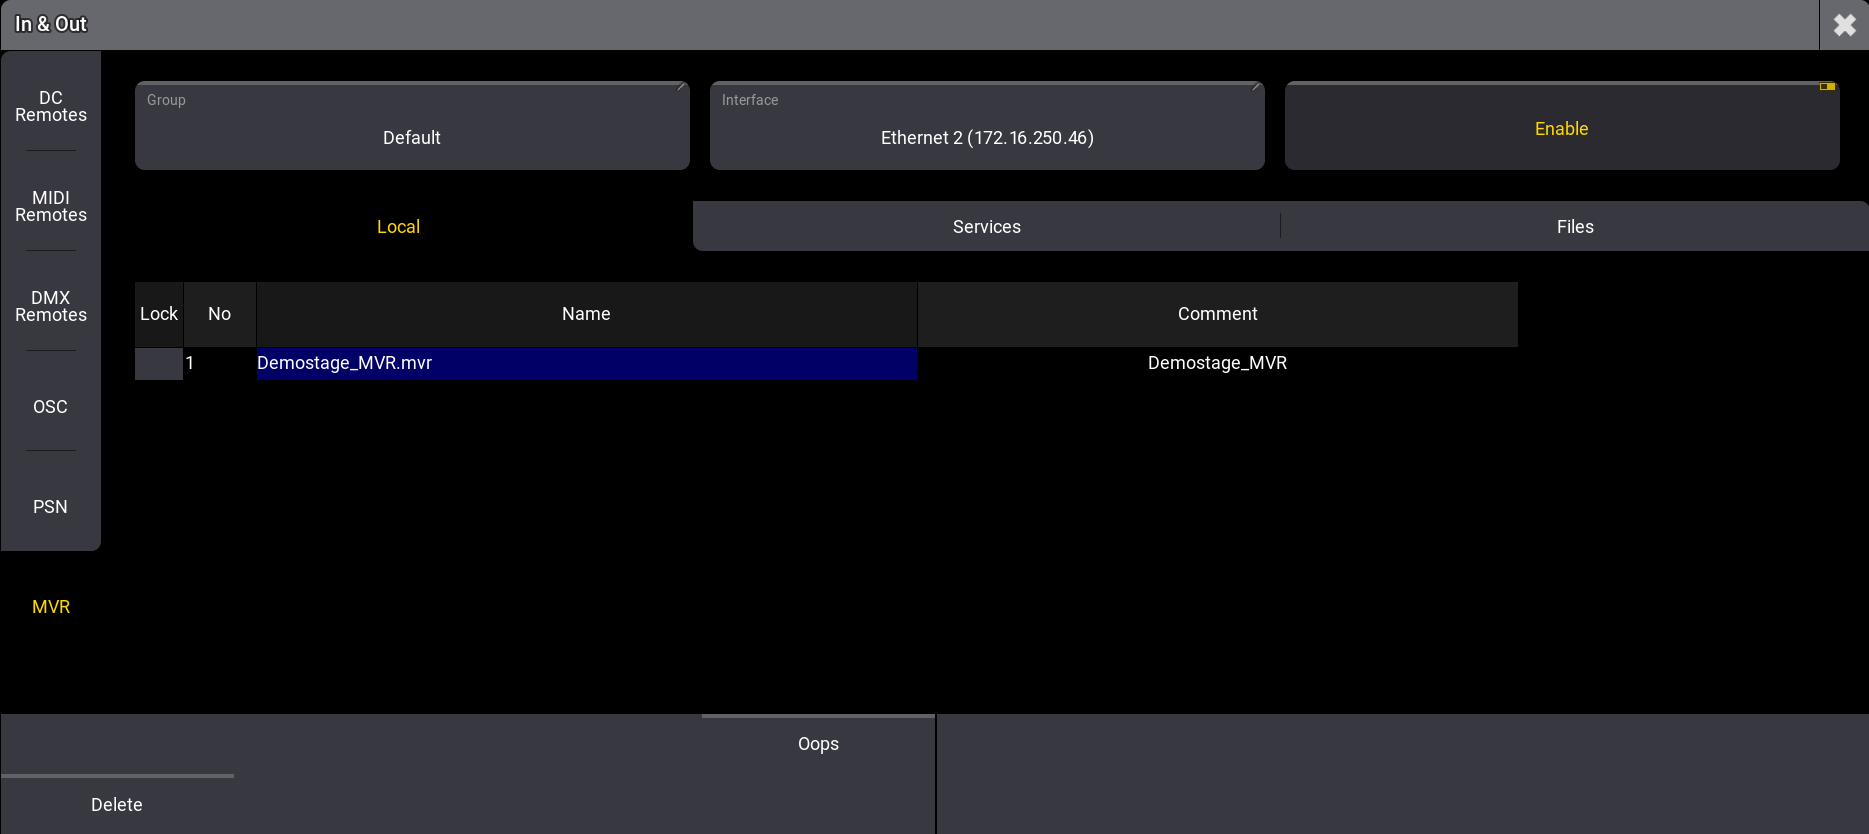
MVR - Local
Services
- Services: Lists all stations in the exchange group. If a station joins the exchange group, it gets listed in Services.
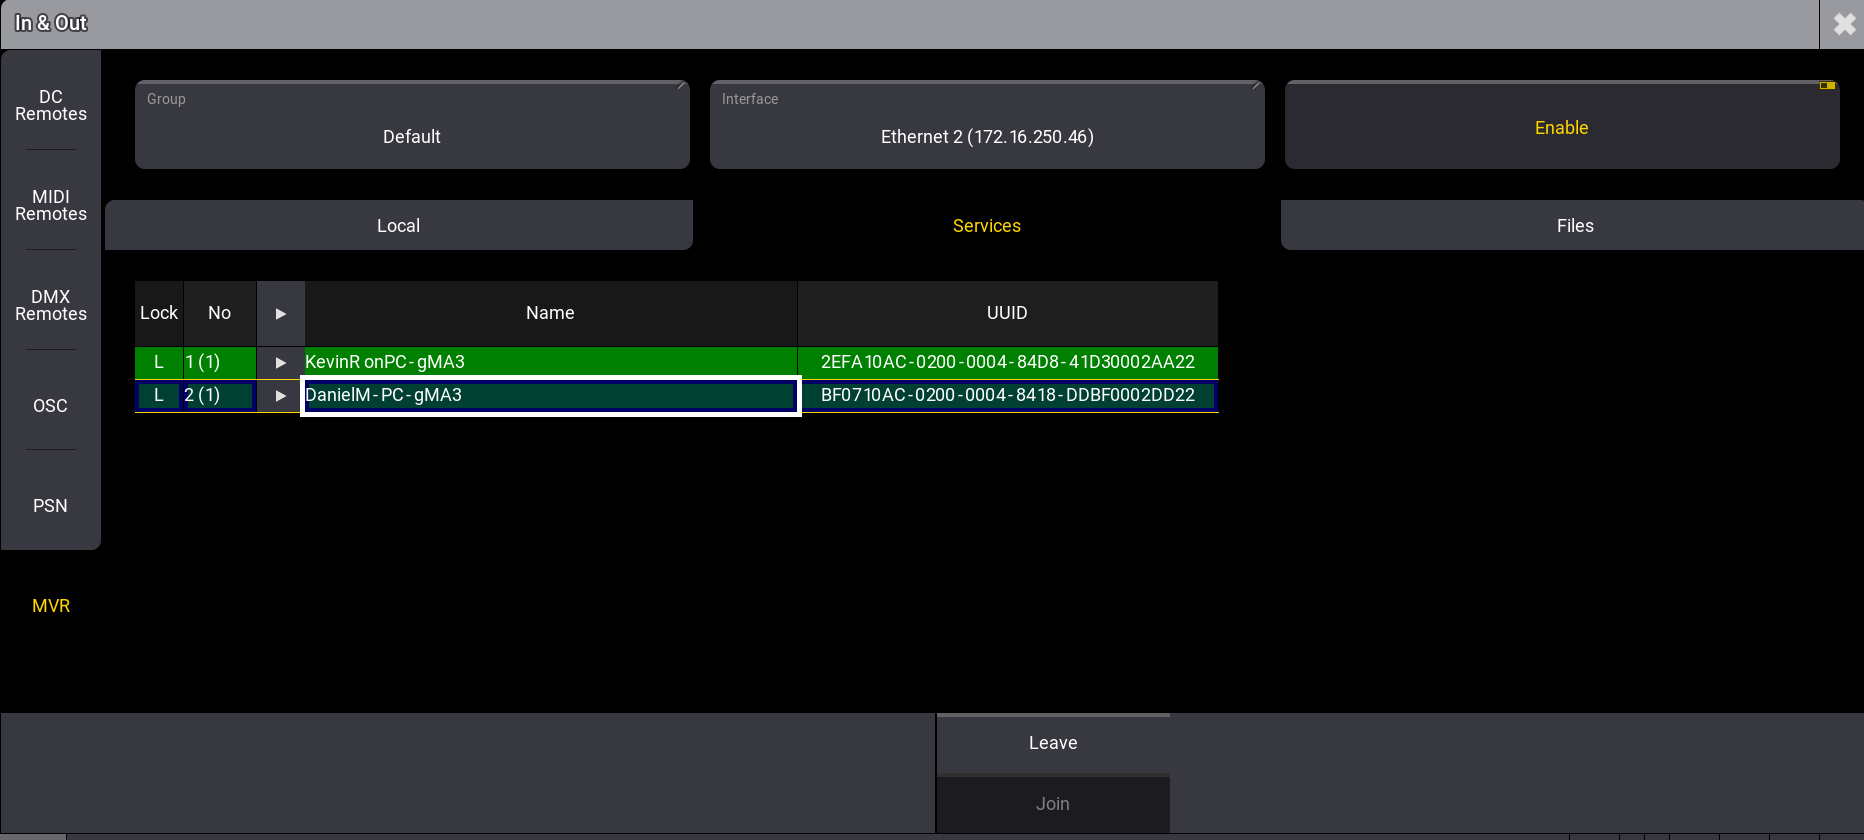
- Green Background: Shows an existing connection. To reestablish a connection, select the station and tap Join.
- Light Green: Displays your connected station.
- Red Background: Shows an interrupted connection. To disconnect from a station, select the station and tap Leave.
- UUID: Universally Unique Identifier.
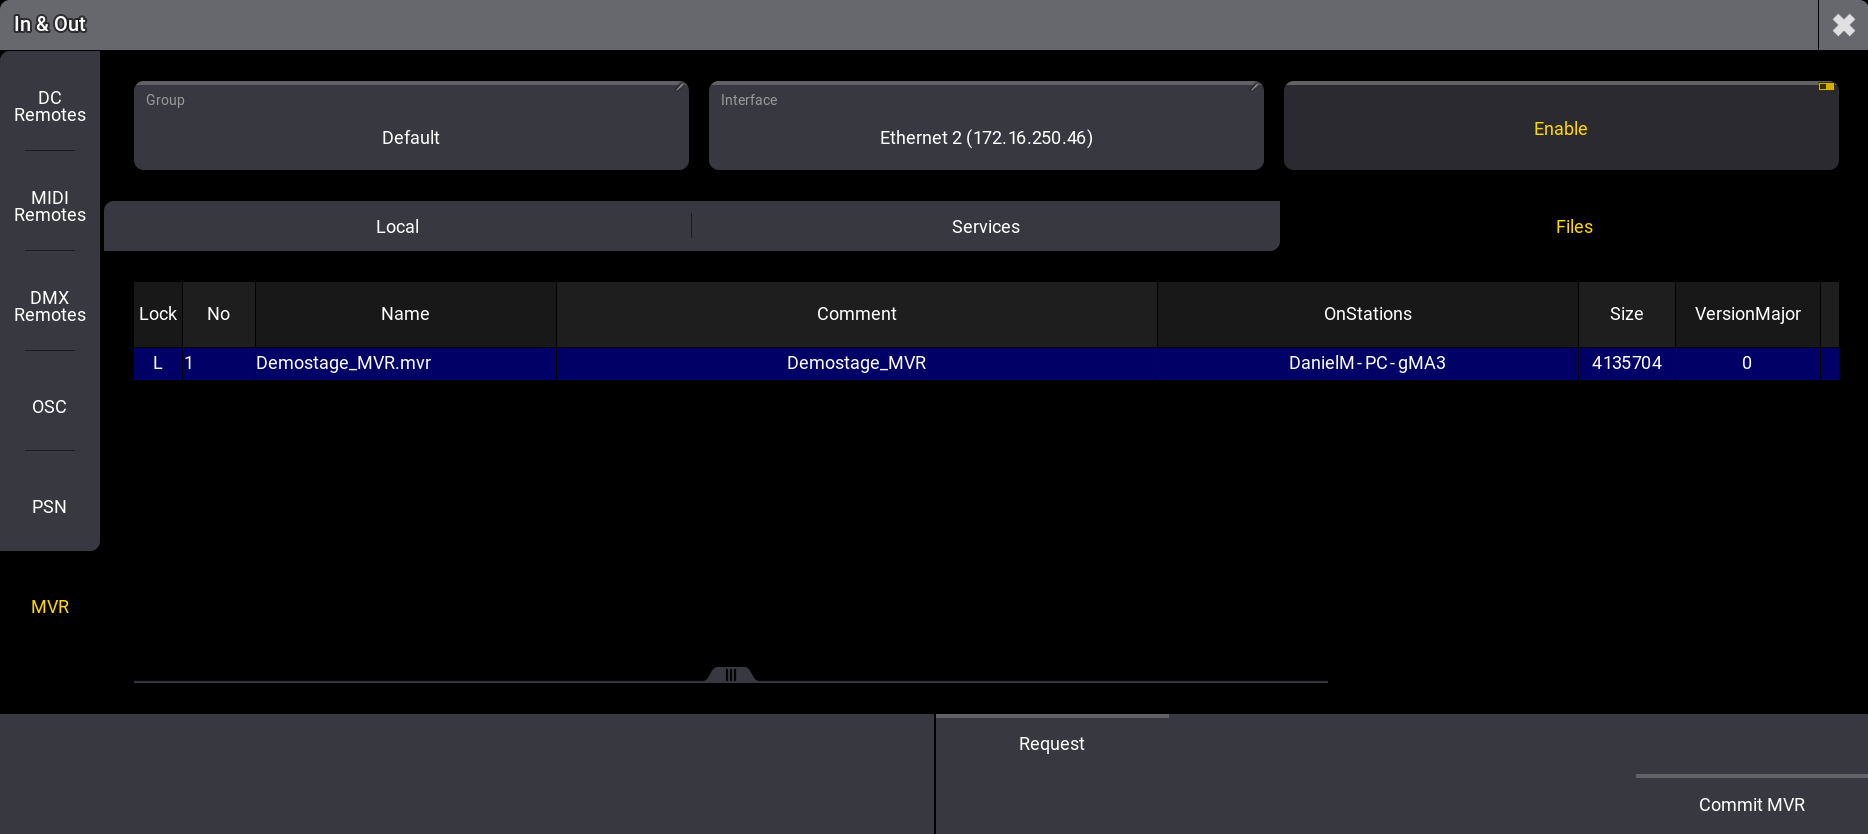
Files
- Files: Allows the request of MVR files that are sent by other stations or to commit MVR files. To request, select a file and tap Request and to commit a file, tap Commit MVR.
Committing an MVR File
To commit an MVR file:
- Tap Files.
-
Tap Commit MVR. A pop-up opens.
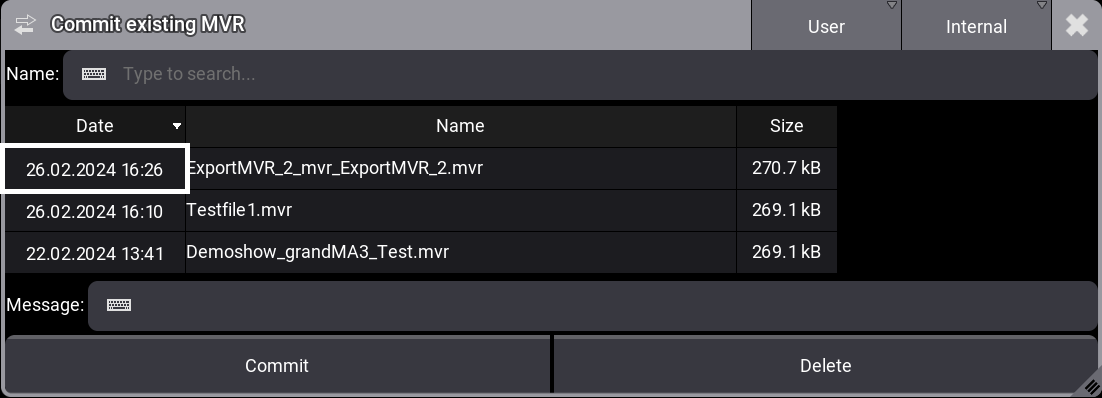
- Select an MVR and tap Commit.
|
|
Hint: |
| A comment can be set in the Message area. This comment is visible for other stations. |
Requesting an MVR File
To request a file from another station:
- Tap Files.
- Tap a file in the list. The file gets selected.
- Tap Request. A status bar shows the request's status.
- A pop-up opens with a confirmation.
- Tap Ok. The file has been requested.
For more information on where the file is stored, see Folder Structure.