|
grandMA3 User Manual » Timecode » View Mode
|
Version 2.1
|
There are three different view modes of a timecode show.
Tap and hold View Mode in the title bar, then select a mode.
Timeline Mode
Displays the timecode show as a timeline.
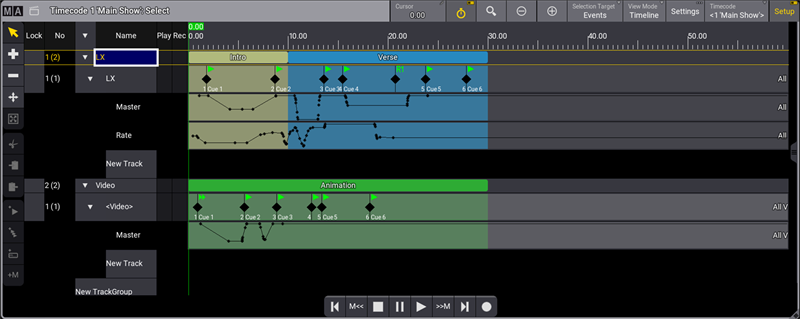
The left side of the timecode window is always visible, whether the view mode is set to Text, Timeline, or Both.
Here is a description of that section.
Lock:
Tap and hold a cell in this column and set it to yes to disable editing.
No:
Displays the number of the track. The number of children for the selected track is displayed in brackets.
Name:
This column displays the names of the track groups and tracks. Tap and hold a cell in this column to open the label pop-up, then set a new name.
Play:
Tap and hold a cell in this column to disable a track's playback. When disabled, events on that track will not be executed when the timecode runs.
Rec:
Tap and hold a cell in this column to disable the recording of a track. When disabled, events can not be recorded on that track.
Appearance:
Tap and hold a cell in this column to open the Select appearance pop-up list. Select an appearance. For more information, see Appearances.
Note:
Add some useful information here. For more information, see Notes.
Target:
- Tap and hold a cell in this column to open the assignment editor pop-up menu.
- Select an object to be assigned to the timecode track.
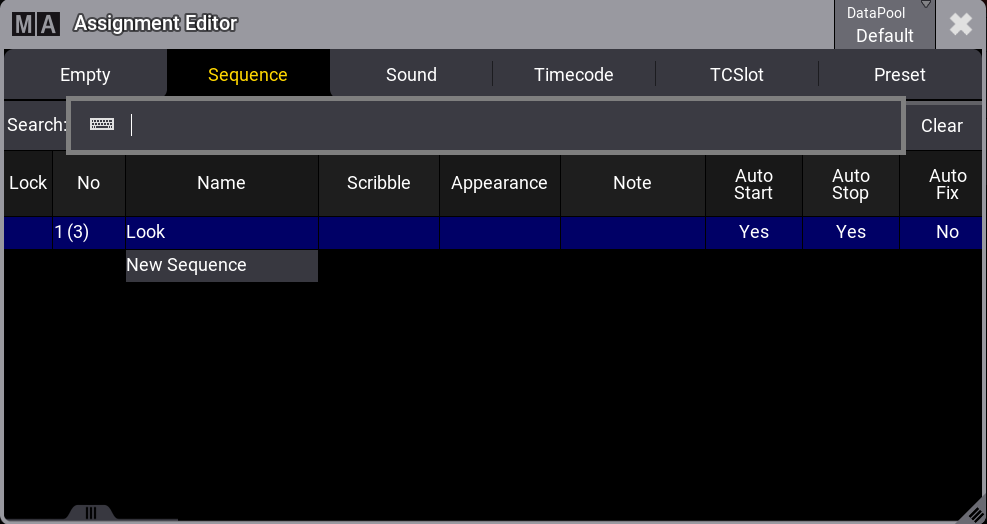
Assignment Editor pop-up menu
Both Mode
In this mode, the display is divided in two, with the timecode displayed as a timeline on the left side and as text on the right.
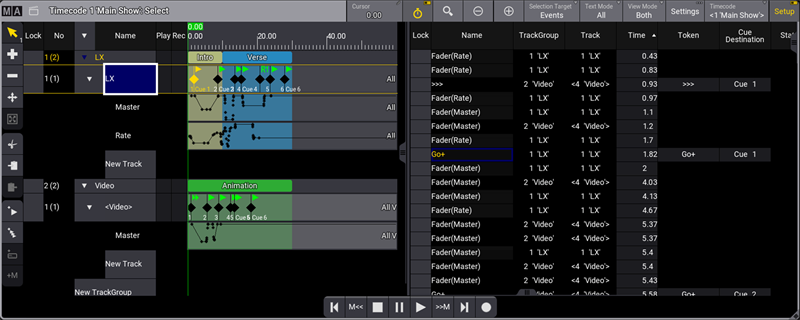
Tapping Selection Target in the title bar will set the focus to Events or TimeRanges.
Tap Text Mode in the title bar to filter the information:
All:
When the Selection Target is set to TimeRanges, this mode displays information for all markers and time ranges in the timecode show.
When the Selection Target is set to Events, this mode displays information for all events in the timecode show.- Tracks:
When the Selection Target is set to TimeRanges, this mode displays information for the selected track's markers and time ranges.
When the Selection Target is set to Events, this mode displays information about events in the selected track.
- Selected:
When the Selection Target is set to TimeRanges, this mode displays information for the selected markers and time ranges.
When the Selection Target is set to Events, this mode will display information for the selected events.
- Markers:
This mode will display marker information for the selected track group.
Text Mode
When View Mode is set to Text, the timeline is hidden.
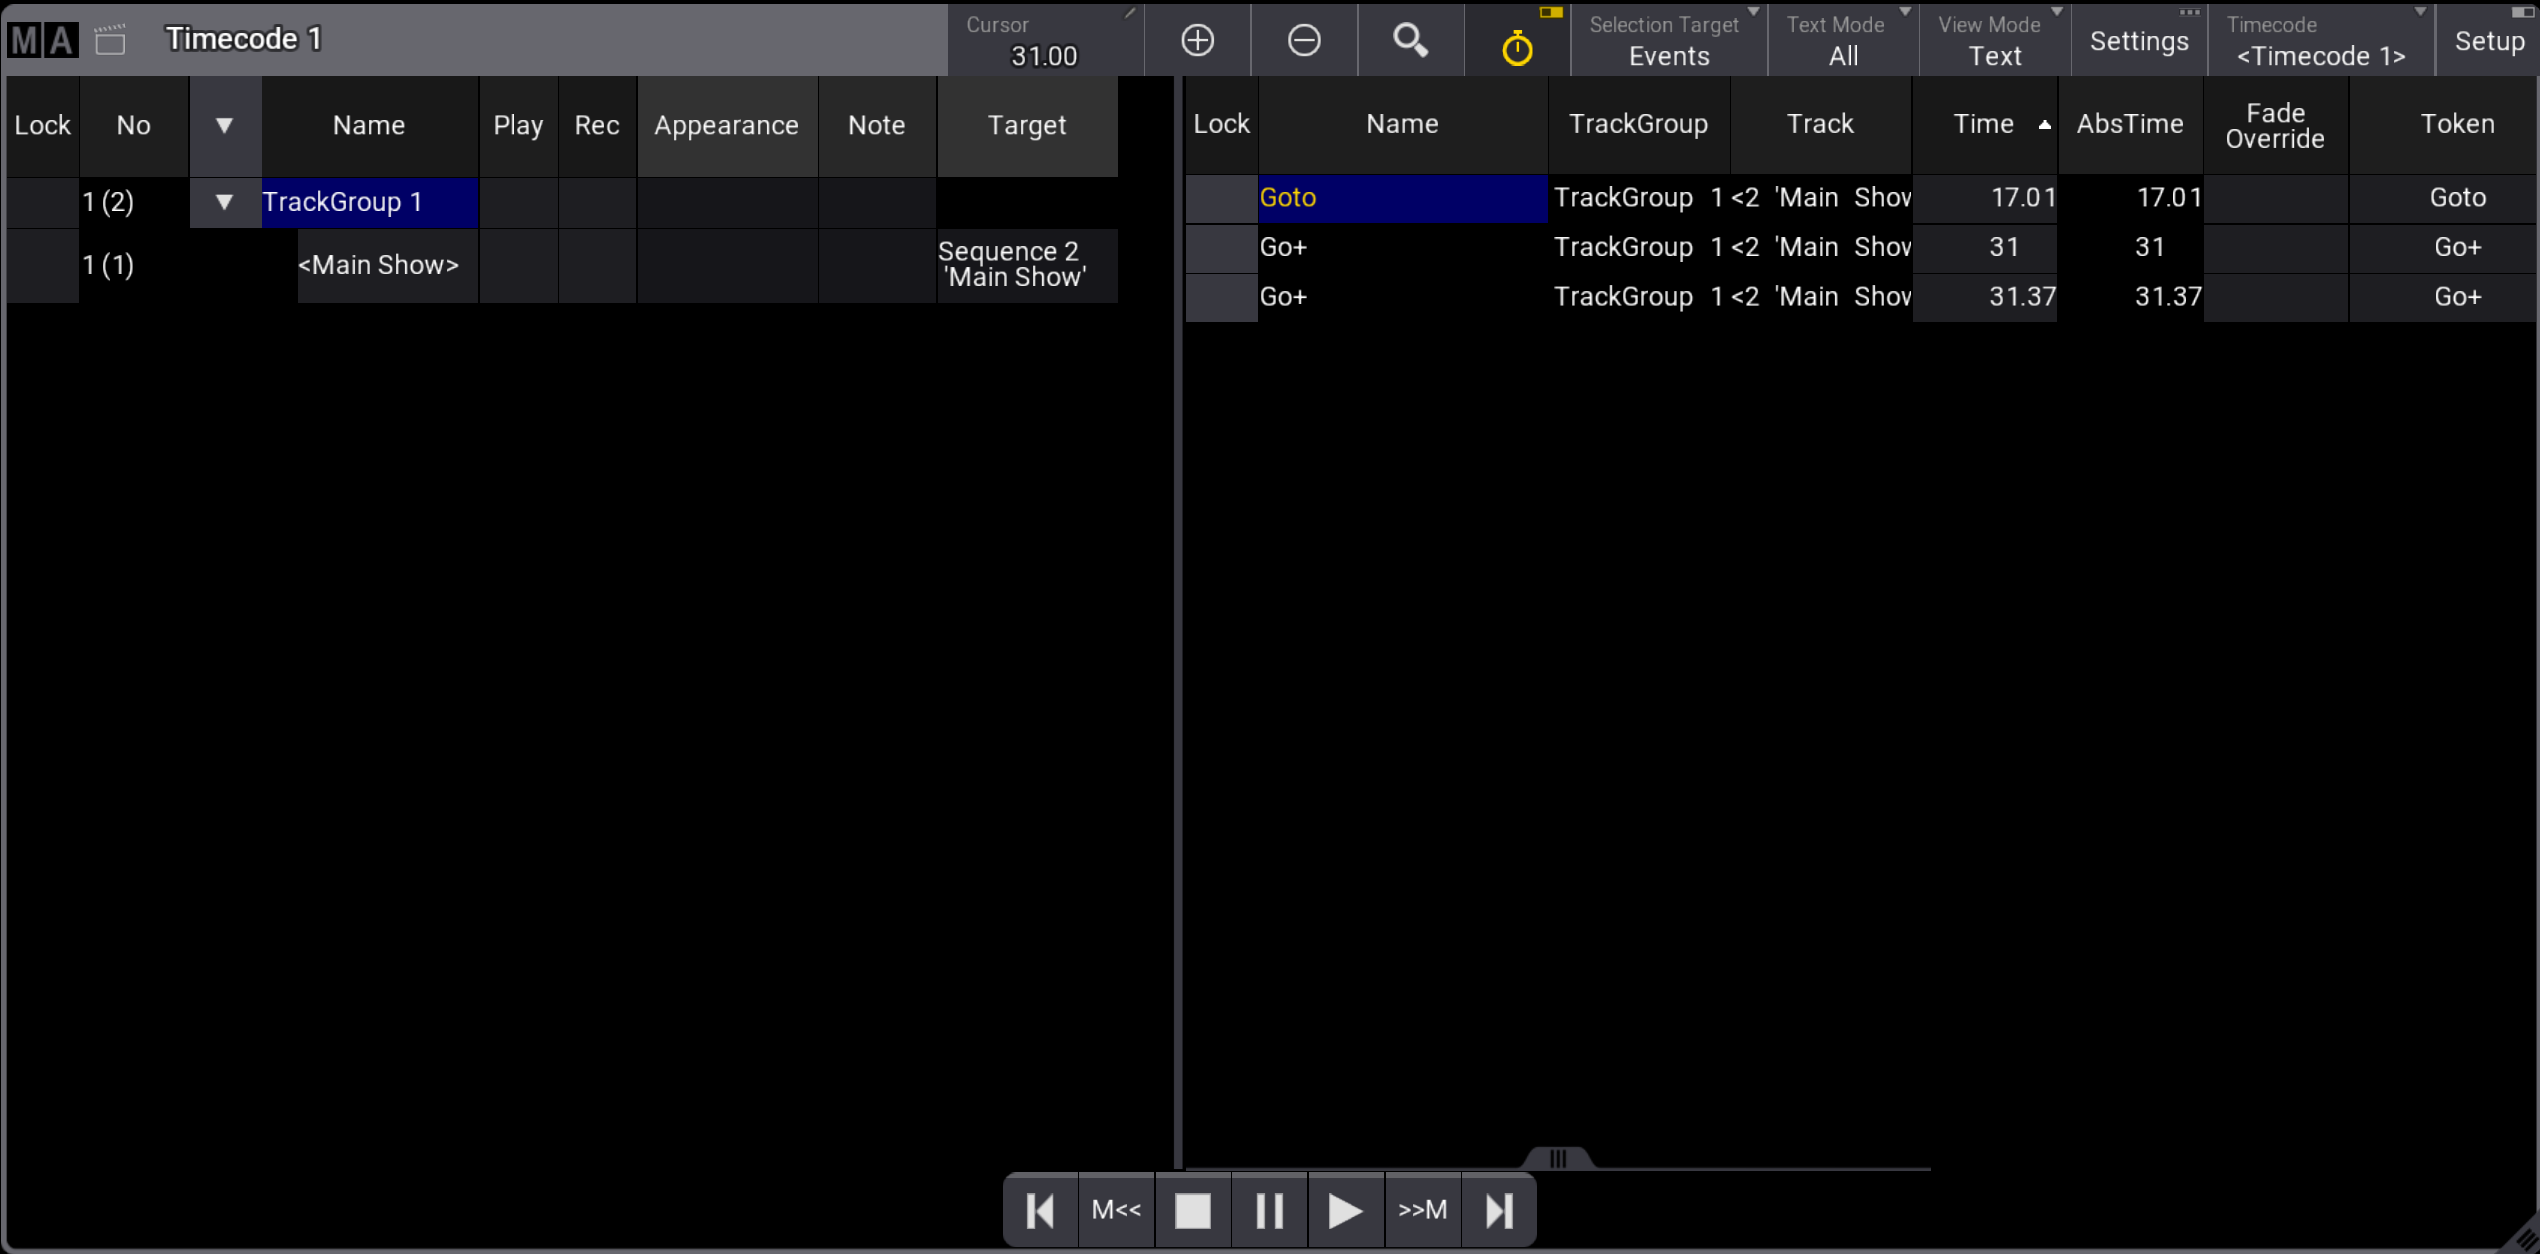
Timecode view with View Mode set to Text
This is a description of the column headers in the text display when Selection Target is set to Events:
Lock:
Set to yes, to disable editing.
Name:
When the Selection Target is set to Events, it will display the handle used to record the event. For more information, see Executor Configurations.
When the Selection Target is set to TimeRanges, it will display information about markers, tracks, and track groups.
TrackGroup:
Displays the name of the track groups.
Track:
Displays the name of the tracks.
Time:
Reports the time of events inside their Time Range. The time encoder in the Timecode Encoder Bar displays the time inside a Time Range as TR.
AbsTime:
Reports the absolute time of events inside the timecode show. The time encoder in the Timecode Encoder Bar displays the absolute time as TC.
For more information about the Timecode Encoder Bar, see Edit a Timecode Show.
Token:
This column displays the action executed when the event is played back. Tap and hold a cell in this column to open the select token pop-up, then select a token.
Cue Destination:
This column displays the cue to execute when the event is played back. Tap and hold a cell in this column, then select a new cue.
Status:
Displays the status of an event recorded when an executor was set to flash, black, or temp. For more information, see Executor Configurations.
Execute Command:
Defines whether cue commands are executed when an event is played back. Tap and hold a cell in this column and set it to Yes or No. The default is Yes. For more information, see Cues and Sequences ─ Look at cues in sequences.
FaderValue:
When recording a track using a fader, the fader movement is recorded in steps between 0% and 100%. This column displays the fader's value at each step. Tap and hold a cell in this column to open the calculator, then set a new value.
This is a description of the additional column headers in the text display when Selection Target is set to TimeRanges:
Appearance:
This column displays the appearances assigned to markers and time ranges. Tap and hold to open a cell in this column. The select pop-up list will open, and then a new appearance can be assigned. For more information, see Appearances.
Start:
Displays the start position of markers and time ranges on the timeline. Tap and hold a cell in this column to open the calculator, then set a new value. For more information on Time display format, see Timecode Settings.
Duration:
Displays in seconds the time duration of markers and time ranges. Tap and hold a cell in this column to open the calculator, then set a new value. The value is displayed in angle brackets < > when the duration is set to the end of the timecode show.
Speed Factor:
Tap and hold to open, then set a value to multiply or divide the speed.
|
|
Hint: |
| Only cells with a gray background can be edited. |
|
|
Hint: |
| Tap with two fingers on a column header cell to sort the display. |