Store and Recall Views
|
grandMA3 User Manual » Windows, Views, and Menus » Store and Recall Views
|
Version 2.1
|
The arrangement of windows is called a View. Views are stored in a View Pool. The pool can be created as a window.
Views can be assigned to View Buttons and Executors.
ViewButtons are located in the View Bar. The view bar is usually located on the right side of screens. View bars can be shown or hidden and they can be on the right side or the top of screens. Learn more in the View Bar and View Button Topic.
Executors are handles used to control other objects. They are often used to control sequences, but they can control other objects. For instance, calling different views. Learn more in the Executor topic.
Store Views
A view is stored using the standard store syntax and the View keyword. This means it is possible to use the keys, keys in combination with buttons on the screens, or the command line.
Storing a view opens the Store View Options pop-up.
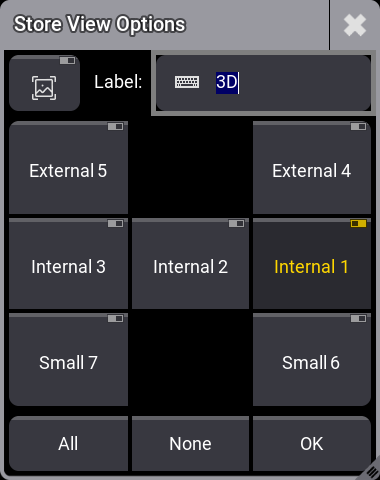
This is used to directly label the view and select which screens should be stored in the view. Each screen has a button that can be turned On or Off. The last touched screen is selected as a default. There are two buttons at the bottom that give fast access to select All or None of the screens. Tap OK to store the window arrangement of the selected screens or press Please to confirm the options.
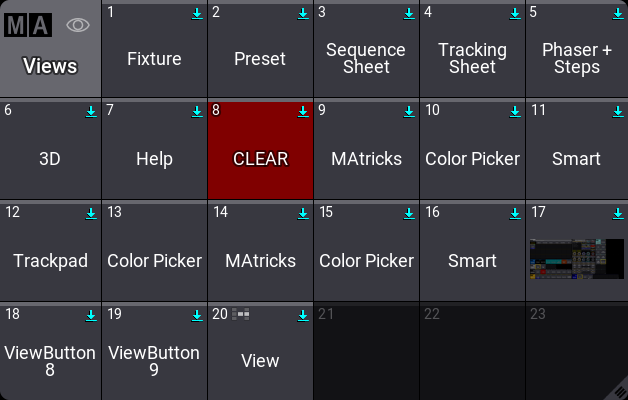
It is also possible to store a screenshot of the view if a single screen is selected. This can automatically be created by toggling the screenshot button (![]() ). Activating the screenshot function automatically creates an image, which is assigned to an appearance, which in turn is assigned to the view pool object. It also removes the text label. A label can be added again. This will be on top of the image. View number 17, in the image above, has a screenshot.
). Activating the screenshot function automatically creates an image, which is assigned to an appearance, which in turn is assigned to the view pool object. It also removes the text label. A label can be added again. This will be on top of the image. View number 17, in the image above, has a screenshot.
If a view has stored information about two or more screens, then there is an icon on the view pool object indicating the relevant screens in a brighter color than the others in a grid matching the screen grid in the Store View Options pop-up. View number 20, in the image above, has stored windows for Internal 1 and 2.
If the command line is used, the screens can be specified using the /Screen option keyword. For more information, please read the Store keyword and View keyword topics.
Store Using Keys
- Press Store.
-
Press and hold MA while pressing X7 | View.
This puts the View keyword in the command line. - Use the numeric keys to type the view number.
- Execute the command by pressing Please.
- Select the desired screens in the pop-up and press Please to confirm the options.
If point 3 is skipped (not adding a number), the first available view in the pool is stored.
Store Using a Combination of Keys and Touch Screens
Requirement:
- A visible View Pool on one of the screens.
To store a new view:
- Press Store.
- Tap an available pool object in the view pool to create a new view or one of the existing pool objects to overwrite the existing view.
- Select the desired screens in the pop-up and tap OK to confirm the options.
The last touched object (the object with the white frame) can be labeled if you start typing on the keyboard. Any of the labeling methods described in the Label Pool Objects topic can also be used.
Store Using Command Line
Storing using the command line is very simple. The two keywords needed are Store and View.
For example, storing the window arrangement on screens 1 and 2 as view 15 with the "layout" label:
|
|
User name[Fixture]>Store View 15 "layout" /Screen "1,2" |
See more in the View keyword topic.
Store a View Directly on a View Button
A new view can be stored on a View Button. This creates a view in the view pool and immediately assigns it to the view button.
- Press Store.
- Tap a view button.
- Select the desired screens in the pop-up and tap OK to confirm the options.
- OR -
- Press and hold a view button until the pop-up appears.
- Select the desired screens in the pop-up and tap OK to confirm the options.
Now, there is a new view in the pool, and it is assigned to the view button.
Any of the described label functions can be used with the view buttons.
Assign Existing View to a View Button
The above method is for creating a new view and having it available on a view button. Existing views can also be assigned to the view buttons.
Again, there are three primary ways to do it: Keys, keys and screens, and command line.
Assign View Using Keys
- Press Assign.
- Press and hold MA while pressing X7 | View once.
- Use the numeric keys to type the view number.
- Press At.
- Press and hold MA while pressing X7 | View twice (this gives the ViewButton keyword).
- Use the numeric keys to type the view button number.
- Execute the command by pressing Please.
Example:
To assign view four at view button seven on screen number one, the following key presses are needed:
Assign MA + X7 | View 4 At MA + X7 | View MA + X7 | View 1 . 7 Please
This is the command result:
|
|
User name[Fixture]>Assign View 4 At ViewButton 1.7 |
Assign View Using Keys and Screens
Requirement:
- A visible View Pool on one of the screens and visible view buttons.
To assign a view:
- Press Assign.
- Tap the desired view in the view pool.
- Tap the desired view button.
Assign View Using the Command Line
The Assign, View, and ViewButton keywords are needed for this command.
Assign View ["View_Name" or View_Number] At ViewButton ["Display_Name" or Display_Number].[ViewButton_Number]
Assign Existing Views to an Executor
Existing views can be assigned to executors.
Again, there are three primary ways to do it: Keys, keys and screens, and the command line.
Assign View Using Keys
When objects are assigned to executors on a specific page using the keys and command line, then the object needs to be assigned to the child of the page using the Page keyword. The executors are children of the page.
If the object needs to be assigned to executors on the active page, it can be assigned to the executor using the Executor keyword.
- Press Assign.
- Press and hold MA while pressing X7 | View once.
- Use the numeric keys to type the view number.
- Press At.
- Press and hold MA while pressing X16 | Exec once.
- Use the numeric keys to type the executor number (executor on the active page).
- Execute the command by pressing Please.
Example:
To assign view 9 at executor X1 | Clone (executor 291) on executor page 3, the following key presses are needed:
Assign MA + X7 | View 9 At MA + X15 | Page 3 . 2 9 1 Please
This is the command result:
|
|
User name[Fixture]>Assign View 9 At Page 3.291 |
Assign View Using Keys and Screens
Requirement:
- A visible View Pool on one of the screens and access to executors.
To assign a view:
- Press Assign.
- Tap the desired view in the view pool.
- Tap the desired executor.
Assign View Using the Command Line
The Assign, View, and Page or Executor keywords are needed for this command.
Assign View ["View_Name" or View_Number] At Executor ["Executor_Name" or Executor_Number]
Assign View ["View_Name" or View_Number] At Page ["Page_Name" or Page_Number].[Executor_Number]
Recall Views
Stored views are recalled to load the view.
If a view is recalled without specifying a destination (which screen should the view be recalled to), then it, by default, opens on the screen where it was stored. The destination can be set using the /Screen preference. See the example below and learn more in the View keyword topic. If the view is stored with two or more screens, then the views are always recalled on the stored screens.
When the view is assigned to a view button, then pressing the view button recalls the view on the same screen as the view button.
Tapping a view in the pool recalls the view on the same screen as the tapped view pool.
Pressing an executor to recall a view uses the default behavior described above.
If a view is recalled using the command line without specifying a destination, it is recalled on the screen where the command line has focus (the command line can be on several screens). Specifying a destination in the command line overrides this default behavior.
(Call) View ["View_Name" or View_Number]
(Call) View ["View_Name" or View_Number] /Screen "[Screen_Number]"
Update Views
A view is updated simply by storing it again and overwriting the existing view. This can be done directly in the view pool or on the view button using the methods described above.
Edit a View Object
A view object can be edited. This opens the View Editor.
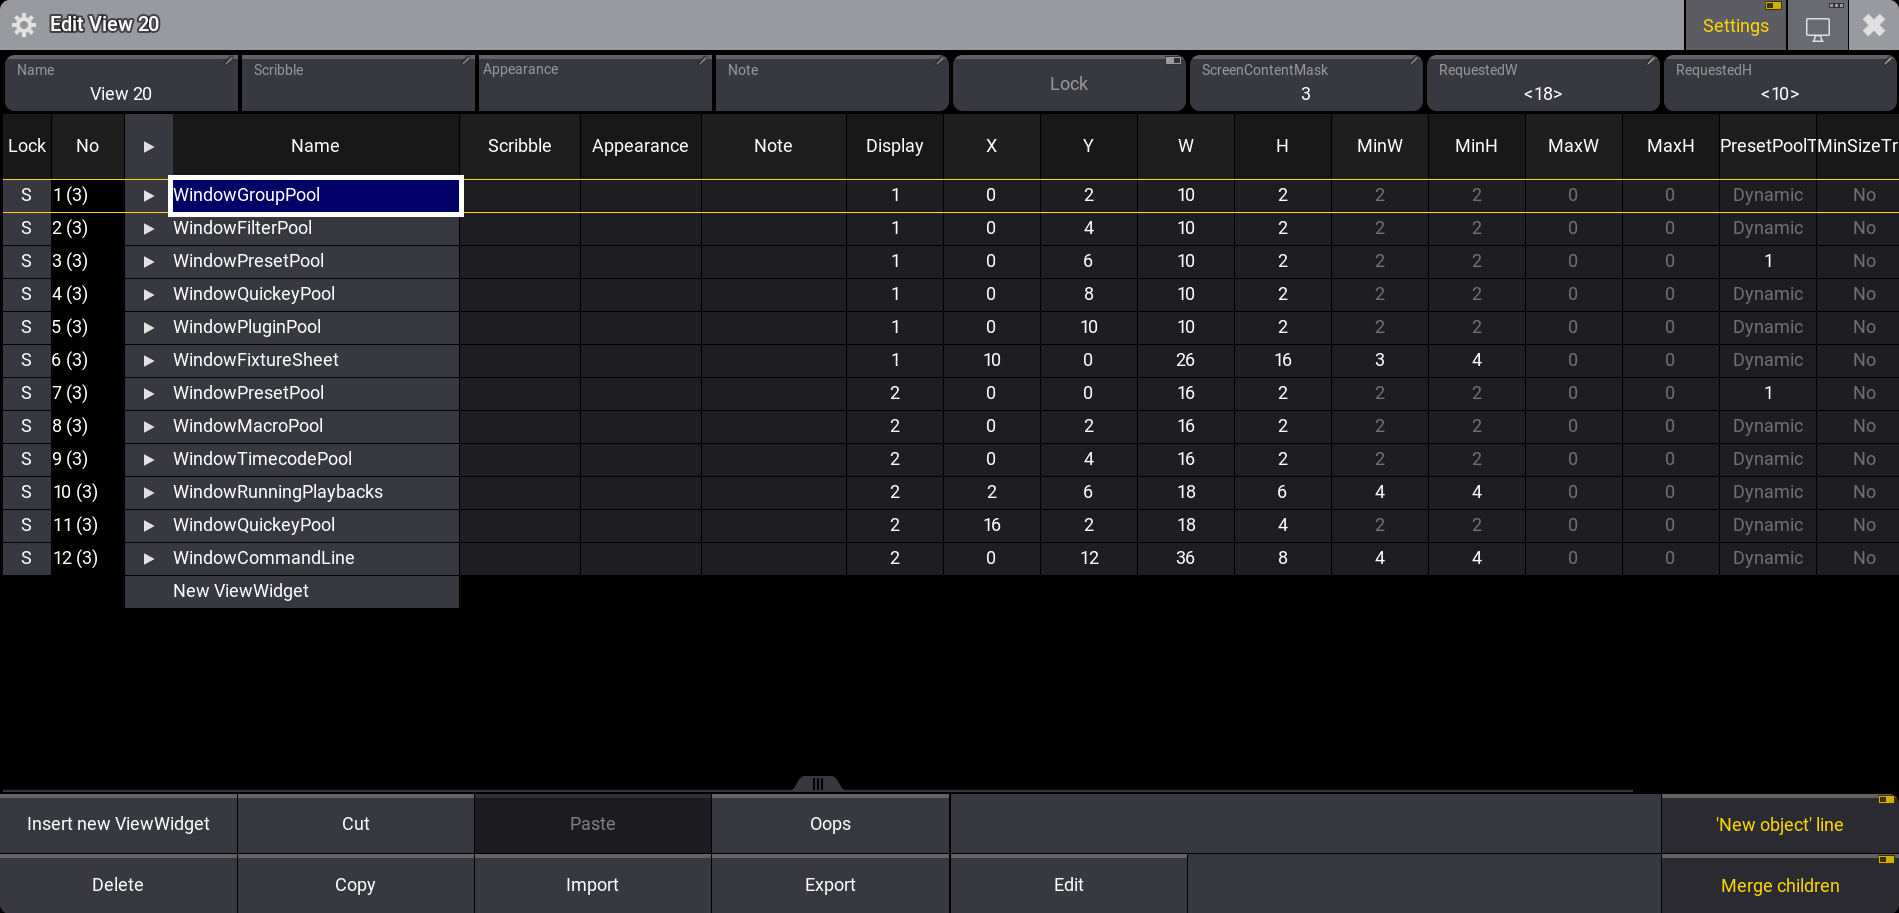
This editor has a table view with each window as a row and all the different settings for the windows in columns. The window objects (called "ViewWidget") can be unfolded by tapping the white arrow. This exposes all the settings for the window.
At the top of this editor, the settings can be visible (like in the example above). This has the standard settings for Name, Scribble, Appearance, Note, and Lock. There are also three settings specific to the views. The ScreenContentMask is a numeric representation of which screens are stored in the view. Tapping this opens a small Edit Screen Content Mask pop-up.
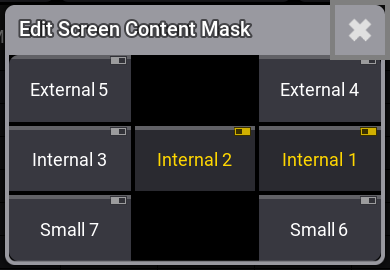
This is similar to the screen grid from the Store View Options pop-up.
The RequestedW and RequstedH settings define the size this view would like the screen to have.
Selecting a window in the list and tapping Edit in the bottom bar opens the relevant window settings pop-up.