Recipe Editor Window
|
grandMA3 User Manual » Recipes » Recipe Editor Window
|
Version 2.4 |
Recipe Editor Window
The Recipe Editor window is useful for working with Programmer Parts and offers a visualization of recipe lines. For more information on programmer parts and the programmer, read What is the Programmer.
The programmer can have several parts (Maximum: Part Zero + 239 individual parts = 240 parts). The Recipe Editor window shows all parts of the current programmer. Parts can be labeled here directly.
The columns of the recipe editor sheet and the context area, are described in the Recipe Editor topic.
With the the recipe editor window you can create standard and phaser recipes, and store them directly into cues, cue parts, and presets. All recipe lines can be edited.
The Recipe Editor window can be found in the Add Window pop-up in Tools - Recipe Editor.
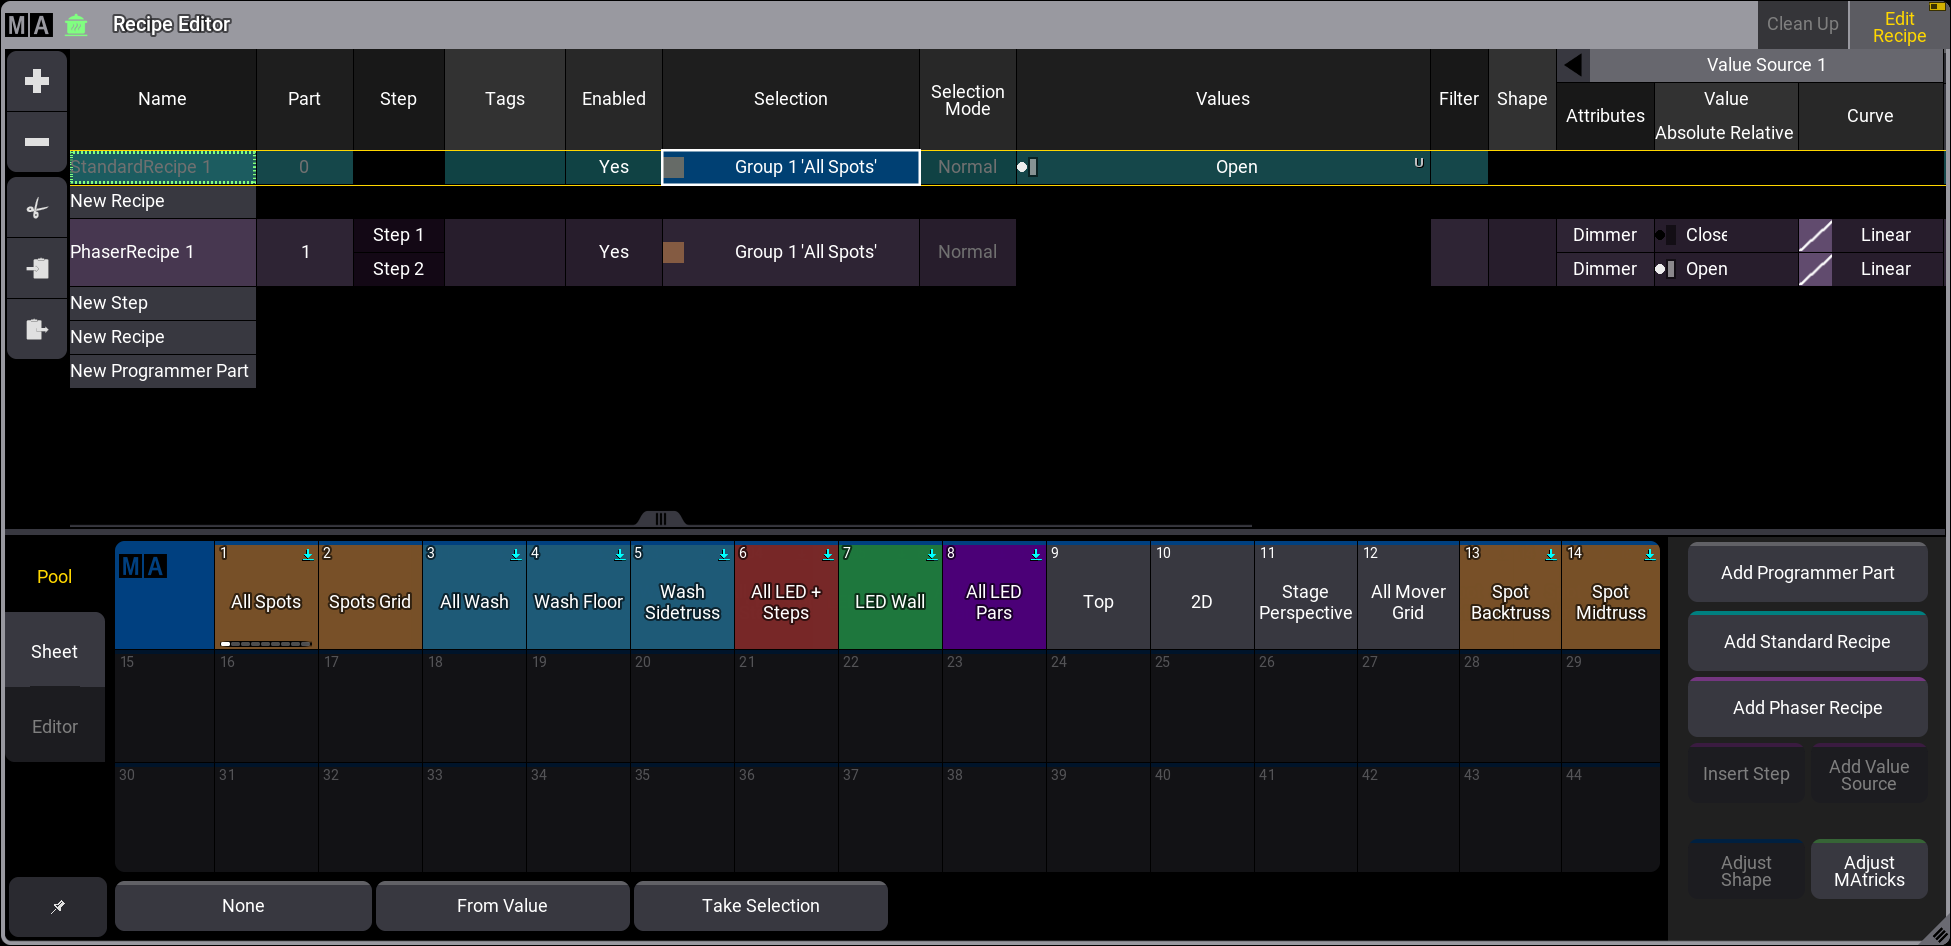
To enable the edit recipe mode, tap Edit Recipe in the title bar. For more more information, read Edit Recipe Mode.
Tap on a Part to select it for creating recipes.
+ and - on the left side can add or delete Programmer Parts, Recipes, and Steps of phaser recipes. They both refer to the selected cell in the sheet.
Use cut (![]() ), copy (
), copy (![]() ), and paste (
), and paste (![]() ) buttons on the left side of the toolbar to edit lines.
) buttons on the left side of the toolbar to edit lines.
For more information about the columns and the context area at the bottom of the window, see Recipe Sheet.
For recipes, if a group has multiple recipe lines with different values and presets for the same attribute, only the last entry will generate output. To delete all recipes that use the same selection with multiple values and presets of the same feature group, tap CleanUp in the title bar. Only the last object that generates the output is kept.
For example, when Group 1 + Red + Yellow + Blue is selected and then CleanUp is tapped, the recipe lines for Group 1 + Red + Yellow will be deleted. If you tap an already selected preset again to deselect it, the corresponding recipe line will also be deleted. CleanUp is only active when the same fixtures are used with multiple items of one feature group. Otherwise the button will be greyed out. With Edit Recipe disabled this button is not visible.
It depends on the destination whether recipes of the different parts are stored or not:
- If cue parts are the destination for storing recipes, recipe lines of the selected programmer part, which is displayed in green, will be stored in the destination cue part. For example, Store Cue Part 1.
- If cues are the destination for storing, all parts will be stored as respective cue parts. For example, Store Cue 1.
- If presets are the destination for storing, the selected part which is displayed in green will be stored into the preset. For example, Store Preset 1.3.
As soon as recipes are stored they will be cleared from the Recipe Editor.
Recipe Editor Window Settings
The recipe editor window settings can be accessed by tapping the MA logo in the title bar of the recipe editor window, and tapping  in the title bar of the Edit Settings pop-up of presets and and in the temporary recipe editor pop-up of sequences:
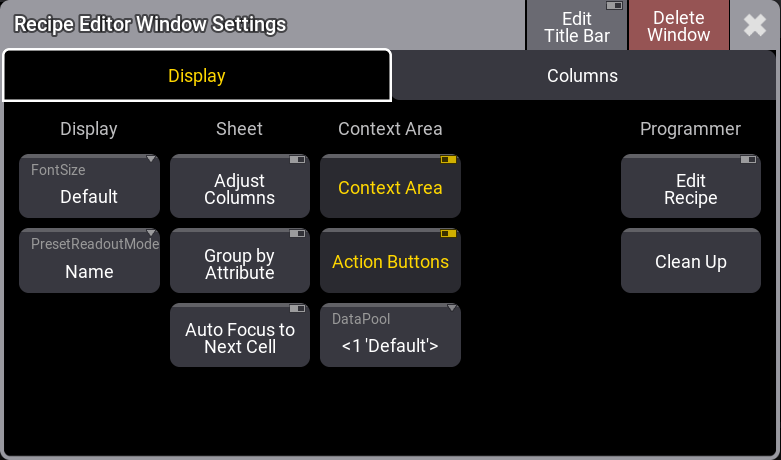
- Font Size:
This selects the font size in the window. It is a swipe button that opens a list of sizes from 10 to 32. There is also a Default property. The default is the same as size 18. - PresetReadoutMode:
This defines how presets are displayed in the sheet:- Name:
Displays the name of the preset. - ID:
Displays the ID number of the preset. - ID+Name:
Displays the ID and name of the preset. - ID+Long Name:
Displays the ID and long name of the preset.
- Name:
- Adjust Columns:
This On/Off button makes a sheet adjust the column width to match the window size and the number of columns. - Group by Attribute:
This organizes recipe lines by attribute. The grid layout changes. One recipe line now corresponds to one attribute. Properties that correspond to the same step are grouped in a numbered Step header. Tap the arrow on the left of the header to unfold or collapse the group and display more or less columns for the step. By default, the group is collapsed. - Auto Focus to Next Cell:
This automatically sets the focus to a new cell after selecting a value.
- Context Area:
This shows or hides the Context Area in the recipe editor. - Action Buttons:
This shows or hides the action buttons on the right side of the context area.
Programmer settings are only available in the recipe editor window.
- Edit Recipe:
This enables the edit recipe mode. - Clean Up:
This deletes all recipes that use the same selection with multiple presets of the same feature group. It is only displayed when Edit Recipe is enabled, and functional when there is something to cleanup.