Create a Timecode Show
|
grandMA3 User Manual » Timecode Show » Create a Timecode Show
|
Version 2.4 |
There are two basic ways to create a timecode show. The time-coded events can be recorded or added manually.
The two workflows can be combined.
A timecode show needs to be created in the Timecode pool. A new show can be added by performing a store or edit action on an empty pool object.
This creates an empty timecode show.
This show is created using the default settings. Many settings are connected to timecode shows and timecode elements, like the viewer and the slots. Learn about the settings in the Timecode Settings topic.
If the edit action is used on the pool object, a pop-up editor appears, which functions like the Timecode Viewer with Setup enabled.
The pop-up editor is missing some toolbar tools on the left that are available in the Timecode Viewer with Setup active. So, it might be better to use the Timecode Viewer.
The Timecode Viewer is described in the Timecode Viewer topic. This includes detailed descriptions of the different tollbars in the viewer.
Time Source
One of the most important elements is the time source. Each timecode show has a setting called TC Slot. This can be "Internal" or one of the Timecode Slots. Learn more about the timecode slots in the What are Timecode Slots topic.
There are a lot of different settings related to the timecode shows. Learn more about them in the Timecode Settings Topic.
If it is internal, it can be run by a Go command to the timecode show. This will put the show in play mode and run the time. The show's playback actions are accessible via the easy-access Playback Toolbar at the bottom of the Timecode Viewer window. This includes a play button(![]() ).
).
This toolbar allows control of the playback status of the timecode show. When the setup mode is active, the extra record button is available. Learn more in the Timecode Viewer topic.
If the time source is one of the timecode slots, the timecode show must be in playback mode, and the timecode slot can then generate the time, or an external source can drive the time in the timecode slot.
Initially, a new timecode show is set to use the internal time source. If the timecode show uses an external source, the source must be set up, and the timecode show must be configured to listen to the relevant timecode slot. Learn how to set up external sources in the External Connections topic.
Record a Timecode Show
The timecode show can be recorded using the Record keyword. It also has a quick access button (![]() ) on the Playback Toolbar at the bottom of the Timecode Viewer when Setup is enabled.
) on the Playback Toolbar at the bottom of the Timecode Viewer when Setup is enabled.
The Record keyword is used to start the recording mode of the timecode show. Learn more in the Record Keyword topic.
This toolbar allows control of the playback status of the timecode show. When the setup mode is active, the extra record button is available. Learn more in the Timecode Viewer topic.
When the record mode is enabled and the selected time signal runs, the executor actions are automatically added to the show in relevant tracks. This includes the fader movements. The different events are added to tracks. Each track represents a target. A target object can be a sequence, preset, sound, group master, master, or another timecode show or slot.
This requires that objects are assigned to executors and that these executors are valid timecode show target objects. Learn about the valid object in the Tracks topic.
The recording can be stopped using the stop button (![]() ) or the Off command on the timecode show pool object.
) or the Off command on the timecode show pool object.
The recorded events can be edited after the recording.
By default, tracks are added to the same Track Group and Time Range.
Track Groups are a way to organize the tracks. Learn more in the Track Groups topic.
Time Ranges are ranges of the time in the timeline. Time ranges are a part of the tracks. Each track must have one time range. Learn more in the Time Ranges topic.
If the Timecode Settings have Record Remote Events active and the Playback and Record setting is All Events, then events that trigger cues or other valid actions are automatically added to the timecode show. These settings also record events triggered by the cues in the timecode show. For instance, follow cues or cue commands.
The timecode settings contain all settings for the timecode show object. Learn more in the Timecode Settings topic.
Manually Add Events
Events can be manually added to tracks. The track must exist, and it can be created manually. The tracks must exist inside a Track Group. The track group must be created in an empty show before the track can be added.
|
|
Restriction: |
|
Subtracks cannot be manually created.
|
Add a Track Group
Follow these steps to create a Track Group manually:
- Make sure the Timecode Viewer is visible and that Setup is activated.
- Select the timecode show to be edited from the Timecode Pool or from the Timecode Viewer Settings.
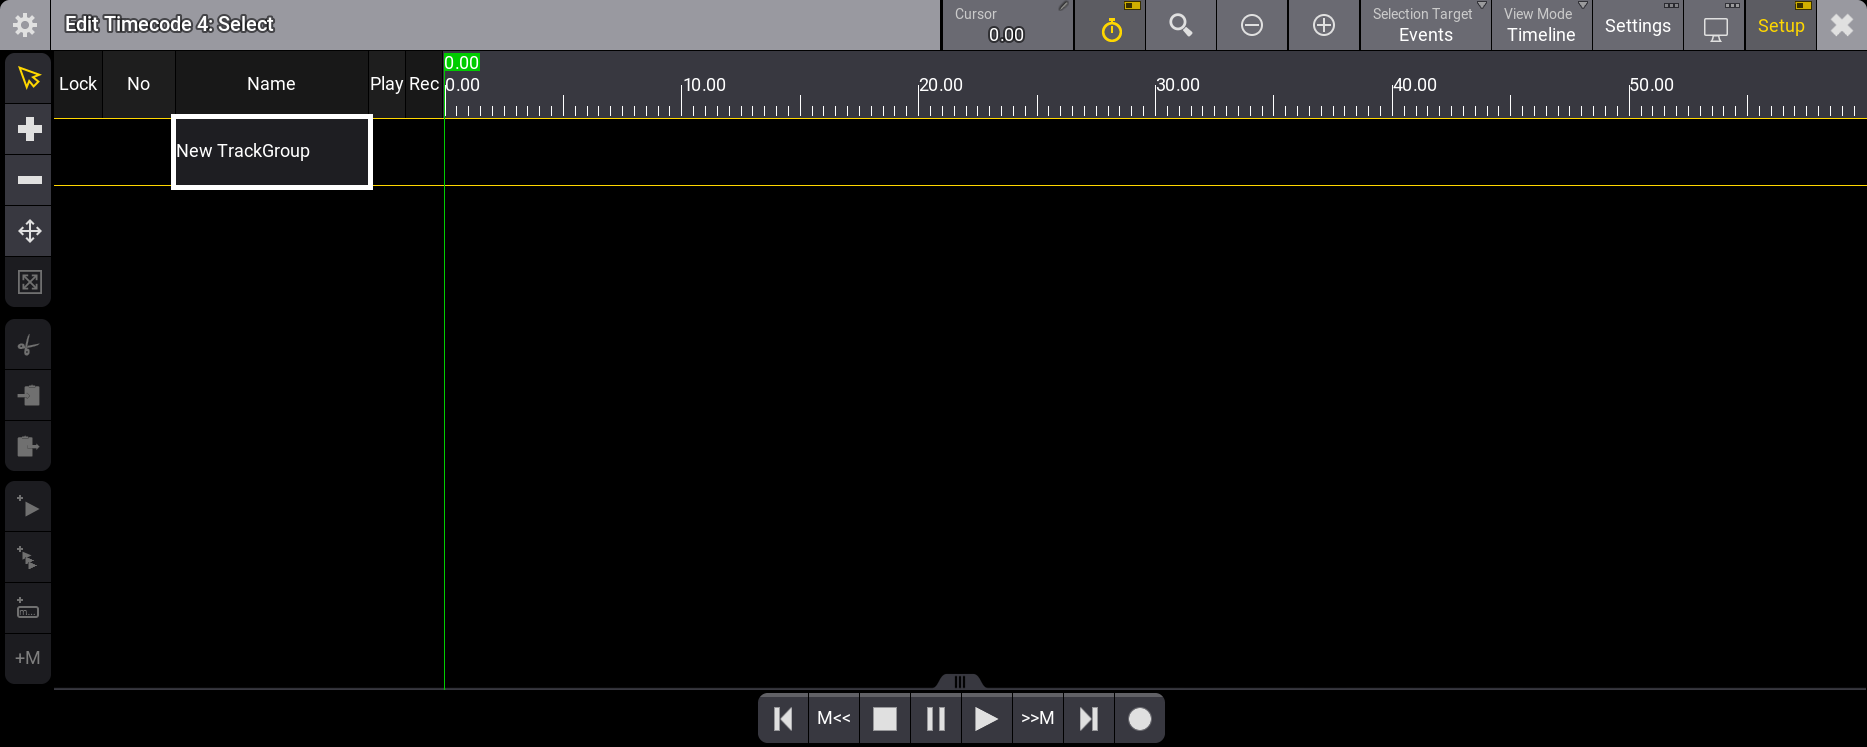
- Tap and hold New Track Group.
A new track group has now been added. It can be unfolded by tapping the right-pointing white triangle ( ). This reveals that it already has one track with a time range.
Add a Track to a Track Group
Follow these steps to add a track to the track group:
- Make sure the Timecode Viewer is visible and that Setup is activated.
- Select a timecode show from the Timecode Pool or from the Timecode Viewer Settings.
- Unfold the desired Track Group.
- Tap and hold New Track.
A new track has been added to the track group.
- Now, edit the Target cell for the track. This opens the Assignment Editor pop-up.
- Select the desired object type by tapping one of the tabs at the editor's top.
- Select the desired target object in the list.
The track is now ready to get some events.
Points 5 to 7 can also be used to edit the desired target. Be aware that this will break existing events in the track.
Add a Single Event to a Track
Single events can be added to the selected track. There are two ways to add events. The beginning is the same for both ways:
The first involves the green cursor:
- Make sure the Timecode Viewer is visible and that Setup is activated.
- Ensure the viewer displays the correct Timecode Show by either displaying the selected timecode show and selecting the proper show, or selecting the correct timecode show in the timecode settings.
- Unfold the desired Track Group.
- Select the desired Track.
-
Make sure the Selection Target is Events by tapping Selection Target in the title bar or by opening and changing the settings. If the Timecode Viewer with setup active is used, tapping the
 icon selects the events as the selection target.
The first method involves the green cursor:
- Move the cursor to the desired time. The cursor can be moved by tapping and holding it while moving it in the timeline or by using the Timecode Encoder Toolbar.
-
Tap
 in the toolbar on the left. This adds the default event to the track.
These two steps can be repeated until all the events exist.
The second method involves tapping the track:
-
Activate the Add tool (
 ) in the toolbar on the left.
- Tap the track where the event should be.
Repeat point 7 until all desired events exist.
|
|
Important: |
| Manually created cue events only trigger follow cues, timed cues, or cue commands if the Playback and Record setting is Manual Events. Learn more about this in the Timecode Settings topic. |
Add Multiple Events to a Track
Multiple events can be added to the selected track:
- Make sure the Timecode Viewer is visible and that Setup is activated.
- Select a timecode show from the Timecode Pool or from the Timecode Viewer Settings.
- Unfold the desired Track Group.
- Select the desired Track.
-
Make sure the Selection Target is Events by tapping Selection Target in the title bar or by opening and changing the settings. If the Timecode Viewer with setup active is used, tapping the icon selects the events as the selection target.
- Move the cursor to the desired time. The cursor can be moved by tapping and holding it while moving it in the timeline or using the Timecode Encoder Toolbar.
-
Tap
 in the toolbar on the left. This opens the Add multiple events pop-up.
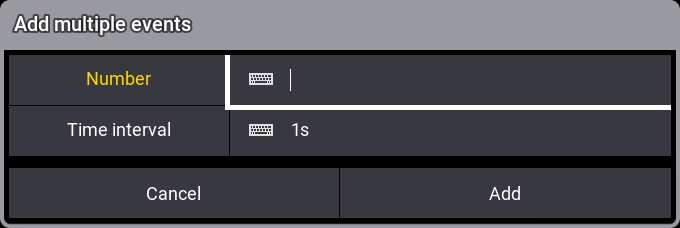
- Type the number of desired events.
- Change the time interval between the events.
- Tap Add.
This adds the number of default events to the timeline using the interval from the cursor's location.
|
|
Important: |
| Manually created cue events only trigger follow cues, timed cues, or cue commands if the Playback and Record setting is Manual Events. Learn more about this in the Timecode Settings topic. |