|
grandMA3 User Manual » Patch and Fixture Setup
|
Version 2.0
|
Fixtures need to be added to the show file before they can be controlled or operated.
Fixtures are added to the show using the Patch menu.
The patch menu gives access to Fixture Types, Attribute Definitions, Parameter List, DMX Universes, Stages, and DMX Curves.
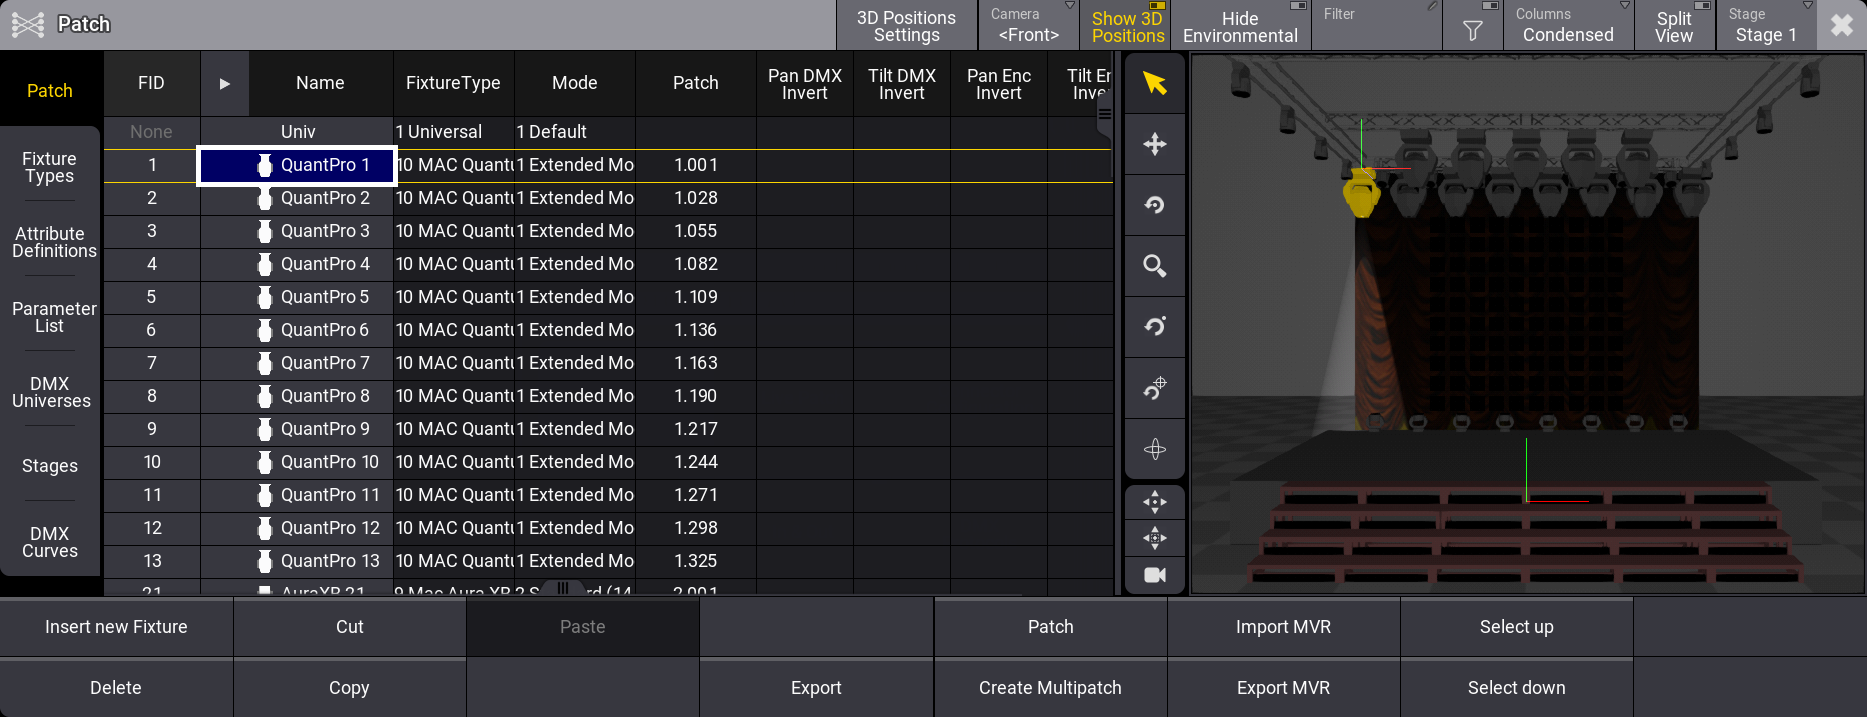
The patch menu has two different modes. The image above shows the Condensed mode. This mode hides a lot of columns that might not be needed. The other mode is called Full. This shows all columns in the patch menu. The mode can be toggled by tapping Columns in the title bar.
The fixture list can also be filtered using the filter settings in the title bar or by activating Split View.
Split view filters the fixtures by different column properties.
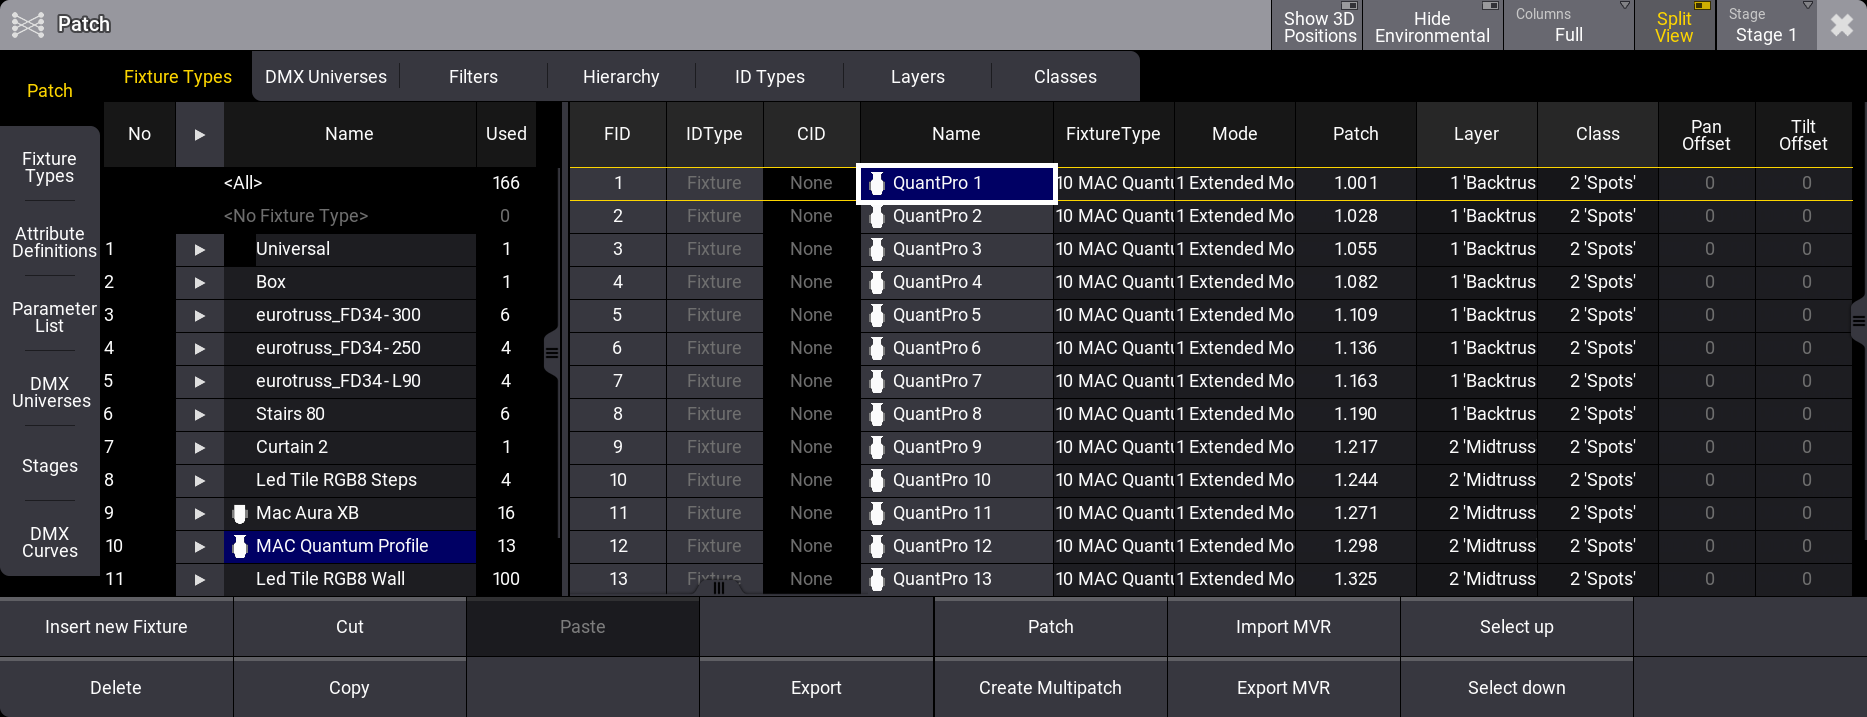
The different split options appear as tabs that can be selected to filter the fixture list.
The list of fixtures is separated into two sides. The left side lists the different elements of the selected split filter. The right side lists the fixtures that qualify based on the object selected on the left side.
The tabs and split options (in Full mode) are:
- Fixture Types:
The left side lists the imported fixture types, including <All> (all fixtures) and <No Fixture Type> (fixtures without an assigned fixture type). Learn more about fixture types in the Fixture Types section. - DMX Universes:
The left side lists the DMX universes, including <All> (all universes) and <Unpatched> (fixtures without an assigned DMX address). Learn more about DMX universes in the DMX Universes topic. - Filters:
The left side lists the filters in the Filter pool, including <All> (all fixtures). Learn more about filters in the World and Filters section. - Hierarchy:
The left side lists the hierarchical structure of the patch. It lists the parent elements and can be unfolded. The right side displays the elements directly dependent on the selected object on the left side. - ID Types:
The left side lists the different defined ID types, including <All> (all fixtures) and <No ID> (fixtures without an assigned FID or CID). Learn more about ID types in the What are Fixtures topic. - Layers:
The left side lists the different defined layers, including <All> (all fixtures) and <No Layer> (fixtures without an assigned layer). Learn more about layers in the Classes and Layers topic. - Classes:
The left side lists the different defined classes, including <All> (all fixtures) and <No Class> (fixtures without an assigned class). Learn more about classes in the Classes and Layers topic.
It is possible to have a small version of the 3D stage open in the patch. It can be toggled On or Off with Show 3D Positions in the title bar. It is visible in the first example image above.
When it is On, it is visible on the right side of the menu. It can be adjusted in size by moving the separator. Also, when it is On, a 3D Positions Settings appears in the title bar. Tapping this opens a limited version of the settings for the 3D viewer.
The settings have two tabs: Misc and Label.
The tab Misc offers these settings:
- Wireframe:
Enables the rendering of the 3D scene as wireframe. By default, this setting is disabled. - Beam:
Changes the visualization of the beam. Available values are "Simple" and "Line". Simple is the default value. - BodyQuality:
Changes the visualization of the fixture body:- Box:
The whole bounding box of the fixture is visualized as one box. - Standard (Default):
The fixture is visualized with its original meshes until the vertex limit of 1 200 vertices is reached. If the overall vertex count of the fixture exceeds 1 200 vertices, the fixture is visualized with default meshes. - Ultra:
The fixture is visualized with its original meshes, no matter its vertex count.
- Box:
The Label settings are the same as for the normal 3D (link below).
When the 3D area has focus (for instance, when tapped), the encoder toolbar changes to the 3D encoder toolbar.
The 3D area in the patch does not visualize the current DMX output. The selected fixture in the patch shows an intensity output of 100%. The zoom of a fixture is visualized with the default value of the zoom attribute or, respectively, with the value of the Beam Angle of its Beam Geometry if a fixture does not have a zoom attribute. Other functions of the fixture (for example, color, iris, or gobo) are not visualized in the 3D area in the patch.
Learn more about 3D and the setting in the 3D Viewer topic.
Sub topics