Instance Manager
If you have arrived at this topic from a link without reading the previous topic, then please read Anatomy of a Fixture Type first.
The Instance Manager is used to add and arrange existing Modules to the fixture.
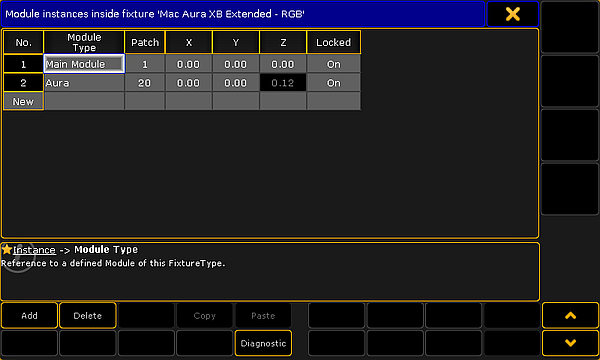
It could look like this:

There are buttons at the bottom to add or delete rows. The Diagnostics button opens a pop-up listing errors or warning regarding the instance setup.
Each row is an instance of the modules. A simple fixture might only have one module and one instance. But if the fixture has multiple color control elements or LED pixels then there are often multiple instances.
The instances need to be arranged physically between each other and there needs to be set a DMX start address offset.
This is done by editing the columns in the instance manager. This is short description of the columns:
- No.:
This is an auto generated number for the row. It cannot be edited. - Module Type:
Here the module is selected. Editing this cell opens a Select DMX Module pop-up. Here one of the modules can be selected and used for this instance. - Patch:
This is the DMX address offset based on the fixture start address. Often each module start with no DMX address offset and then the instances have the offset. This makes it a lot easier to create one LED pixel module that can be used for multiple LED instances where the DMX offset is set based on the fixture documentation. - X, Y, and Z:
The is the location of the instance in relation the center of the fixture. This is often used to position LED pixel instances in relation to each other. This is needed for correct visualization in MA 3D and in the Stage window. - Locked:
Enable if instance should not be individually movable, but move together with the other instance, keeping the relative distance between them.

