
Position fixtures in the virtual 3D stage
To fully enjoy the Stage view you will need to position your fixtures in the virtual 3D stage.
There are several places where you can change the location of the fixtures in the 3D stage. One option is directly in the Stage view, but there are also several places in the setup where you can do this. It can also be done in a connected MA 3D.
Stage view
The Stage view can be in a Setup mode. To activate this you will need the "Setup" title button. When you activate the setup mode then you can select one or more fixtures. The encoder toolbar is then changed to look like this:

This toolbar have two lines.
The top line has different buttons that assists your setup. The right most button changes between to sets of encoder modes. Page 1 is "Position". This means that the second line is current allowing you to change where the fixture is in the 3D space. If you tap the right most button then you get to the second page "Rotation". It could look like this:

Now the second line shows you that the encoders rotate the fixture.
The left most swipe button selects the move / rotation axis. There is two options.
- Object Axis:
Move or rotate along the axis of the object/fixture. - Stage Axis:
Move or rotate along the world/stage axis.
The next swipe button chooses how the fixtures should rotate when you have multiple fixtures selected.
- Single:
This will rotate the individual fixture around each fixtures/world axis. - Group:
This will rotate the entire group of fixtures around the combined axis.
The next swipe button allows you to use the Align functions in your placement of fixtures.
The next button opens the Wizard pop-up. The wizard allows you to arrange multiple fixtures in different formations. Read below for details about the Arrangement Wizard.
The next button is the Reset Position. Tapping this will put the fixture at the default zero position.
Arrangement Wizard
The arrangement wizard is used to easily arrange multiple fixtures.
It has three different tabs: Move, Circle and Matrix.
Move
This is the move section of the Arrangement Wizard:
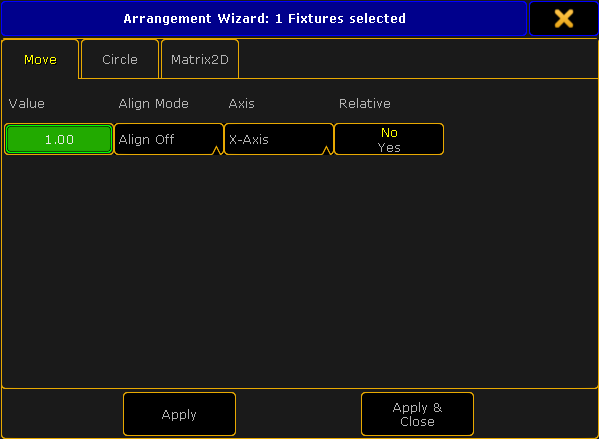
This gives you the possibility to move a selection of fixtures.
There are four settings:
- Value:
This is the value that tells you how far you want to move the fixtures. A positive number usually moves things to the right or up (depending on your view position). A negative number moves the selection in the opposite direction. - Align Mode:
This is the usual Align options. This allows you to combine the move function with Align. - Axis:
This is the axis plane in which the fixtures will move. - Relative:
With this you can move the fixture to its relative position.
When you are happy with your settings you can tap the Apply button once or several times to keep moving the fixtures (relative). If you only want to move it once more and then close the pop-up you can use the Apply & Close button. If you are done moving or just want to close the pop-up without applying any new values you can use the big X in the upper right corner.
Circle
This is the circle view of the Arrangement Wizard:
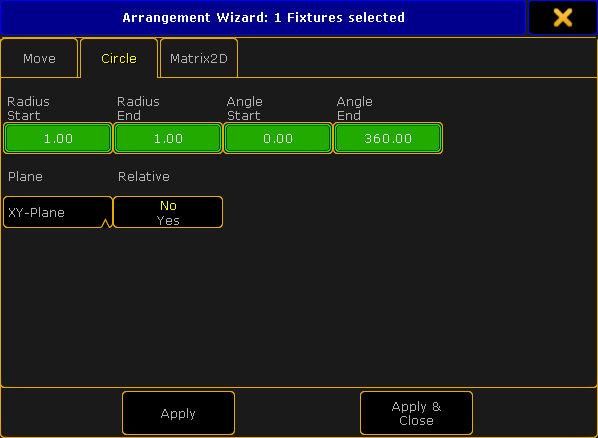
It can be used to arrange in circles or spirals.
There are six settings here.
- Radius Start:
This specifies the radius at the beginning of the circle. If this is different than the End radius the result will be a spiral. - Radius End:
This specifies the radius at the end of the circle. If this is different than the Start radius the result will be a spiral. - Angle Start:
Used to specify the beginning angle of the circle. - Angle End:
Used to specify the end angle of the circle. If the Start and End angle is not the same "degree" number then you will create arcs. - Plane:
With this you can choose in what (stage) plane your circle will be made. - Relative:
With this you expand your circle every time you tap the Apply button.
When you are happy with your settings you can tap the Apply button once or several times (and make the circle bigger with Relative on). If you only want to make one circle and then close the pop-up you can use the Apply & Close button. If you are done making circles or just want to close the pop-up without applying any new values you can use the big X in the upper right corner.
Matrix
This is the Matrix view of the Arrangement Wizard:
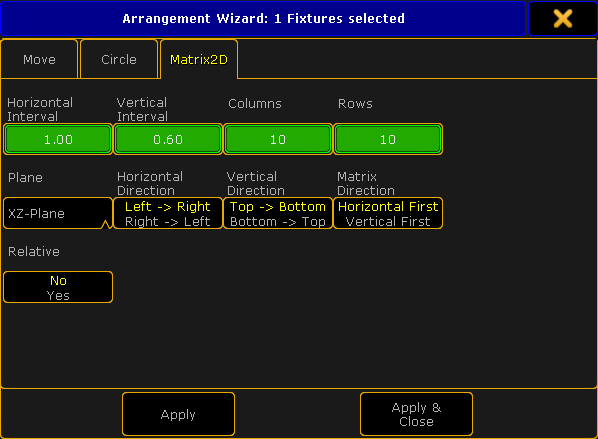
With this you can arrange your selected fixtures in columns and rows. There are nine settings here.
- Horizontal Interval:
This specifies the horizontal width between the fixtures (depending on your point of view). - Vertical Interval:
This specifies the vertical width between the fixtures (depending on your view). - Columns:
Here you set the number of columns you want. - Rows:
Here you set the number of rows you want. - Plane:
With this you can choose the plane in which your matrix will be created. - Horizontal Direction:
With this you can change the horizontal direction your fixtures should be placed in. - Vertical Direction:
With this you can change the vertical direction your fixtures should be placed in. - Matrix Direction:
Here you can chose if it should place fixture horizontal or vertical first. - Relative:
With this you can expand your matrix every time you tap the Apply button.
When you are happy with your settings you can tap the Apply button once or several times (and make the matrix bigger with Relative on). If you only want to make one matrix and then close the pop-up you can use the Apply & Close button. If you are done making matrixes or just want to close the pop-up without applying any new values you can use the big X in the upper right corner.
Layers in setup
You can also position and rotate the fixtures in the EditSetup or LiveSetup.
In the menu you need to select the layer containing the fixtures you want to position. Then scroll the right side almost all the way to the right. Here you'll find position and rotation XYZ values for each fixture.
Fixture positions window
In both EditSetup and LiveSetup you'll find a button on the right side called Fixture Positions. Tapping this (or the U2 key if the view is on screen 1) will open the Fixture Positions pop-up.
It could look like this:
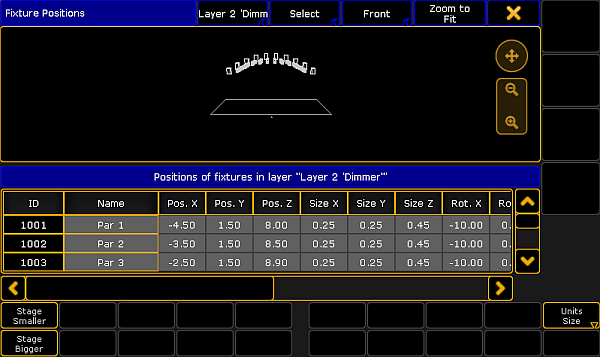
The top half works a lot like the Stage View. Although there is an extra swipe button in the title bar.
This is a layer selection. Swiping this will show you all the layers in your setup, but it will also include a layer with all the "3D objects".
The default is that there is always a "Stage plane" and a non-editable "Stage Markers". If you have added 3D elements in your show file then they will also be listed here.
The "all layers" does not include the 3D objects only the fixtures in your Patch & Fixture schedule.
Below the stage area is a list of all the fixtures/objects in the selected layer. This is used to arrange the fixtures/objects in a 3D environment.
Each line is a fixture/object.
There are several columns:
ID:
This is the ID of the fixtures. If the Channel ID and Fixture ID is not identical, then it displays the Fixture ID and then the Channel ID.
Name:
This is the name of the fixture.
Pos. X, Pos. Y, Pos. Z:
These cells are used to move the fixture in the 3D environment.
Size X, Size Y, Size Z:
These cells are used to change the physical size of the fixture.
Rot. X, Rot. Y, Rot. Z:
These cells are used to rotate the fixtures in the 3D environment.
Visible in 3D:
If this is "Yes" then you can see the fixture in MA 3D. Empty cell is the same as "No" and then the fixture/object will be hidden in MA 3D.
Sunshade:
If this is "On" then the Sunshade function in the MA 3D visualizer is active. This has to do with the object casting shadows.
Follow Target:
If this is "On" then the Follow Target function in the MA 3D visualizer is active. This has to do with the Follow function in the Stage view. It is relevant for 3D stage elements.
Model:
Here you can see and change the model used for the fixture/object. Editing this cell will open the small select Model pop-up. It could look like this:
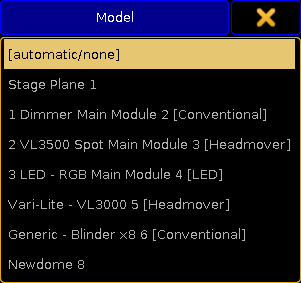
If you have custom models for your fixtures then you need to import them into your show (in MA 3D) and then select the imported model here for the relevant fixtures.
At the bottom part of the Fixture Positions pop-up there are three buttons:
Stage Smaller, Stage Bigger:
These two buttons are used to change the relationship between the stage area and the fixture/object list.
Unit:
This toggles between Size and Scale. The size is in meters. Scale is based on the model information.
This is a User setting and can also be changed in Setup -> User -> Settings. Here it is called "3D Item Units".
When the Fixture Positions pop-up is visible then you also have the same Encoder Toolbar as when you are using the Stage view to edit the position (read above).
Edit Fixture
Editing a fixture gives you the same position and rotation XYZ options as the using the EditSetup and LiveSetup layer view (read above).