
DMX testing in the DMX Sheet
You can send DMX values to any DMX address. This can be a great tool for you to locate the address of a fixture or even to just turn on a DMX address for work light.
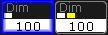
The DMX tester have a higher priority than your programmer, executors, and parked values. A DMX address under the influence of the DMX tester has a white background color behind the value and a white marker. The currently selected DMX address also has a yellow marker. It could look like this:
As usual there are several ways to use the DMX tester.
Using the DMX tester with the GUI
You can use the encoders and the encoder toolbar to test DMX channels.
You'll need to open a DMX sheet and make sure the "Link Encoders" option is activated.
Now touch anywhere inside the sheet.
This gives you a new encoder toolbar. It could look like this:

The left encoder is used to select the Universe. There is a small button next to the encoder readout where you can change between Universe or Absolute. If you choose Absolute then you do not need to use this encoder. You can just use the center left encoder.
The center left encoder is used to select the DMX address. The button next to the encoder readout has two options Release or Retain. Release means that when you scroll through the DMX address then it is only the selected channel that is affected by the DMX tester. Retain means that the addresses that you pass will keep the Test Output value when you select the next address.
The center right encoder is used to set the Test Output. This is the value that will be sent to the selected DMX address. The button next to it is used to change between a percent (0 to 100) and decimal (0 to 255) value range. If you have not touched the encoder then it has a special "none" value. This means that you are not affecting the DMX address. You can actually also use the DMX tester to set a value of zero. This can be useful if for instance you want to force a rouge shutter channel to stay open. The easiest way to get to the "none" value is to shortly press or tap the encoder and use the Calculator pop-up.
The right most encoder is used to patch a fixture to the selected DMX address. To learn more about this and live patching please follow this link.
Above the encoder readout there are several buttons. The following is a short description of each button.
All / Patched / Unpatched:
This button toggles between three different options: All, Patched, and Unpatched.
The selects what DMX address you are allowed to select and affect by the DMX tester.
Select All:
Tapping this button will select all the DMX addresses that you are affecting by the DMX tester.
Release Current:
This will release the currently selected DMX address from being affected by the DMX tester.
Release Others:
This will release all other DMX address but the currently selected DMX address from being affected by the DMX tester.
Release All:
This will release all DMX address from being affected by the DMX tester.
Park Current:
This can be used to park the currently selected DMX address at the current DMX value. Read more about the park function in the Park Keyword.
Unpark Current:
This can be used to unpark the currently selected DMX address. Read more about the unpark function in the Unpark Keyword.
Using the DMX tester with the command line
You can also do some DMX testing from the command line.
To do this you need to use the DMX keyword.
Please follow the link above to read details about the keyword.
The general idea is that you type
DMX [address (range)] At [Value (range)]
This will set the DMX address at the value.
To release a channel you type:
Off DMX [address (range)]
to release a single address (range) from the DMX tester.
Off DMX Thru
Will release all DMX addresses.