
Effects View
To go to the Effects Editor View on screen 1, press Effect on the console or press the loop  in the title bar of a preset type view.

To open the Effect View on screen 2, tap More... in the view bar and then Effects.
The effect view depends on the selected fixtures in the fixture view and the selected preset type in the preset type bar.
For the following preset types are predefined effects available:
- Dimmer
- Position
- Gobo
- Color
- Beam
- Focus
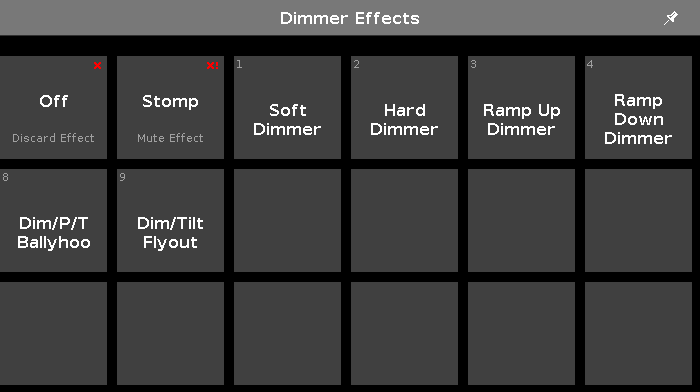
To go to the Dimmer Effect View, select Dimmer in the preset type bar.
The title bar displays in which effect view you are, e.g. Dimmer Effects.
The tiles on the left side of the view, are the available effects for the selected fixture and preset type.
The effects view on screen 2 displays only the available effects.
The buttons on the right side of the view, are additional options for the effect.
The current selected effect has a white frame around the tile.
In the upper left corner is the object number of the effect.
Off Effects
Every effect view has the Off function.
Tap off, to discard a running effect from the fixture selection in the programmer.
If you tap Off in the dimmer effects view, all dimmer effects will be discarded in the programmer.
Example:
Let´s assume, you have a running dimmer effect in the programmer and additional pan tilt values.
To discard only the effect values from the selected fixtures, open the dimmer effect view and tap Off.
The dimmer effect is discarded from the programmer.
Stomp Effects
Every effect view has the Stomp function.
Tap stomp, to mute a running effect stored on an executor.
To deactivate Stomp, press Clear.
Example:
Let´s assume, you have stored cue 1 with a dimmer effect and you will mute this effect in cue 2.
- Select the fixtures in the fixture view that should mute the effect from cue 1.
- Open the dimmer effects view and tap Stomp.
- Press Store Cue 2 Please.
Cue 1 starts the dimmer effect and cue 2 mutes the dimmer effect.
Stomp Effect in Position Presets
If you store the Stomp effect in a preset, this effect is displayed as a red exclamation mark in the preset pool.
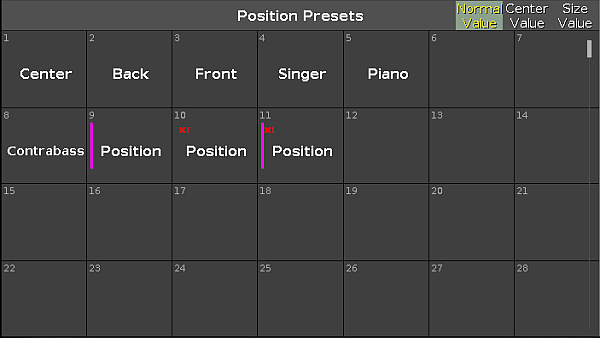
To store the Stomp effect, run an effect first.
Effect Options
The effect options are the seven buttons on the right side of the screen.
Direction <>:
The direction <> button is available if you have fixtures with a running effect in the programmer.
Tap to change the direction of the effect from left to right or reversed.
Shuffle Selection:
The Shuffle Selection button is available if you have selected fixtures in the programmer.
Tap to mix-up the order of the fixture selection. This is the same as Macro "Shuffle Selection" in the Macros Pool.
Sync:
The Sync button is available if effects are running in the programmer.
Tap to synchronize effects in the programmer. Refer to, SyncEffects Command.
Align >:
Selects the align mode >. Refer to, Align Key.
Align <:
Selects the align mode <. Refer to, Align Key.
Align ><:
Selects the align mode ><. Refer to, Align Key.
Align Off (default):
Turns the align mode off. Refer to, Align Key.
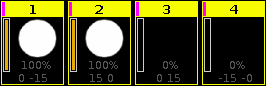
Dimmer Effects
In the dot2 are six predefined dimmer effects available.
Soft Dimmer (object number 1):
Opens and close the dimmer with softness.
Hard Dimmer (object number 2):
Opens and close the dimmer without softness.
Ramp Up Dimmer (object number 3):
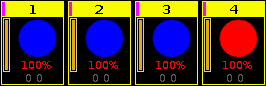
Dimmer snaps to 100% and fades slowly to 0%.
Ramp Down Dimmer (object number 4):
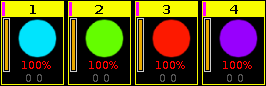
Dimmer snaps to 0% and fades slowly to 100%.
Dim/P/T Ballyhoo (object number 8):
Soft dimmer effect and pan tilt movement.
This effect is in the position effects as well.
Dim/Tilt Flyout (object number 9):
Fixtures are moving from position one to position two.
After they reached position two, dimmer fades to 0% and the fixtures moves back to position one.
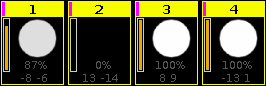
Position Effects
In the dot2 are eight predefined position effects available.
Circle (object number 5):
Fixtures moving in a circle.
Pan Sinus (object number 6):
Soft pan effect. Pan of the fixture moves around the current position, for example beginning from the current position 0 the pan moves from - 15 till 15.
Tilt Sinus (object number 7)
Soft tilt effect. Tilt of the fixture moves around the current position, for example beginning from the current position 0 the tilt moves from - 15 till 15.
Dim/P/T Ballyhoo (object number 8):
Refer to, Dim/P/T Ballyhoo in the dimmer effects.
Dim/Tilt Flyout (object number 9):
Refer to, Dim/Tilt Flyout in the dimmer effects.
Pan Half Sinus (object number 22):
Soft pan effect. Pan of the fixture uses the current position as starting position, for example beginning from the current position 0 the pan moves till 30 and back to 0.
Tilt Half Sinus (object number 23):
Soft tilt effect. Tilt of the fixture uses the current position as starting position, for example beginning from the current position 0 the tilt moves till 30 and back to 0.
Figure 8 (object number 24):
Fixture moves like an eight. The center is the current position.
Gobo Effects
In the dot2 are three predefined gobo effects available.
2 Gobo (object number 10):
Changes between two gobos on the gobowheel.
Select the gobos with high value and low value in the gobo preset type view, effect mode.
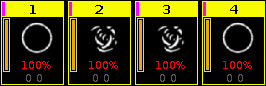
Gobo <> (object number 11):
Gobo rotation speed effect.
Gobo Index (object number 12):
Gobo position effect.
Color Effects
In the dot2 are four predefined color effects available.
2 Color Soft (object number 13):
Changes between two colors with softness.
This is a mix color effect.
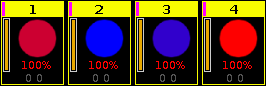
2 Color Hard (object number 14):
Changes between two colors without softness.
This is a mix color effect.
RGB Rainbow (object number 15):
A red green blue rainbow effect with softness.
This is a mix color effect.
Colorwheel 2 color (object number 16):
Changes between two colors.
This is a color wheel effect.
Beam Effects
In the dot2 are three predefined beam effects available.
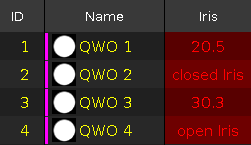
Iris (object number 17):
Opens and close the iris.
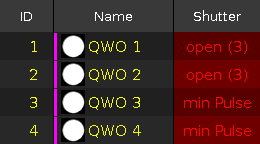
Shutter (object number 18):
Opens and close the shutter.
Strobe (object number 19):
Changes between fast and slow strobe.

Focus Effects
In the dot2 are two predefined focus effects available.
Zoom (object number 20):
Changes between wide and narrow.
Focus (object number 21):
Changes between minimum and maximum focus.
Encoder Bar Functions
The default encoder speed is without decimal place.
To change the encoder speed to slow, press the encoder key  . The encoder speed is with decimal place.
To change the encoder speed to ultra slow, press and hold the  key and press the encoder key . The encoder speed equals one DMX step.

To use the second function of an encoder, press and hold the key.
To open the calculator, press the encoder.
For detailed information about the settings, refer to What are Effects?.
High Value or Low Value:
To select the high or low value, turn the encoder left or right.
Speed:
To select the speed in BPM (beats per minute), turn the encoder left or right.
Phase:
To select the phase, turn the encoder left or right.
Width or Softness:
To select the width or softness, turn the encoder left or right.
Groups and Blocks
It is possible to enable Groups and Blocks in the effect encoder bar.
To make Groups and Blocks visible, press MA.

- To enter numbers in the calculator, tap Groups or Blocks.
Groups:
Groups divide selected fixtures into groups that move in the same direction.
Example:
If you create 2 groups:
- The first fixture will be added to the first group.
- The second fixture will be added to the second group.
- The third fixture will be added to the first group.
- The fourth fixture will be added to the second group and so forth.
Blocks:
Blocks divide selected fixtures into small groups which work as an entity.
Example:
If you created a simple dimmer chase containing 10 fixtures:
- Set the block value to 2.
- You will then see that the fixtures one and two are moving together in the same direction.
- The same principle applies to fixtures 3 and 4.
None:
The effects runs through all fixtures.
The shaded background symbolizes that Groups and Blocks are not taken over into the effect editor when editing cues or presets.
Wings
Wings divide selected fixtures into smaller groups. These groups are mirrored.
Example:
If you have created a simple dimmer chase containing 10 fixtures. They move from left to right:
- Set the wing to 2.
- The first 5 fixtures move from left to right.
- The next 5 fixtures move from right to left.
- The fixtures move in sync to one another.
- Select fixtures.
- Press Effect.
- Choose an effect.
- Tap Phase and the calculator EffectPhase opens.
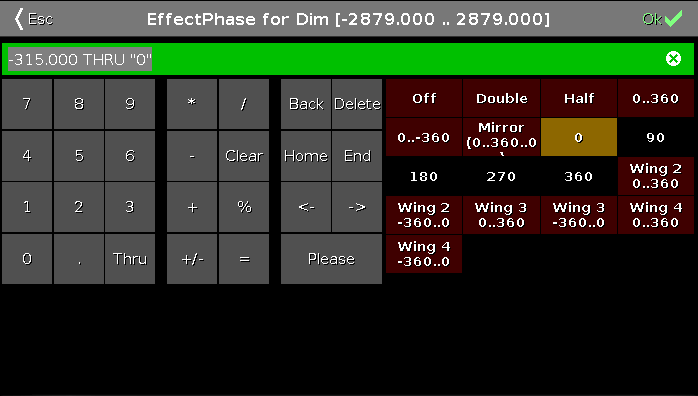
To use the wings, tap one of the six predefined wing buttons with the following numbers:
0...360:
The effect starts in the middle and moves toward each side in a parallel way.
-360...0:
The effect starts on each side and moves toward the middle in a parallel way.