Hint:
The fixture Stage Marker moves in the position mode XYZ and the Stage Marker II moves in the position mode XYZ, rotates and can be scaled.
Move the Stage Marker
Select the stage marker for example in the fixture sheet.
Open the stage view:
-Tap Other and then tap Stage in the Create Basic Window.
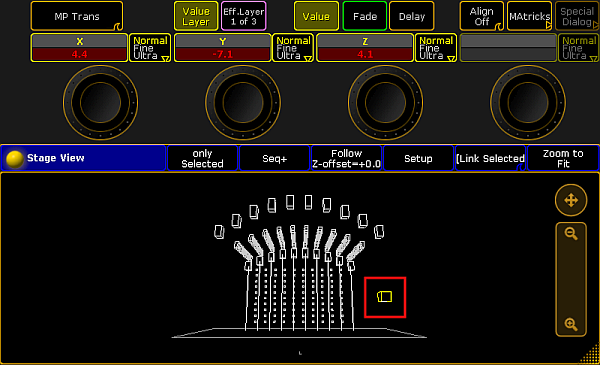
-The stage marker is displayed in form of a square at the bottom of the stage view.
Tap Position.
To move the stage marker, activate MP Trans and use the three encoders from left that are located below screen 2.
To adjust the size of the stage marker, tap MP Trans to toggle it to MP Scale and use the encoders.
To rotate the stage marker about the axes, tap MP Scale to toggle it to MP Rot and use the encoders.
The position of the marker has been adjusted.
Move the stage marker
Transition, Scale, Rotation
MP Trans, MP Scale, and MP Rot are position features of the stage markers. Access them via the preset type Position.
MP Trans:
To move the stage marker to the left or right, use the first encoder from left.
To move the stage marker forward or backward, use the second encoder from left.
To move the stage marker upward or downward, use the third encoder form the left.
MP Scale:
To expand the sides of the stage marker on the X-axis, use the first encoder from left.
To expand the sides of the stage marker on the Y-axis, use the second encoder from left.
To expand the sides of the stage marker on the Z-axis, use the third encoder from left.
MP Rot:
To rotate the stage marker about the X-axis, use the first encoder from left.
To rotate the stage marker about the Y-axis, use the second encoder from left.
To rotate the stage marker about the Z-axis, use the third encoder from left.
Direct the Fixtures´ Beams to a Stage Marker
To apply the stage marker:
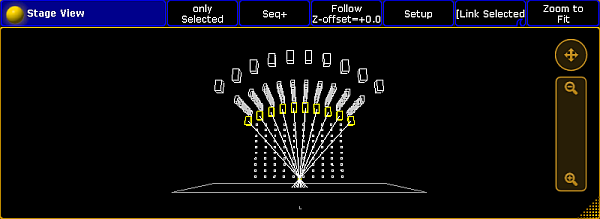
Select the fixtures that are to point to the stage marker in the fixture sheet and turn them on.
Important:
Note that XYZ has to be activated in the fixtures that point to the stage marker. For more information see XYZ.
Tap the preset type Position and then tap Stage B.
Tap Mark and the calculator opens displaying the channel sets of markers.
Select a stage marker.
Tap Stage B to toggle it to Stage A.
Hint:
The calculator that opens in Stage B displays the names of the stage markers.
To direct all the fixtures toward the stage marker, set XYZ to 0 in Stage A.
Important:
The XYZ position of the beam of fixtures that are assigned to a stage marker are relative to the position of the stage marker.
The fixtures are now pointing to the stage marker you have set.