
Quickstart with grandMA2
First start the VPU with grandMA2 network.
Startup and loading a show
Start the grandMA2 onPC.
Press Backup, select the tab Demoshows Load Show.
In the upcoming dialog select the 'vpu demo show.show.gz'.
Tap Check all, then tap Load Show.
The show will be loaded.
On the Display you see an overview of the layers and the fixture sheet:
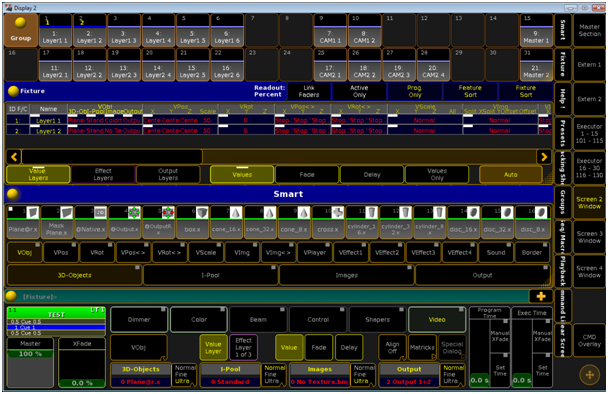
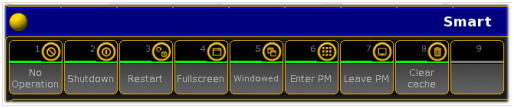
You can configure the layout via the buttons on the right:

Connecting the VPU to a session
Now we will invite the VPU to the session:
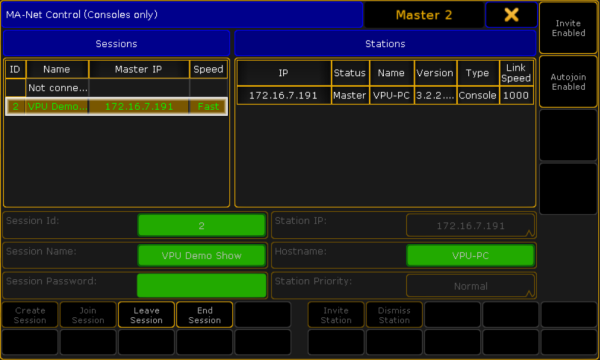
To start a session press Setup and tap MA Network Control.
In the upcoming dialog tap Create Session. The session will start:
Press Setup and tap MA Network Configuration.
In the upcoming dialog select the VPU tab:
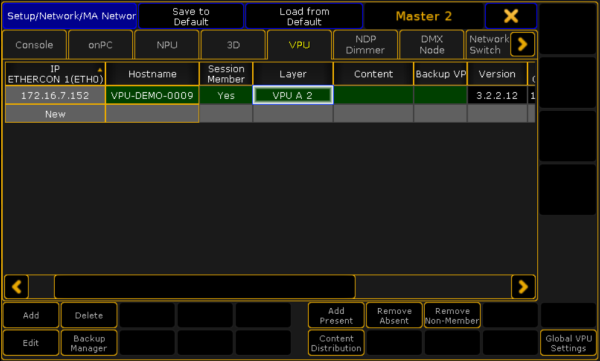
If your VPU is not listed, tab Add Present.
If the VPU is not already a member of the session, select the 'Session Member’ entry and press the screen encoder. The entry will change to 'Yes’ and the VPU will join the session.
After that choose the 'Layer' entry and press the screen encoder. Choose the fixture layer 'VPU A 2'.
If the VPU does not join, check the VPU IP address and software version.
It is displayed in the VPU status bar e.g.:

In this case the desk IP is 172.16.7.191 and the VPU IP is 172.16.7.152
Console and VPU must be in the same IP segment.
Playback of a still image
To select the first layer of the VPU demo show, press Fixture 1 Please, or select the first group '1: Lay1’ in the group pool:

To see the layer at the output of the MA VPU, press at 1 0 0 Please to open the dimmer.
At the Fixture sheet you can see all attributes of layer 1:

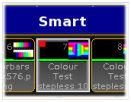
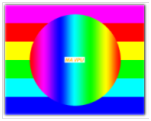
On the Smart view all settings of the VPU Layer are displayed as buttons. Select the 'Images’ attribute and you get an overview of all images of the selected I-Pool.

Tap an image button and the appropriate image is displayed on the VPU output screen:
| Desk Image button | VPU output |
|---|---|
 |
 |
Hiding the VPU GUI
To hide the GUI of the MA VPU you can either press 'Shift + Enter' at the keyboard of the VPU station or use the fullscreen mode of the VPU master fixture.
To select the master fixture at the VPU demo show, press Fixture 11 Please, or select group 15 '11: Mas A’ in the group pool.
Select the preset type 'Control':
 |
 |
|---|---|
The 'Smart View’ offers the controlling possibility to watch the output in 'Fullscreen’:
Playback of a video file
Press the Clear button, select layer 1 again, select the attribute 'I-Pool’ and tap the channel set 'HD_25’.
Select the attribute 'Images’:
 |
 |
 |
 |
|---|---|---|---|
Now the 'Smart View’ offers a choice of video loops in HD quality with 25 frames:
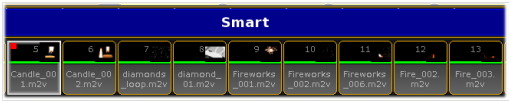
Select a video of your choice, tap the feature 'VPlayer’ and select the attribute 'Playmode'.
Now you can choose how to play the video e.g. as a loop, select 'Loop’:
 |
 |
|---|---|